
Chameleon Skinks are back, baby! The new Warcry: Sundered Fate box brings us the Hunters of Huanchi – which is both a new skirmish specialist kit and a sneaky update to a box very much in need of a glow up. Games Workshop was kind enough to provide us with an advanced copy of the box, and we shipped some skinks off to a few intrepid Goonhammer painters!
Mugginns (Michael O)’s method:
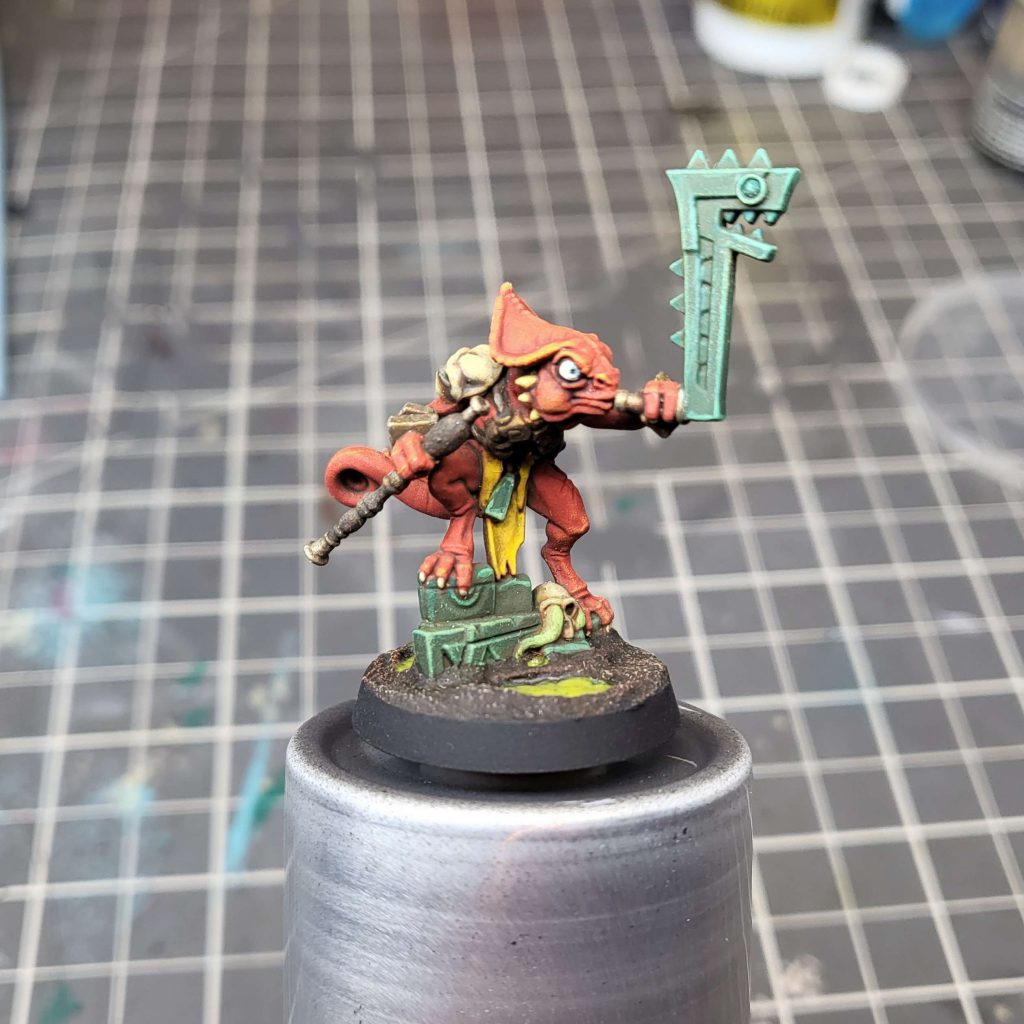
I will be using these guys for my son’s Seraphon army. I had initially thought about using the blowpipes but they were rather flimsy; I felt like they might break. I gave them shields and clubs and they’ll lead each of his Skink units. I basecoated them first after priming with Krylon White. I used:
- Scales: Army Painter Pure Red
- Shields: Vallejo Game Color Jade Green
- Weapons: Vallejo Game Color Bright Bronze & GW Runefang Steel
- Tongues: Coat D’Arms Dark Blue
- Eyes: Vallejo Game Color Scorpion Green
- Loincloth: Army Painter Mummy Robes
- Wash: Army Painter Strong Wash
For the bases, I glued sand down, painted it brown with Vallejo Brown Earth and drybrushed with Army Painter Mummy Robes. I used blue and dark grass from Gamers Grass to decorate their bases.
I really just did a basecoat then wash then highlight with colors mixed with white for the most part. My stuff is mostly tabletop quality and I think this’ll be good enough for that.
Fowler’s Method
Similar riff on a theme here! For my skink I started out with a zenithal prime. The main body scheme follows the same steps as the red cloth recipe I used for my Sons of Velmorn. I started with a Zenithal prime, then airbrushed Encarmine Red followed by Pure Red and Archangel Red From above. After that I drybrushed Evil Sunz Scarlet then Troll Slayer Orange, and followed it with a 2:1 contrast medium to Blood Angels Red Glaze. If you don’t have an airbrush or want to skip steps, you can just prime Wraithbone, apply Blood Angels red and go straight to drybrushing Evil Sunz Scarlet and Troll Slayer Orange.

Leather and wood got a basecoat of Baneblade Brown, Wyldwood Contrast, and either a highlight or drybrush of Baneblade again. Bone, spikes, and nails were basecoated Zandri Dust, glazed with Skeleton Horde Contrast, then drybrushed or highlighted with Ushabti Bone. The loincloth is Bad Moon Yellow, which takes a couple of thin coats to get solid coverage.
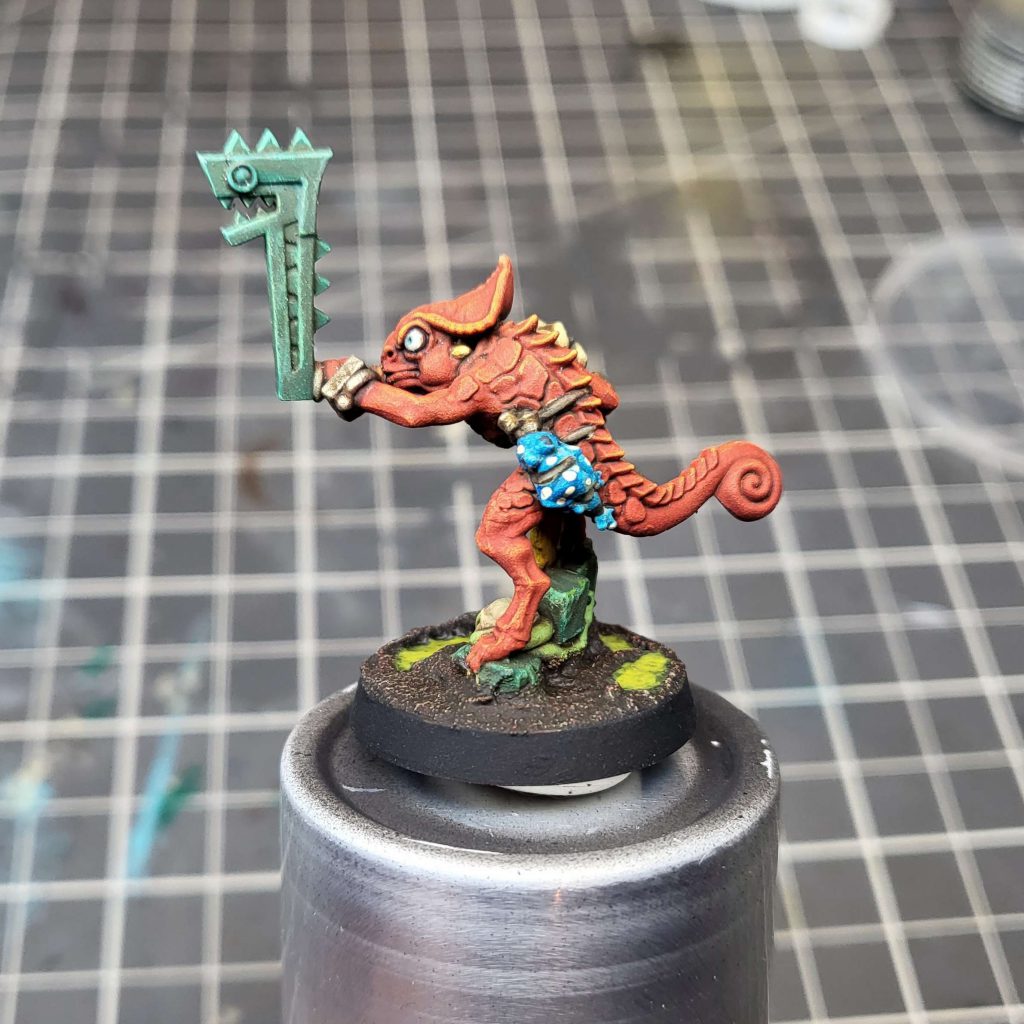
From my stint painting Estelle La Veneaux, I can attest to the joy of painting little tiny frogs. For mine I basecoated with Lothern Blue, glazed with Talassar Blue contrast, then highlighted with Lothern again. Gold details are Scale75 Necro Gold, washed with Reikland Fleshshade, and drybrushed / highlighted with Canoptek Alloy. The snake is just Skarsnik Green with Black Templar eyes. The ruins and moonstone bits are Vulkan Green, which is drybrushed or highlighted with a progression of Kabalite Green, Syrabite Green, and Ushabti Bone.
I’ve stuck with the same basing as my previous Warcry Gnarlwood stuff – swampy. The basing paste is from a Vallejo earth texture bottle. I basecoated with Golden High Flow Acrylic Sepia, and drybrushed with Baneblade Brown. Goo pools are basecoated with Castellan Green to give them a bit more definition. After all of this was done I brushed on Ammo By Mig Streaking Grime – and subsequently wiped off the vast majority of it with soft makeup sponges. I’ve recently made the switch from Satin Varnish to Ammo by Mig Ultra Matt and I think it really shines with this model!
Skails’ Method
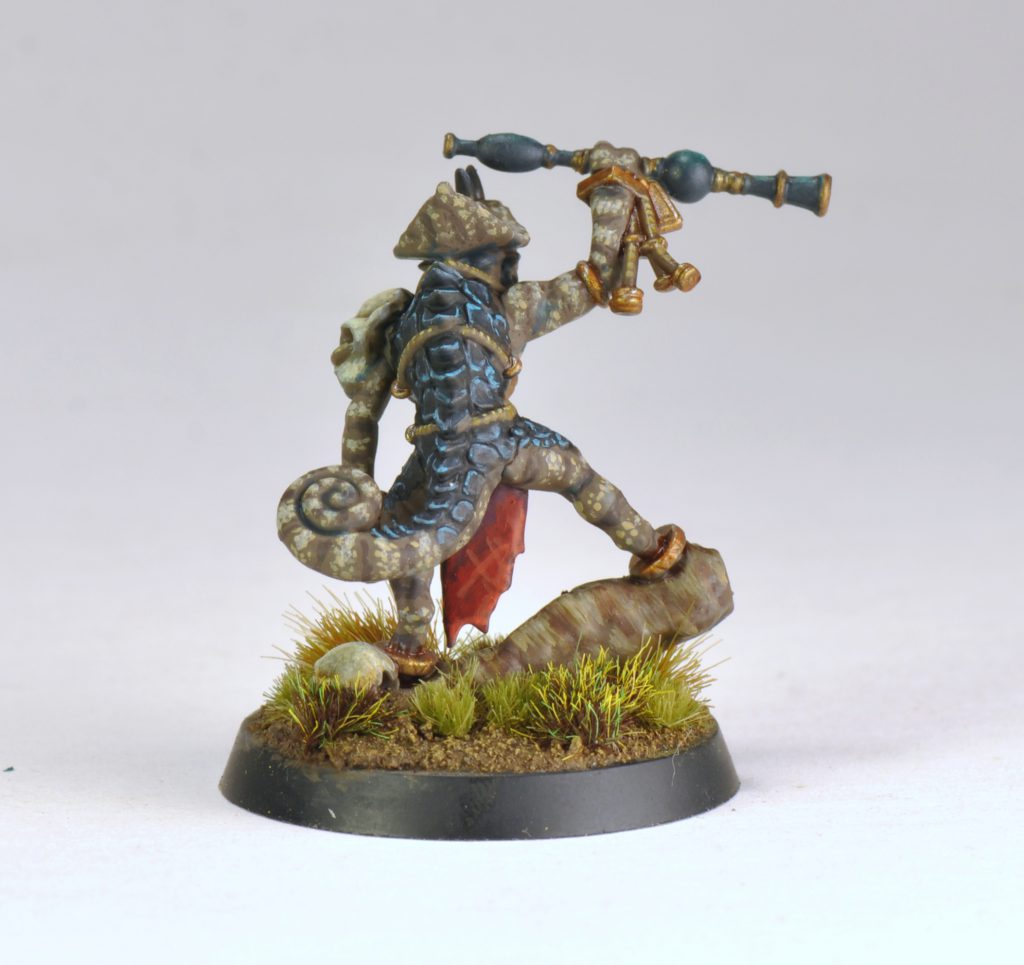
Chameleon Skink
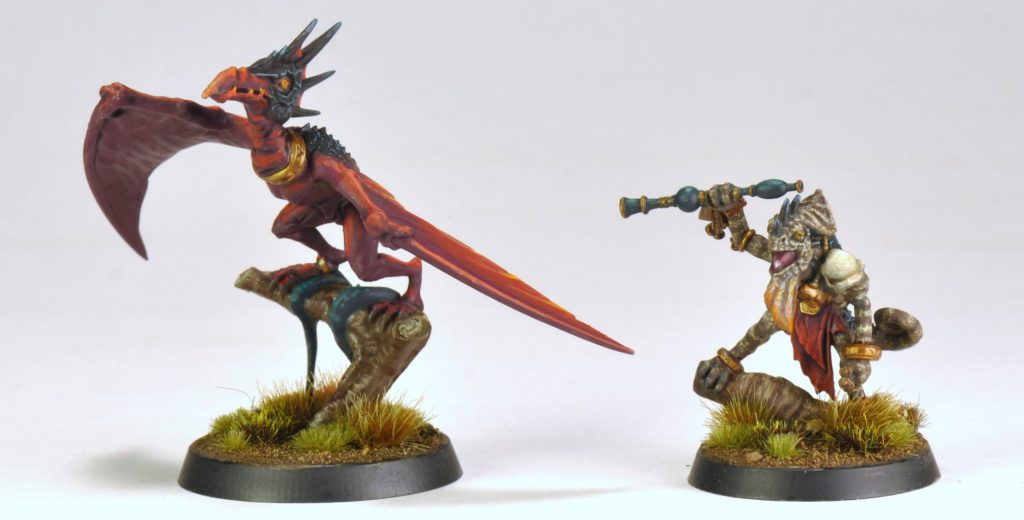
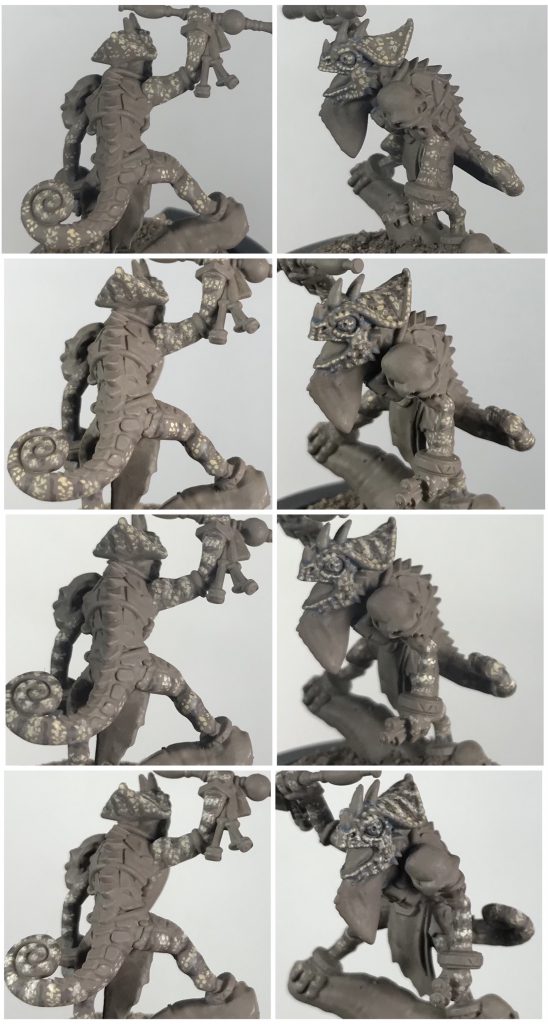
For the skink I went for the naturalistic skin color of an ivory and brown colored chameleon. The stippling is reminiscent of their scales form a gradients of color. The images are a shot from the back with a shot of the same step from the side next to it. I’m going to call them steps one through four, top to bottom.
Step 1: Stipple of Citadel Zandri Dust in bands along legs, arms, and crest. I also stippled in dots along the mouth, eyes, face, and edge of crest.
Step 2: Stipple and lines of Vallejo Model Color German Camo Brown Black between Zandri Dust lines.
Step 3: Stipple Citadel Ushabti Bone over Zandri Dust bands. I did slightly less of these than in the previous Zandri Dust layer.
Step 4: Stipple Citadel Screaming Skull over Ushabti Bone/Zandri Dust, again less dots than the Ushabti Bone layer and focused more along upward facing surfaces.
To finish off the skin I went through with Citadel Incubi Darkness and hit the deepest recesses and anywhere two surfaces needed a more distinct seperation, like around the eye for example. Around the bottom edge of the neck flap I glazed in Monument Burnt Orange, then a glaze of Vallejo Game Color Sun Yellow closer to the edge.
Cloth: Citadel Screamer Pink basecoat, Druchii Violet Wash, Mephiston Red layer, Wild Rider Red edge highlight.
Metal: Scale 75 Victorian Brass, Citadel Reichland Flesh wash, Citadel Runefang Silver spot highlight.
Skulls: Vallejo Model Color Basalt Grey basecoat, Vallejo Game Color Stonewall Grey layer, Citadel Seraphim Sepia wash, Citadel Screaming Skull lighlight.
Tongue: Screamer Pink basecoat, Druchii Violet wash, Bugmans Glow highlight, Fulgrim Pink spot highlight.
Blowgun: Incubi Darkness basecoat, Kabalite Green layer, Nuln Oil wash.

Scales and Horns: Monument Coal Black basecoat, Nuln Oil wash, Temple Guard Blue edge highlight.
Ropes/Straps: Vallejo Game Color Leather Brown lines slashed along surface, Monument Golden Brown slashed along upper edges.
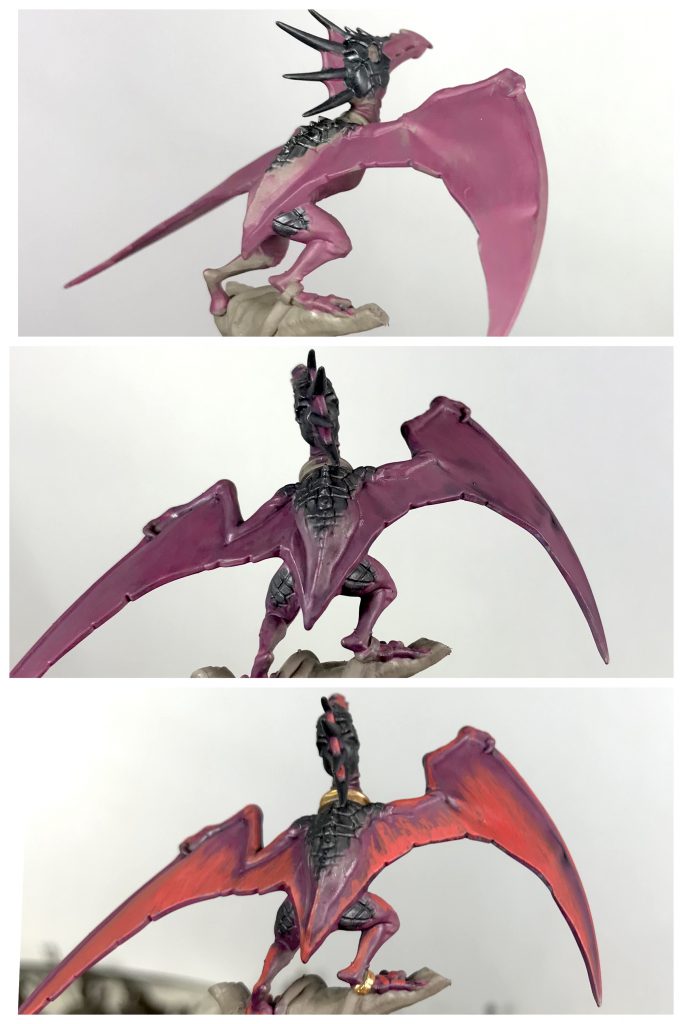
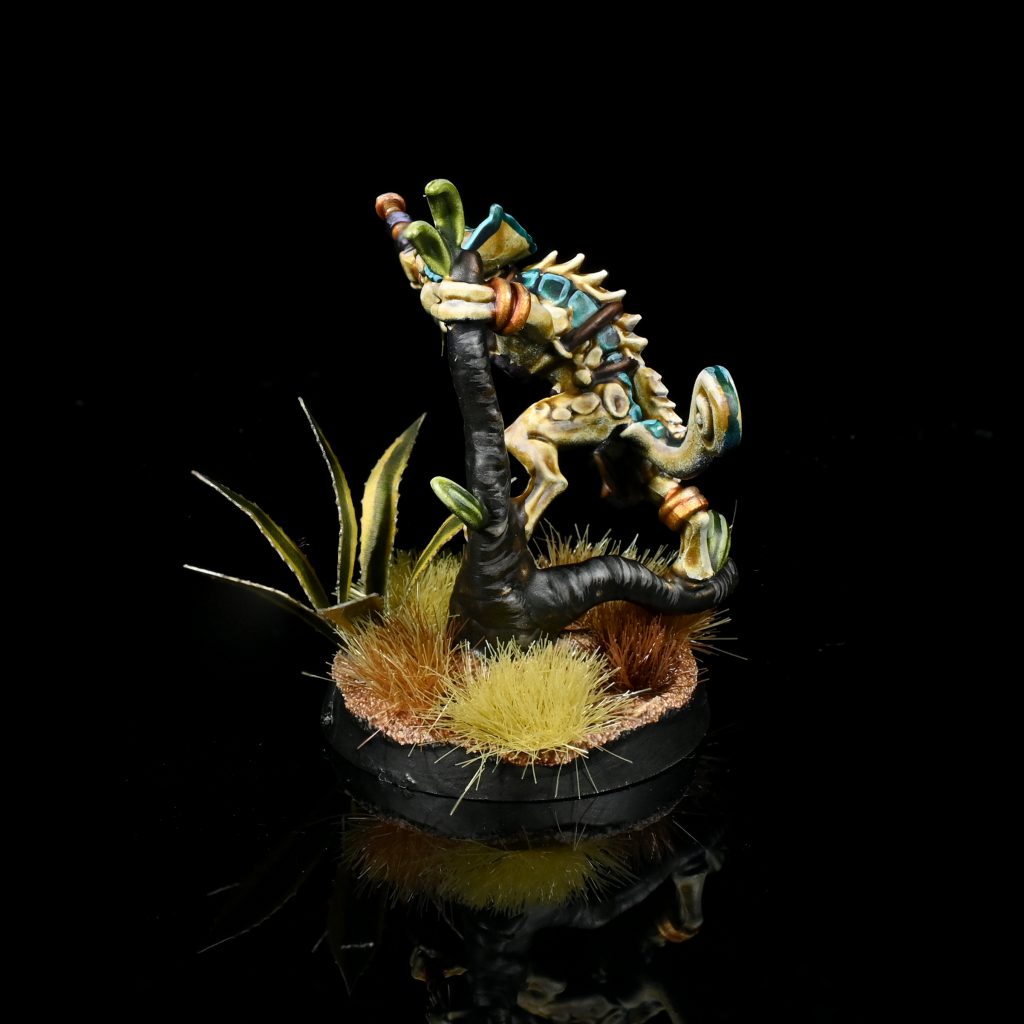
Terrawing
For the Terrawing I went with a violet to red transition with yellow stripes. This one was quicker and more fun, I would do something like this for the Skink skin if I were to do more! The skin process is broken up between two sets of pictures, I’m going to call them steps one through five from top to bottom.
Step 1: Screamer Pink basecoat on skin, Coal Black on scales.
Step 2: Druchii Violet Wash
Step 3: Mephiston Red layer along tops of arms and legs, face, and bottom 3/4 of wings. I did this as a series of lines going from top to bottom, overlapping and built up till it had pretty good coverage while still showing texture.
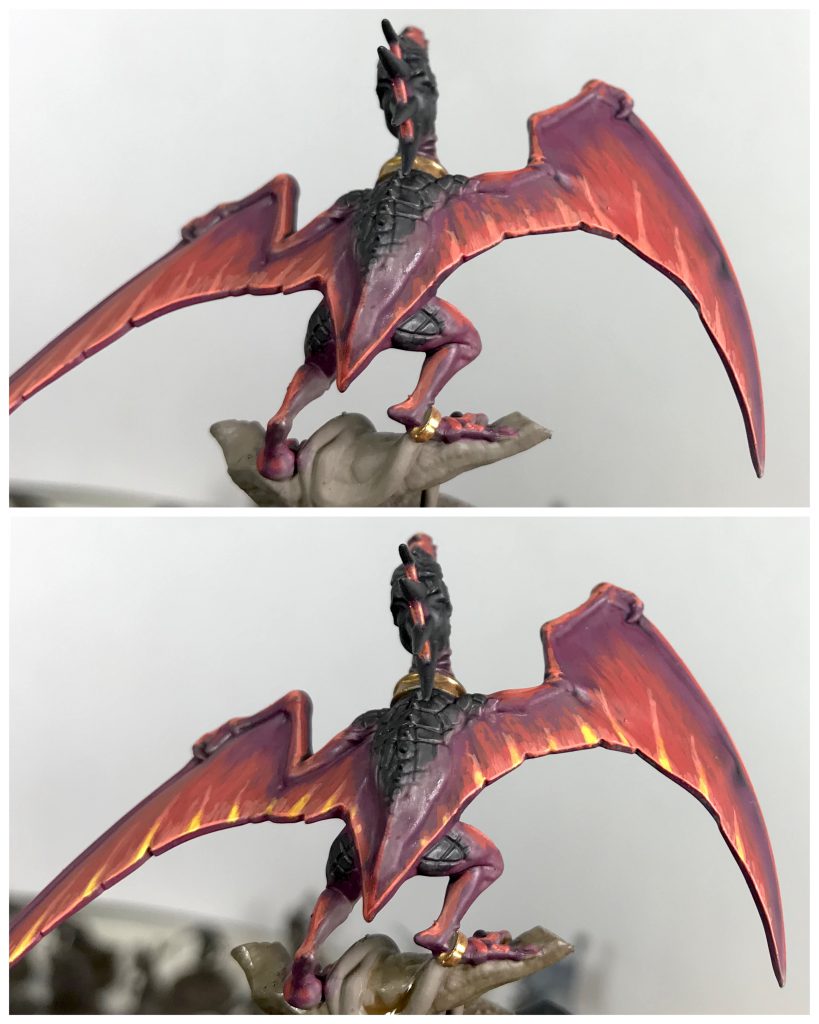
Step 4: Wild Rider Red edge highlight along bottom of wings, then used for a series of stripes along bottom edge of wings heading partway into the Mephiston Red. Also used to pick out highlights on face, legs, arms.
Step 5: Sun Yellow from bottom edge of wings to about halfway up the Wild Rider Red stripes. Also used to pick out edges of teeth and end of beak.
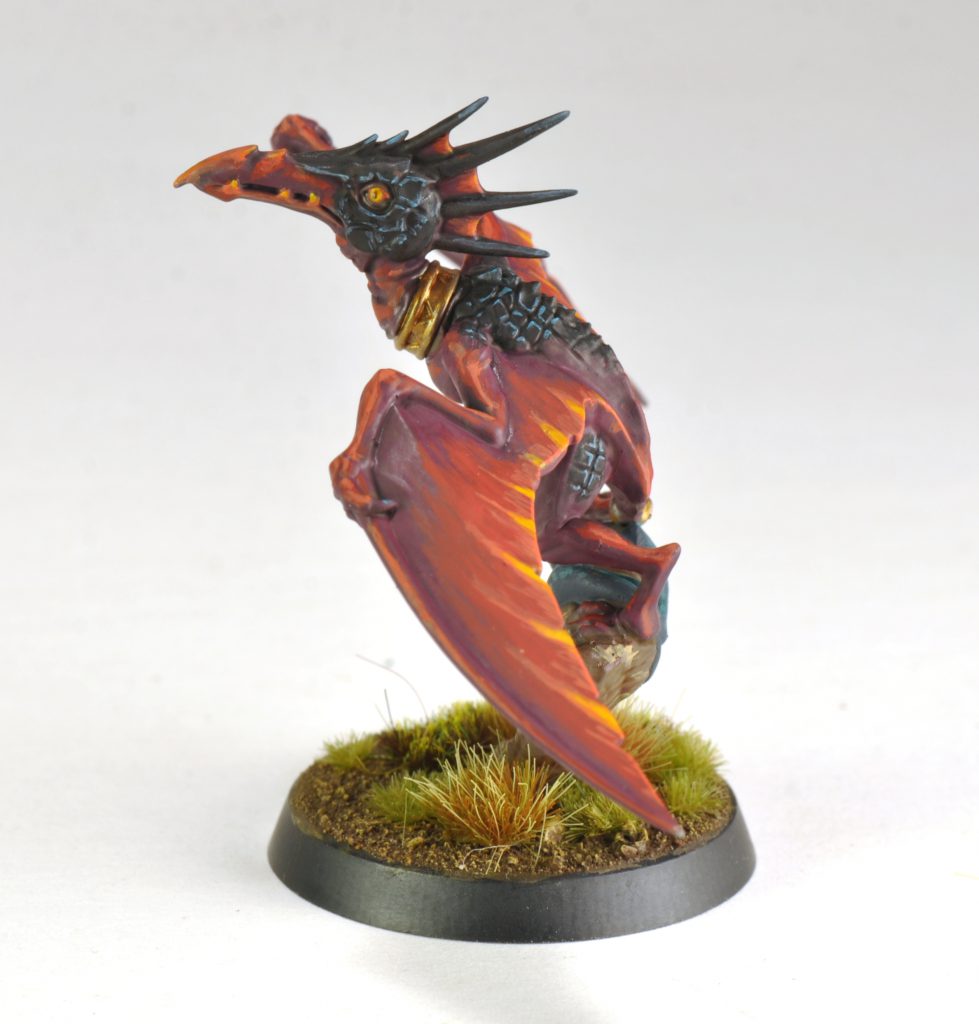
 Metals: Victorian Brass with Reichland Fleshshade wash.
Eyes: Sun Yellow with Coal Black iris.
Scales and Horns: Edge highlight of Temple Guard Blue.
Rockfish’s Method
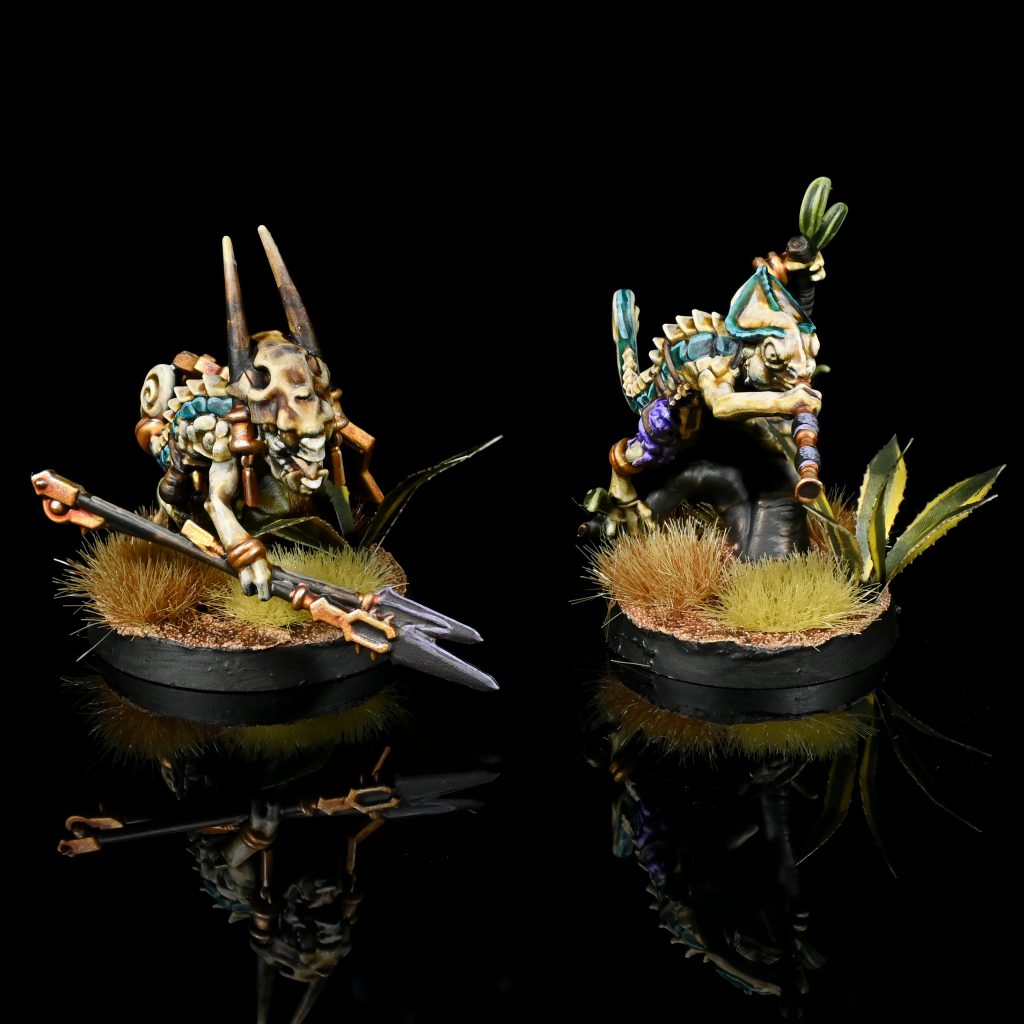
Well these were neat to get to paint! I’ve done a couple boxes worth of the old resin version of this kit and this is the logical progression of those models. They have gotten modernized proportions and their details have been rationalized into what looks good without having too much going on.
The build didn’t have anything I would really call out, other then maybe the tail of the one on the tree not really wanting to stay put. Otherwise, these are modern GW infantry scale models, while each has a ton of pieces for how small they are, they do go together well with a minimum of mold lines.
So I had a mildly intrusive thought a bunch of times when painting, which was that these have some details that slightly remind me of the grunts from halo. Specifically their forearms being slightly thicc, and something about their leaned over pose.
When I was considering how to paint these, I decide to go back to my Seraphon scheme from a few years ago that you might have seen before. While hardly the highest effort scheme, I’ve found it looks good on the table!
I didn’t take in progress shots really, so this will mostly just be text update to the old article, and for this I started with a zenithal of white ink over black primer. The main colours go as follows:
- Skin is skeleton horde, highlighted screaming skull and pallid wych
- Stripe is akelian green with a highlight of baharroth
- Metal is retributer washed reikland with highlights of liberator and stormhost
- Obsidian is shyish washed reikland with a highlight of dechala
- Base the mini with Vallejo grey sand, wash it with reikland and agrax then drybrush with screaming skull
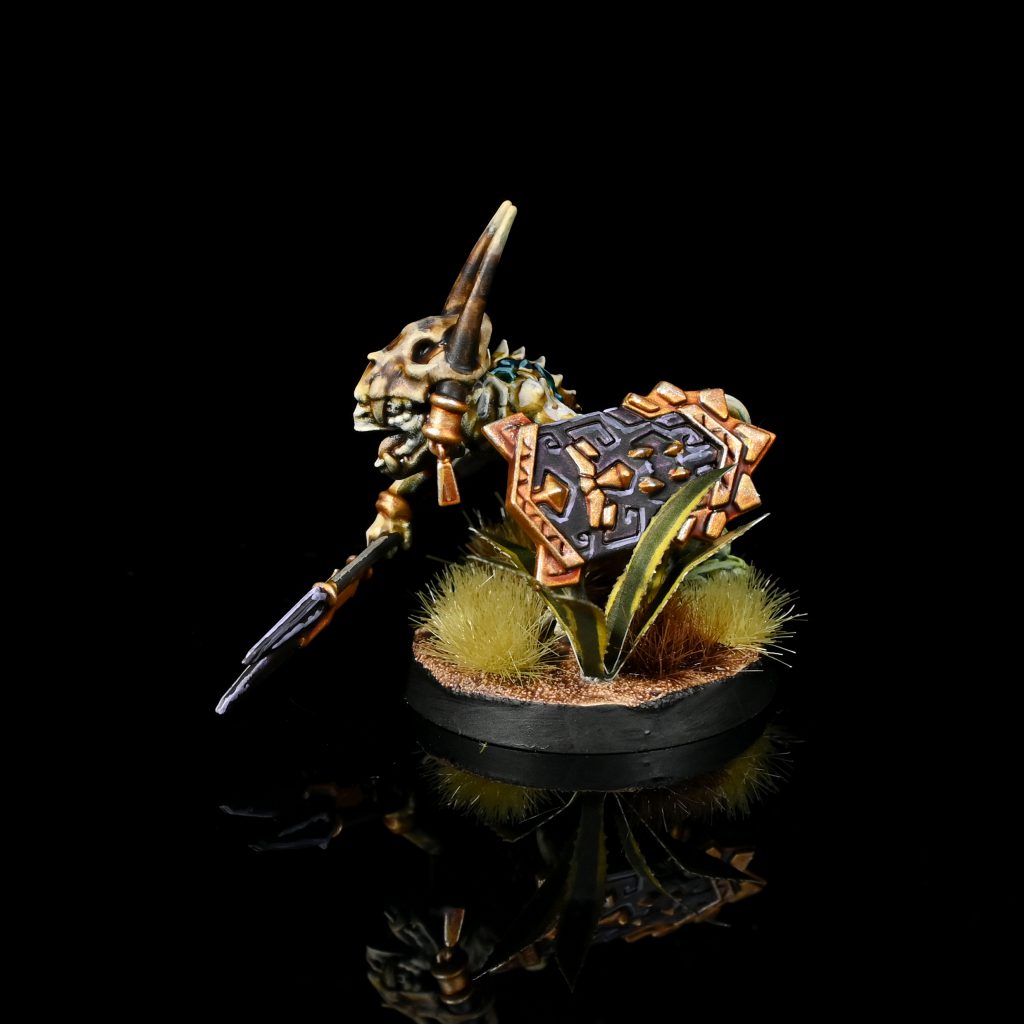
After that its a bunch of details:
- Bone is a wash of sepia over the zenithal, followed by agrax and then thinned wyldwood. The highlights are morghast and ushabti
- Leather is cygor and skrag
- Wood is wyldwood and baneblade
- Little bits of greenery is militarum green and highlights of nurgling
- The leader’s tongue is darkoath and kislev
- the frog is luxion purple highlighted dechala with a bit of pallid wych mixed in
To finish off the base I used Black Legion then threw some tufts on, for that I used a bunch of stuff from Gamers Grass. Specifically the laser cut Agave and the contents of the Dry Steppes set.

It was a whole lot of fun to slap paint onto some lizards for this roundup. We’d like to explore this format more for some future previews – splitting up a unit among a few painters to get some different takes on schemes. Let us know what you think! You can drop us a line at Contact@Goonhammer.com.
