
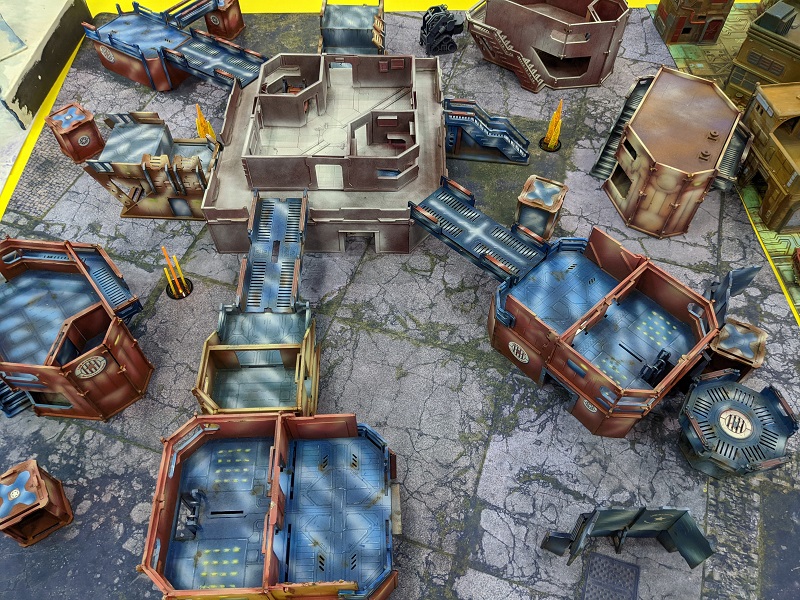
After a frenetic prep phase in which I painted something like 380 points of Shasvastii, let’s talk about how I actually did in the ITS After Dark tournament at GenCon.
If you harken back to the beginning of this saga, you’ll recall that one of the things I really like about the late night Infinity events at GenCon is that they are extremely chill. Everyone is good natured, the vibe is very relaxed, and the camaraderie among folks willing to mortgage their Friday plans at GenCon to stay up until after 3:00 in the morning is noteworthy. We’re all playing in this event because we love the game itself. This year’s tournament was no different, and just meeting and talking with folks before the event I knew I was in good company.
So without further ado, let’s get into the games themselves!
Game 1: Countermeasures
This mission is extremely cool. In it, each player brings three High-Value Targets (HVTs), and there is a shared pool of three Classified Objectives that are constantly being replenished during the course of the game as they are completed. Each player may discard one at the beginning of their turn to get a new one, and any that are completed during their turn get replaced before the next player’s turn. Thus, if you think you can’t complete a classified but your opponent can, it behooves you to discard it.
My first opponent was Roger, who as it turns out only lives about 45 minutes from me. Roger was playing the list we’re all hearing about these days, the dreaded vanilla Combined Army. That said, his list was quite the twist, as it didn’t include an Avatar and was instead built around the Skiavoros. The Skiavoros is the smallest of the EI Aspects, but with a points cost in the mid-to-upper 50s it comes with a bunch of handy skills and abilities, not least of which is the Strategos skill (which turns your Lieutenant order into a Regular Order that anyone can use). Roger won the Lieutenant roll-off at the beginning of the game and chose to go second, with the plan being that he would know going into the final turn how many Classifieds he’d need to win. Keeping deployment worked out pretty well for me given that I had a Speculo in my list (and I was pretty sure he had one in his). This put me in the often-desirable position of deploying second and going first. My opponent opted to expend a Command Token to reduce my primary Order Pool, but my Mentor trooper’s Counterintelligence skill meant I only lost a single order.
Deployment went about as expected, with my Sphinx in Hidden Deployment in the middle of my deployment zone and my Gwailo on my right flank where I had a couple of decent firelanes. I really agonized over the placement of my Speculo, as Roger had a surprising number of camo markers and a plasma-toting Q-drone (all of which have 360-degree visibility) covering his deployment zone. It turns out I didn’t need to worry, as I failed my Impersonation roll and was forced to deploy Karen from Sales in my own deployment zone. As the game unfolded, this actually ended up working in my favor.

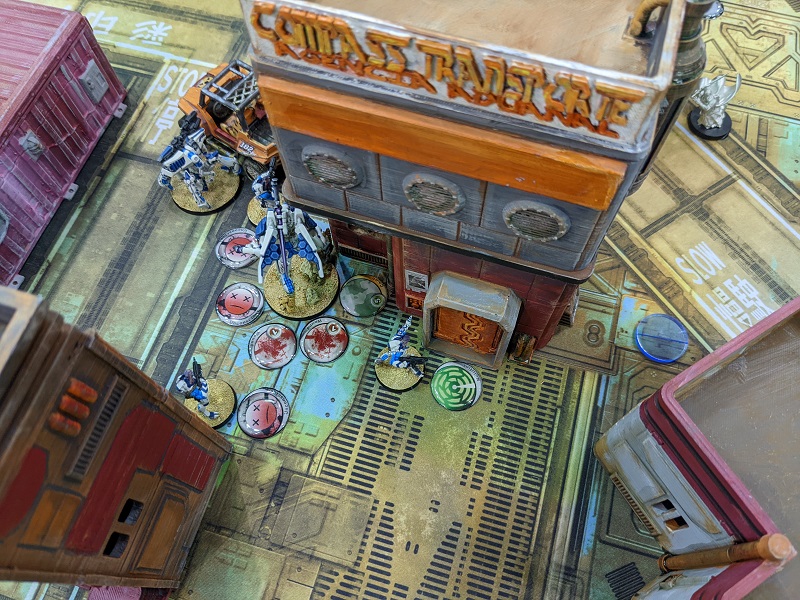
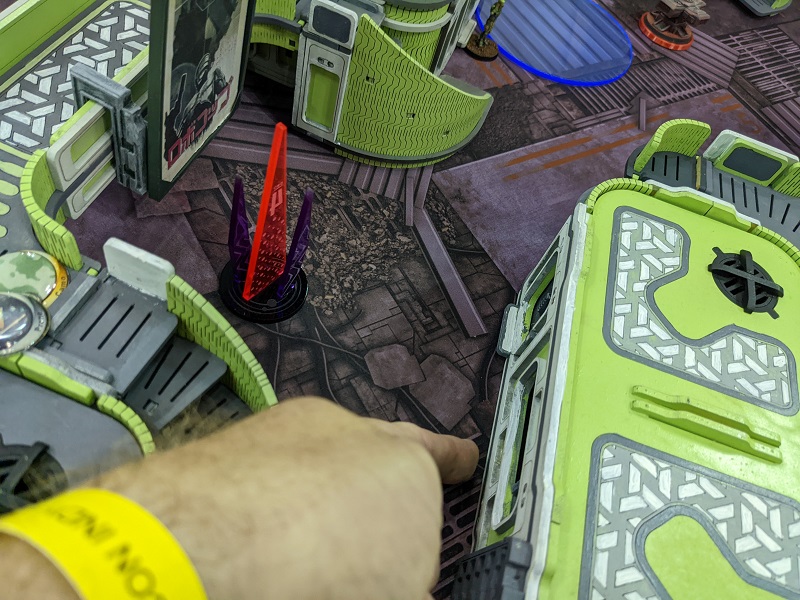
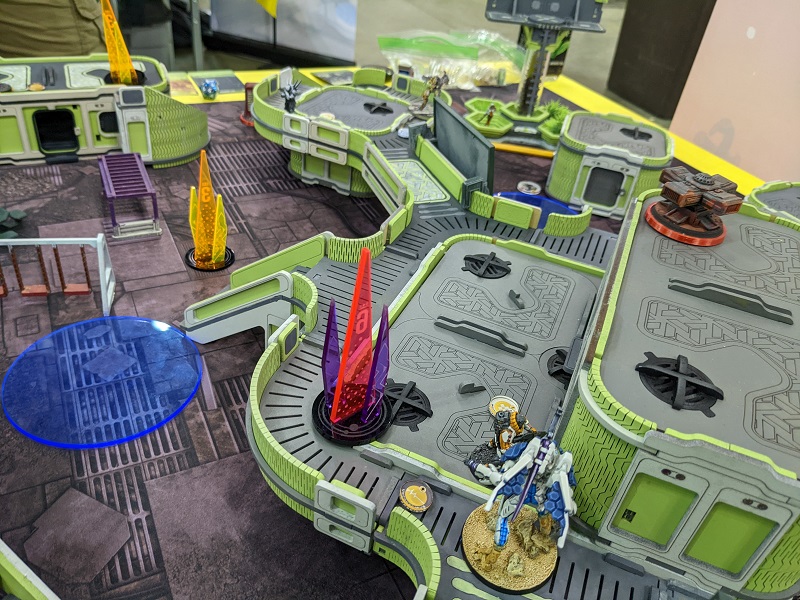
I forgot to write it down and it’s hard to remember now, but I think the three shared Classified Objectives were Predator, HVT: Retroengineering, and HVT: Designation
Turn 1
My opponent’s Speculo Killer was just outside my deployment zone on my right flank, looking menacingly at my Gwailo. I knew I was going to have to do something about it, but first I had to deal with my opponent’s plasma Q-Drone (which was in an elevated position and had excellent fields of fire). As such, my first orders went to my Gwailo, who moved up and lobbed a couple of heavy rockets at the Q-drone. The Shasvastii HI’s MSV-2 negated the Q-Drone’s Mimetism and the range bonus negated its cover, so I was shooting at straight Ballistic Skill. The Q-Drone was shooting in a -3 range band and the Gwailo’s Nanoscreen always gives him cover, so unsurprisingly I hit. The Continuous Damage rockets did very bad things, and the Q-Drone dropped Unconscious. I’d have loved to have killed it, but I’ll take what I can get. Fortunately for me, its elevated position would make it kind of difficult to reach for my opponent’s Dr. Worm or associated helper bots, and it would stay down for the remainder of the game.
At this point I had to deal with my Opponent’s Speculo Killer, and when mine failed to impersonate I dropped her along my right flank board edge in support of my Gwailo (who was otherwise kind of all on his own). Thus began several orders’ worth of expenditure on my own Speculo to Discover his (which started the game in Imp-1 state). Fortunately, I made my first roll, because failing a Discover roll means a trooper can’t make another that Turn. But that only brought my opponent’s Speculo to Imp-2. I thought about declaring Discover+Shoot for my second order, but decided to first Idle and force Roger to declare his ARO – which he chose to decline, trusting his disguise and hoping I’d fail. As it turned out, I made the second roll too, and now his Speculo was as exposed as Karen. But now I had a problem: She was quite close to my Gwailo and I needed to kill her fast. I thought about just blasting her with my Gwailo’s breaker pistol, and in hindsight that was probably the better odds. But instead I declared a Coordinated Order with my Gwailo and Speculo (and some other trooper that I wanted to move elsewhere on the board) to move both into base contact. Knowing that I’d roll extra dice in close combat for having both troopers in base contact, Roger actually chose to Dodge. I think his highest value play would have been CC Attack against my Gwailo, but I think he wanted to extricate himself from the situation. Either way, the roll went to me and his alien assassin fell to Karen’s monofilament blade. Alas, this didn’t leave a convenient body to get the “Coup de Grace” classified if it came up later.
With this flank relatively clear, I began moving my 5-man Nox link team up the middle. I spent one order making one of the forward observers the link leader and managed to secure the HVT: Designation Classified Objective by laser-designating the nearest enemy HVT (hitting with both shots and completing the task in a single order). I kept the team relatively spaced out, and the extra order I had mentally allocated to lasing the HVT a second time (the objective requires two hits) was instead spent moving the team’s hacker forward.
With my final order of my first turn I moved Dr. Worm forward a little bit to get into better cover and potentially make a run to get the HVT: Retroengineering classified. I drew Telemetry to replace the classified I had completed during my turn.
When my opponent took over for his first Active Turn, he started by moving a camo token on my right flank forward. It had been on a catwalk out of sight, but now it was starting to menace. I tried to discover it with my Gwailo while it was still on the catwalk and failed, meaning I wouldn’t get another chance that turn with my MSV-2 heavy infantry. Executing an entire order (Jump), the camo token then moved down to ground level. I tried to discover it with my Speculo (who now had line of sight) and successfully revealed it as a Caliban. Even if the Speculo had failed, several members of my Nox fireteam now had line of sight. This would be critical, because my opponent zoomed that Caliban foward, getting into close combat with my Gwailo. Everybody who had line of sight on the charging Caliban (my Gwailo, Speculo, and at least two members of my Nox fireteam) unloaded. The Caliban scored a hit and a wound (my Gwailo didn’t score very highly with his pistol shot or ARM roll), and because the model has Protheion this actually gave him another Wound (space vampires, man). But between the Speculo and all the Nox that shot at him, I ended up doing three wounds and killing him outright (again depriving myself of a convenient body).
In writing this AAR, I realized something that I think my opponent missed: Caliban are all armed with D-Charges, which can be used in close combat. Had it used that weapon instead of its normal CCW, it likely would have slurped down more wounds from my Gwailo (don’t ask me how this works, apparently the explosive exposes more of your blood for the Caliban to drink?). It probably wouldn’t have been enough to keep it from going Unconscious, but it certainly would have been a much closer affair!
Going to “Plan B,” my opponent instead started his attack run with his Skiavoros. His initial movement was out of my line of sight but not out of my Nox Hacker’s hacking range. Seeing an opportunity for an easy Telemetry Classified, I successfully used Spotlight against him, placing him in the “Targeted” state. This would effectively cancel out the enemy’s Mimetism -3, and would potentially subject him to guided missile attacks from my T-Drone in my next active turn. With his next order the Skiavoros peeked out around a corner until he could just see my Gwailo and blasted him with plasma. He only hit with a single round and between cover and a thoroughly respectable BTS 9 my HI trooper lived. I chose to fail my Guts check and fall back into total cover. My Speculo (who was also in LOF but wasn’t targeted) succeeded in dodging out of the Skiavoros’ LOF, aided by the +1″ Dodge move.
Roger then inched forward and turned his Skiavoros on my Haiduk in its foxhole, blasting it with plasma as well. This was a bit of a risky play; we were both in cover but I was in the better range band, had MSV-2 to avoid his Mimetism, and he was Targeted. But Burst won the day and I ended up eating plasma for my troubles. Alas, my poor Haiduk was not as resilient as my Gwailo and I failed both the ARM and BTS rolls.
Next came the attack I was dreading. Having reduced the number of AROs I could throw at him and throwing caution to the wind, the Skiavoros moved out around the corner of the stairway he’d been sheltering behind until my Nox Hacker was in his sights and unloaded with the dreaded Sepsitor Plus. I actually chose to Dodge with the Nox Hacker and shoot with everyone else who had a shot, but a number of my Nox fireteam were facing the wrong way (I was trying to protect against Rasyats or other nasty airborne deployment surprises) and my T-Drone was in a crap range band, so my AROs were lackluster at best. Because my Nox Hacker was still the fireteam leader, this broke my fireteam and removed my bonuses immediately. This turned out to be a terrible play because my hacker of course failed his Dodge roll, got his brain scrambled, and joined the other team. And all of my other shots at the Skiavoros either failed to hit or failed to wound.
Now I had a real problem: my opponent now had a hacker (formerly mine) sitting within coherency – and thus hacking range – of my T-Drone. Spending another order from his main pool, he activated said brain-washed hacker and attempted to Carbonite my drone. This led to the ignominious result of the rest of the hacker’s former fireteam having to blast him to smithereens. Argh, being forced to kill my own troopers – well played, Roger! Fortunately for me, the Carbonite either didn’t go off or I tanked the effect, I don’t remember which.
With the hacker (sigh, my hacker) now dead, the Skiavoros turned its attention to the rest of the Nox and the T-Drone. Unloading with plasma in blast mode, he hit a couple of them with overlapping template weapons – and a couple of them in the back, as now that the fireteam was broken they no longer benefitted from Sixth Sense. I don’t remember the exact sequence of events, but by the end of it half my Nox and my T-Drone were either dead or Unconscious. Fortunately he ran out of orders before he could completely gut them. I think I had one left. Somewhere along the way I put a wound on the Skiavoros, but it has No Wound Incapacitation so it didn’t care. With his last couple of orders my opponent moved one of his camo tokens on an elevated catwalk in the midfield forward. The second half of his movement brought him into LOF of Dr. Worm’s little helper, who made a fantastic ARO to Discover it as a Malignos. Yikes!
We drew Data Scan to replace the classified I had accomplished in my opponent’s Active Turn.
Turn 2
Using a Command Token, I transferred my one remaining Nox into my main order pool. I thought I’d get cute and reveal my Seed Soldier and shoot the Skiavoros with a panzerfaust; this resulted in my Seed Soldier being dead. Then I thought that even with bad range bands my Gwailo and his HRL would do the trick; this resulted in my Gwailo taking another wound and dropping Unconscious. Then I thought, “Oooh, I’ll get my Speculo over there and carve him up; I made a Cautious Move to give me a covered approach, but missed a camouflage token that could see me, which allowed the Skiavoros itself to take a free shot in ARO; making an unbelievable pair of ARM and BTS saves, the Speculo lived, opting to fail her Guts check and get out of everyone’s LOF. OK, fine, I’ll reveal my Sphinx. Finally, the Spitfire in the good range bands did the trick and the Skiavoros went down. Criminy that guy was tough.
By this point time was running down and I was pretty sure I wasn’t going to get a third turn. Time to make a gutsy play! To this end I moved Dr. Worm around the edge of the building in the center. This gave my opponent’s Malignos a zone-of-control ARO, which he used to get LOF to the poor doctor (whose subsequent movement wasn’t quite enough to escape, given he’s on a big honkin’ 40mm base. The next order was spent to Move+Dodge, which put me within range of another of my opponent’s HVTs. The Malignos took a shot at me as I left his LOF, but my Dodge roll won out. Whew! With my next order, I used Dr. Worm’s prodigious 6” first move to get me into contact with an enemy HVT. There were a bunch of enemy troops who could see me, including an Ikadron and a Mentor who came out of camo state to shoot me. I did not expect to live, but the roll to get the HVT: Retroengineering objective was a 17 or less, which I easily passed. Regardless of what else happened, I had my third objective! Then imagine my surprise as Dr. Worm tanked every shot that hit him. Unreal! Dr. Worm had no right living through this.
With an order left and nothing immediate on which to spend it, I activated Dr. Worm again, this time using his combi-rifle in offense. Focusing my burst I dropped my opponent’s Mentor unconscious, but Dr. Worm ate fiery death from the other AROs, finally succumbing to a hail of gunfire. With that I drew another classified (which I can’t remember, Rescue maybe?) and went over to the Reactive Turn.
By this point I’d done a fair amount of damage and my opponent didn’t have a lot of orders left. He ditched the Data Scan classified and drew something else, but I don’t recall what it was. Whatever it was he accomplished it, putting him on the scoreboard! Looking at what remained, he didn’t have a lot of good options left. So imagine my surprise when he revealed his own Sphinx out of hiding and rampaged it across the table. By this point my right flank was looking pretty weak and I didn’t have any forward hacker support (my Shrouded hacker was still in camo state on my left), and my opponent drove his Sphinx straight at the closest enemy model within easy reach – my Speculo Killer. I think this was last ditch effort, because Speculo Killers are fantastically equipped to kill TAGs. Sure enough, she hit (at least she didn’t crit), forcing Roger to make the dreaded “beat a 12 or die” roll imposed by the Speculo’s monofilament CCW. Given his luck so far he failed that roll, which in turn actually completed the Predator objective for me (kill two enemy troopers in melee combat).
With his last heavy hitter down, few orders remaining, no way to accomplish any more Classified Objectives in his turn, and time expiring, we shook hands and called the game.
Though we only played 2 turns, a whole lot of murder happened! We had all sorts of goodies – hacking, close combat, sepsitor, TAGs jumping out of hiding spots, and a couple of really furious exchanges of gunfire! In the end I scored four Classified Objectives to my opponent’s 1, and 2 more points for having scored more objectives than my opponent.
Final Result: 6-1 Victory!
Game 2: Capture & Protect
I’m not gonna lie – I’m not a huge fan of this mission. Ostensibly you can score points for each turn you hold the enemy’s beacon, but I think I’ve only ever seen someone get it before the last turn once. As such it almost always devolves into both sides whaling away at each other until one side is completely spent, at which point the other side makes a mad dash for the beacon with however many orders it can muster. It’s…unsubtle.
My second opponent was Justin, who as it turns out only lives about 15 minutes from me! In this tournament Justin was playing O-12, a relatively new faction to Infinity that dropped with the release of CodeOne. He won the Lieutenant roll-off and chose turn order, opting to go first (which is absolutely the correct play for this mission unless the table is extraordinarily lopsided). I chose to force him to deploy first, which at the very least would allow me to place my Speculo Killer as the last model deployed, ostensibly where I thought it could do the most good. Justin’s deployment didn’t leave me a whole lot of options, so rather than risk a WIP roll to deploy in the back corner of his deployment zone I chose instead to forego the roll and simply deploy near the center of the table, with the idea being that I could potentially use her to grab the opposing beacon. My Sphinx was again placed in Hidden Deployment, this time guarding the beacon against anyone who might approach it.
The last deployment details to work out were the “Booty” rolls for our biker mercenaries, one of the special troops each player gets for free in this mission. Mine picked up Mimetism -6, which is fantastic. I opted to lose the Impetuous rule such that I could take advantage of cover, potentially allowing me to stack a -9 modifier on my opponents without vision-enhancing equipment.
Turn 1
My opponent started in the center, where he used smoke from one of his Varangians to maneuver some troops up the table. This brought him into line of sight of my Speculo, but I declined an ARO. He failed the Discover roll with at least two models, so was essentially forced to ignore her.
Then, on my left side the pain began. Using his Cyberghost’s Hacking Device Plus, my opponent used the repeater on his Kytta Remote to put down a zone of “white noise” blocking a gap between a couple of terrain pieces behind which he had deployed a couple of troops. The White Noise hacking program is cool because it works kind of like smoke but only affects troops with MSV – normal troops can see right through it. This left my Haiduk (who was covering that flank) blind and exposed. With his next few orders, Justin then worked his Mimetism -6 Omega trooper armed with an HMG into a position where he could utterly obliterate said Haiduk. Somewhere along here he also blasted my Taigha beast apart as well. Worse, my cover options on this flank weren’t great and poor Dr. Worm’s butt (tail?) was sticking out enough that he too ate hot machinegun death.
This last attack did bring the Omega trooper forward far enough that he was within range of my Shrouded hacker, who I revealed and who successfully ran a scan against the Omega to accomplish my Classified Objective. Yay, points on the board!
Rather than risk face-to-face attempts between my hacker and his Omega, Justin brought one of his other heavy hitters forward. This time it was Andromeda, who is pretty scary in close combat. Worse, she’s got the “Guard” skill, which allows her to engage in close combat within an 8″ range so long as she also has LOF. Woof. The in-universe backstory fluff for this unique ALEPH character (who can be taken in an O-12 list) is that she’s carrying a fashionable briefcase that happens to transform into a mechanical tiger. Yikes! She worked her way forward to deal with my Shrouded Hacker, but he proved resilient/sneaky/dodgy enough that it actually took a couple of orders to finally kill him. That brought my opponent’s first turn to an end and I took over.
By this point I had only lost a few Regular Orders, but they were critical ones. With Dr. Worm taken out, I’d need to be more cautious with my troopers. As I was used to doing, I got to work with my Gwailo. First and foremost was the Epsilon Unit with MSV2 and a Multi Sniper Rifle standing atop a tall tower in my opponent’s deployment zone. Though the board was cluttered enough that the sniper perch wasn’t completely dominant, it still had to be dealt with. I moved my Gwailo out, secure in the knowledge that its Albedo would make him invisible to my opponent’s sniper – but I did not account for a second sniper in Hidden Deployment! Revealing a Lynx (also armed with a Multi Sniper Rifle), Justin announced a shot in ARO. Given that the Epsilon was blind to me, I focused my attention on the new Lynx and put both rockets towards it. This did the trick, and the Lynx died a fiery, flaming death. For my next order I fired at the blind Epsilon. I was really hoping to take him out – after all my MSV negated his Mimetism, my range band negated his cover, and I was firing two rockets! Alas I only hit with one, and he tanked the damage. Opting to fail his Guts check, the Epsilon wisely dropped prone and out of my Gwailo’s LOF. Dang it! I really wanted to take that guy out, because next turn my Albedo would expire, he’d be able to see me, and the odds would swing in my opponent’s favor.
Next it was time for my Speculo Killer to go to work. Still in IMP-1 state, she moved around the nearby Varangian, who again failed to Discover her. Hippolyta (another ALEPH character usable in O-12) that my opponent had moved a little bit forward in his first turn (she’s Impetuous and fast!) had a long-range spot underneath a bridge in the center of the board, and managed to drop my Speculo to IMP-2. No matter, I was where I needed to be. Charging in from the Varangian’s rear and attacking out of a marker state, I was poised to do some serious damage – until I rolled like a 2 for my CC Attack and my opponent rolled a considerably higher number for his close combat ARO. I of course failed my ARM roll and dropped unconscious. Well, crap.
With my last few orders I moved my biker up to tangle with Andromeda and the Omega unit, spending several to finally kill off Andromeda (thankfully before she could get into close combat range with me), but was not able to dent the Omega. That thing was becoming a serious thorn in my side.
Finally, I tried to use Regeneration with my Speculo Killer. This is a straight PH roll, so I had a 60% chance of passing and getting her back into the fray…and of course I failed this roll too. I guess she had bargain-basement repair nanites. Sigh.
Turn 2
Early in the turn there was some wrangling between the Omega and my Gwailo, most of which resulted in both of us rolling for crap. At one point the Epsilon sniper stood up and took a shot at my Gwailo. I somehow managed to dodge the shot and used my movement to get out of line of fire. The Omega did take the opportunity to gun down my biker, however. By the end of it both my Gwailo and the Omega were in mediocre range bands and my Gwailo was kind of far left and forward, which opened up the middle of the board a little bit.
Taking advantage of the openness and now free of the Speculo, my opponent’s Impetuous Varangian made a run for my beacon. This was what I had been waiting for with my Sphinx. Revealing myself out of Hidden Deployment and taking the shot with a Heavy Flamethrower, the poor Varangian failed his Dodge roll and got barbecued for his trouble.
At this point Justin brought Hippolyta forward. Being a 2 Wound Berserk warband trooper with an Explosive Close Combat Weapon, she, uh, made short work of my poor Gwailo.
Finally, some of my opponent’s stuff got shuffled around in his back-field, which was needed to protect his beacon (since most of his heavy hitters were now on my side of the table). With this, the Active Turn passed to me.
Well, crap. The Omega was still a huge pain in my ass and needed to be dealt with. Now that my Sphinx was revealed, I used its Tactical Awareness order to move over to where I could get a line-of-fire against his Omega trooper. We were both in good range bands and both had Mimetism -6, but I was in cover and he was in the open. I was also rolling 4 dice to his 1 in ARO, so all in all I felt like it might take a couple of orders but I had a good chance to take the Omega out.
Until I rolled and after all was said and done my opponent hit. Worse, I failed my ARM roll and took a wound for my troubles. But lightning never strikes twice, right? The odds are still in my favor, right? Burning another order I tried again – and again ended up taking a Wound. Argh! I don’t want to lose my TAG in ARO, especially since Dr. Worm was already down and wouldn’t be able to patch it up.
OK, I still have a fresh 4-man Nox fireteam with an HMG that I can apply to this problem, easy-peasy! And it’s in a different combat group, so I don’t have to worry about draining my main pool. I moved my fireteam across the back of my deployment zone and got them into a position where I my HMG could see the Omega. I opened fire and…took a wound, dropping unconscious. Argh. Well, my next best chance is with my Nox Forward Observer, right? Nope, he fails, gets shot, and goes unconscious as well. Double, no triple argh! With no other alternative I fired again with my Sphinx and again failed both to hit and my ARM roll, dropping unconscious.
This is one of the things that sometimes happens in Infinity – if you make your highest probability play and it doesn’t work out, you go to your next highest. And if that doesn’t work out you take the next highest, and so on. Eventually your plays are starting to look like pretty long odds and become increasingly desperate. The analogy I usually use to describe the sinking feeling of this phenomenon is “feeding your dick into a wood-chipper.” At this point I did not have great options. At the beginning of my turn I felt like I really needed to take the Omega out, because there was a big, lateral opening at ground level underneath some tall LOF-breaking terrain in the middle of the table and the Omega was looking right through that gap. This left me without a good lane to advance up the field to grab my opponent’s beacon, absent swinging way left and going on the far side of some buildings – and I didn’t feel like I had the orders left to do that. I had done what I could and it hadn’t panned out. I shuffled around my Nox Hacker and another camo token (hiding a Shrouded minelayer with a boarding shotgun) to protect my beacon. I knew I couldn’t win, but maybe I could prevent a runaway victory.
With my few remaining orders and almost as an afterthought I brought in my Cadmus Killer Hacker, air-dropping into my opponent’s deployment zone. I managed to stick the landing and got into a position to try to melt the brain of his Cyberghost with Trinity, but just couldn’t pull it off. I also tried to blast someone with a Boarding Shotgun and failed, the end of a really bad run of dice rolls. In the my last order got my Cadmus into a position to at least be able to see his beacon.
Turn 3
By this point, time was very close to expiring and Justin and I discussed what to do. As I saw it, if I could keep Hippolyta from grabbing my beacon, I could force a draw. It all came down to whether my Shrouded minelayer and/or Nox Hacker could do the deed. This meant my opponent would end up getting one more turn than me, but I was OK with that as I suspected that I’d have very little with which to oppose him had I gotten a third turn anyway. So we’d speed run just the important stuff in the few moments we had remaining.
Starting out, the Epsilon jumped up from prone with one order and tried to Discover+Shoot my Shrouded with the next. I declined an ARO, hoping the range and my cover would protect me (as my Mimetism was cancelled by the MSV). Justin hit his Discover and one of his shots, but I somehow miraculously tanked the ARM roll. Opting to fail my Guts check, I fell back out of the Epsilon’s LOF. But I was now revealed and in Hippolyta’s LOF.
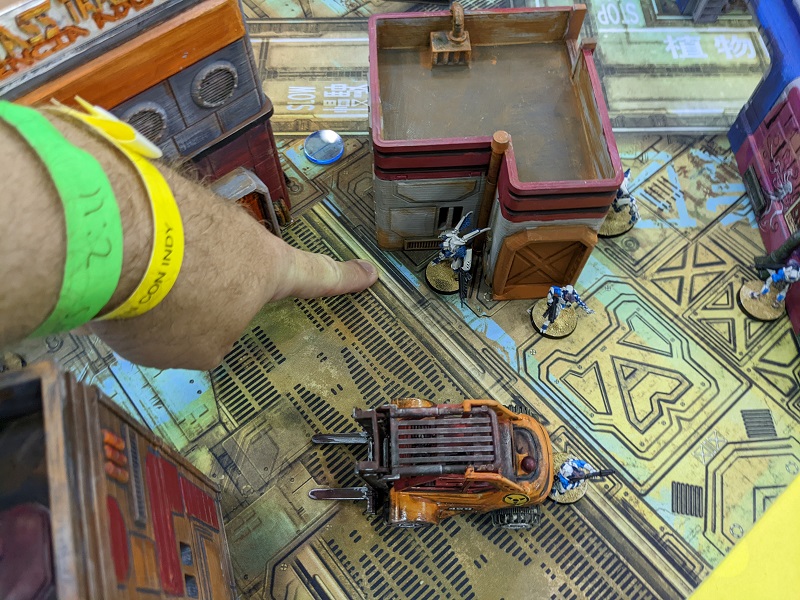
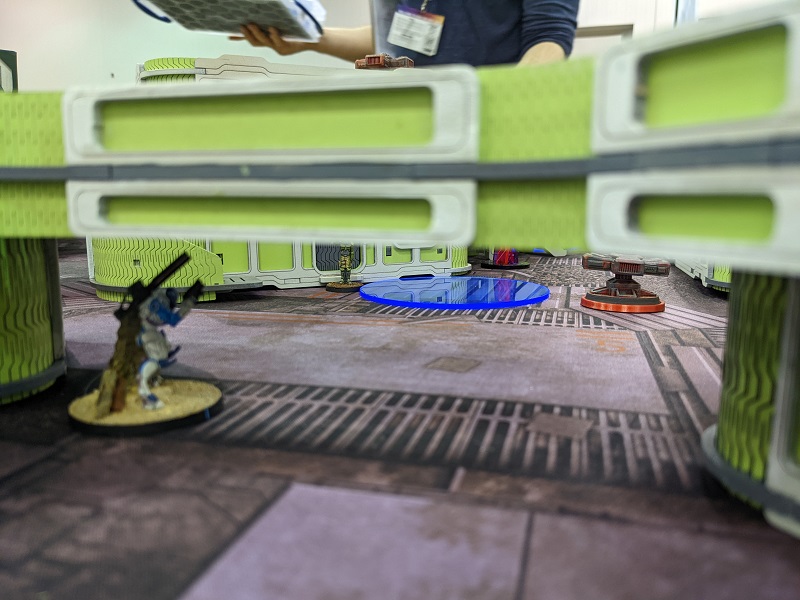
Hippolyta advanced, and here my own cleverness screwed me – during deployment my Shrouded Minelayer had put down a Dazer near my beacon (identified as the green “nullifier” token next to the Nox Hacker in the picture above). This made an area all around it difficult terrain – my thinking was that everything I could do to slow down any enemy troopers who came for my beacon would be worthwhile. When we first did the order, we missed this and Hippolyta advanced into the hacking range of my Nox Hacker, who successfully pulled off a Spotlight and put her in the Targeted state (handy, because she too is Mimetism -6). He was able to do this because her shot against my Shrouded cancelled her Stealth. But Hippolyta doesn’t have Terrain (Total), so her movement would have been stopped right at the edge of the Dazer zone – outside the reach of my Hacker. We quickly realized all this and backed her up to the correct location – alas, no Spotlight for me.
What she did do, however, was blast my Shrouded with her Breaker Combi-Rifle, killing him pretty dead. This left just my Nox Hacker all by himself, and when Hippolyta came into line of sight (which her 6-2 movement – even reduced to 5-1 by the Dazer – made easy), she was able to blast him too.
We both agreed that with the orders remaining in his main pool, Justin would be able to snatch the beacon and run it back to his deployment zone. We also agreed that he’d easily be able to accomplish his Classified Objective. No need to play it out, and an amiable handshake ended the game.
Final Result: 1-6 Loss!
Game 3: Frostbyte
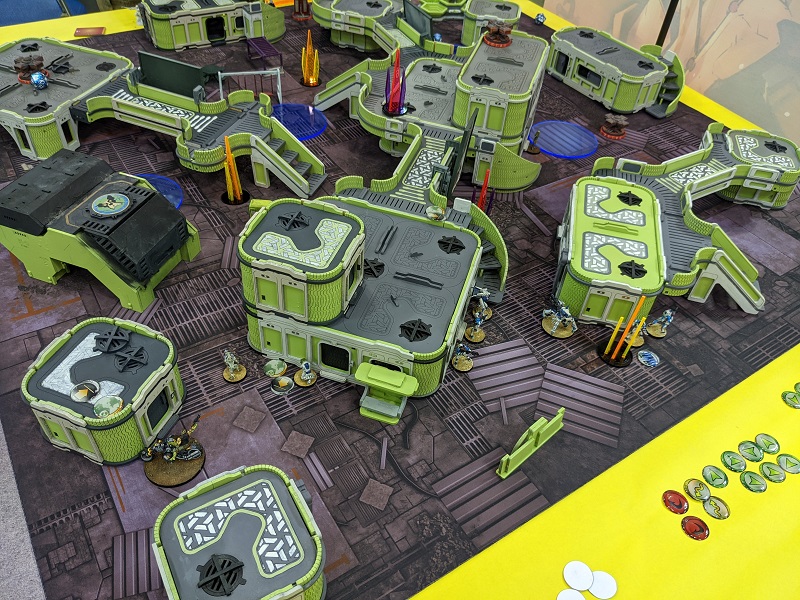
This was the mission I was most looking forward to. It’s complicated and has a lot of special rules, but it makes for some very fun interactions. Specifically it funnels everyone’s TAGs and heavy infantry and drones into the middle of the board and encourages all of the lighter stuff to hang back. This generally results in wicked close-range firefights among the biggest units in Infinity, and this game was no exception.
My third opponent was Steve, who as it turns out lives near where I grew up. Steve was going to be playing White Banner, a sectorial of Yu Jing and an army against which I have have almost no experience playing. I finally won a Lieutenant roll off and opted to go first. I know that zone-dominance missions often favor the second player, but I wanted to do some damage up front, especially because taking out just a few key pieces can make a huge difference in the total points someone can dump into the exclusion zone late in the game. Steve of course chose table sides and forced me to deploy first. For my Classified Objectives I drew Test Run, Data Scan, and HVT: Designation.
It wasn’t until I started deploying, however, that I discovered something insidious about this table: see all those catwalks and staircases and railings and stuff? Yeah, at ground level the table was remarkably wide open. On the one hand this was great – my Haiduk had a pretty commanding field of fire even from all the way back in my deployment zone! But it meant that moving up the field was going to be murder. That’s, uh, that’s “foreshadowing” by the way.
Since this mission also included a free biker mercenary, I once again rolled on the Booty chart for my random equipment and came up with 8-4 movement. Well crap, my movement was already 8-6, so my gear was essentially a downgrade. I suppose it meant he was almost as fast dismounted as he was mounted – apparently my biker had found a pair of roller-skates! Fortunately, this particular Booty skill allows for a re-roll, which I opted to use and instead got an HMG. Now that’s more like it! Combined with the Red Fury he was already toting, that would give him optional Burst 4 weapons with good range bands from 8″-32″, which is pretty rad. Steve was less lucky, and even after using his re-roll ended up with Grenades. Given how open the middle of the table was at ground level, the utility of an indirect weapon seemed somewhat dubious.
Finally, I put my Sphinx in Hidden Deployment, again at the forward edge of my deployment zone very near the center. After my opponent’s deployment – during which he plopped down a Blue Wolf(TAG) + Adil Crane Rank duo, a full 5-man Shang Ji + Jujak heavy armor core fireteam, and a Liang Kai + Shaolin Haris, I knew he’d brought a bunch of stuff that was designed to move fast and hit super hard. I placed my Speculo Killer just outside his deployment zone in a place where I could make a run against his Blue Wolf TAG, which I saw as likely the biggest threat. My opponent placed his reserve mini, completing deployment and kicking off the game proper.
Turn 1
In my Impetuous phase I did…nothing, because I completely forgot it! When I figured it out two orders later Steve graciously offered to let me take it, but I declined – you learn more from costly mistakes than you do from mulligans. But while I should have been doing that, instead I was focused on…
Standing between my Speculo Killer and Steve’s Blue Wolf TAG was a Yaofang Long-Ya Remote – the AP Minelayer variety – that had been deployed in camo state as a marker. Even as a marker its silhouette gave it away as a drone, so I needed to deal with it. Activating my Haiduk, I declared Discover+Shoot. My opponent responded with a Panzerfaust (!), so thank goodness I hit. Of course Steve’s drone laughed off the shot.
But now it was revealed and my course was clear – kill it with a missile! This was going to be super useful for me, because both the AP Mine that he had placed during deployment and the Blue Wolf TAG would be covered by the blast! To that end I swapped to my second combat group and activated my Nox fireteam and their T-Drone buddy. It took a shot at long range (just outside my good range band) and ate another Panzerfaust ARO, but fortunately we both missed. Whatever, he’s out of Panzerfausts so let’s move into our good range band and try that again.
That’s where everything went to hell in a hand-basket. Using one of my own favorite tactics against me, Steve revealed a Hundun ambush unit with Heavy Rocket Launcher from Hidden Deployment, who unloaded on my fireteam. He initially placed the template such that it got three of them, but I let him know that since he could place it at any point during their movement there was a choke-point they were moving through where all five of them would have been hit. Oh, and the enemy bot I was trying to shoot? It unloaded on me with a Flammenspeer. When all was said and done my T-Drone was in its 2nd level of Unconsciousness and my Hacker and one of the Forward Observers were dead. Well that didn’t go as planned!
OK, time to get crazy. Activating my Gwailo I sent a Heavy Rocket at the enemy Remote that had been vexing me and blocking my Speculo. Part of what was making this thing so hard to take out was that we were shooting at each other through one of the Blizzard Zones. This dropped my missile and rocket launchers to Burst 1, which is much less good in terms of odds of scoring a hit. But I finally managed to get one, knocking the Yaofang Long-Ya out and even putting a wound on the Blue Wolf TAG (which was out of my LOF but still under the template). Maddeningly, the AP mine survived.
Next it was time to take out the Hundun. With the Yaofang out of the way I moved my Gwailo to get a shot. My MSV cancelled his Mimetism, and while the range band wasn’t great I managed to score a hit, immolating the troublesome ambusher.
Next it was time for my Speculo to do her thing. I moved around behind the Blue Wolf TAG. There were a couple of other troops over on this flank, but most of them were prone. Using both halves of my order for movement (dropping prone for the second half) I was able to get in the TAG’s rear arc and be in a position where only one other trooper could see me. I wanted to be in the TAG’s rear because otherwise I’d eat a Heavy Flamethrower shot as I charged in and I didn’t want that. Knowing that this was likely to be a sacrifice, I spent another order and leapt into melee. Of course I scored a whopping 2 on my die – which was a hit, to be fair – but it didn’t come close to Steve’s roll, and I was forced to resist a Damage 15 Double Action attack. Unsurprisingly she failed both ARM rolls and died. No need to resolve the AP Mine she set off or the free shot she gave the Shang Ji who could see her. Ugh.
With my last couple of Regular Orders I moved Dr. Worm up to patch up my T-Drone. I failed the first roll, but burned a Command Token for a re-roll which passed. This got me my Test Run Classified Objective – woohoo, I’m on the board! Finally, using my Irregular Orders I moved my biker and Taigha Beast forward, then passed the Active Turn to my opponent…
Who proceeded to make a run of death with his Blue Mongol TAG. Moving out around the corner that had been occupied by the Yaofang Long-Ya he casually murdered my Haiduk along the way. I’ll spare you the gory details (partly because they were too traumatic to recall!) but the next several orders were spent leapfrogging forward with the TAG and taking out Dr. Worm (who courageously tried to dodge away and was cruelly gunned down for his trouble), my T-Drone, and my Nox FO and HMG. He also managed to Discover and knock out my Shrouded Hacker (from outside my hacking range, of course). And he did it all through a Blizzard Zone, which generally helps the Reactive player. Now this wasn’t easy-peasy, I made a couple of shots and/or Dodge rolls that frustrated his efforts, and it burned through a lot of orders. Still, it was incredibly damaging. Making matters worse, he moved part of his Shang Ji link up onto a catwalk and wasted my Gwailo with a linked HMG. All in all: Ouch!
Adding insult to injury, with both of my normal hackers and both forward observers dead, I now had no way to complete either of my remaining Classified Objectives. Brutal.

Turn 2
Woof. Well, no need to count orders for my second combat group, as they’re all dead. This was not a great start. But I still had some tools.
This time I remembered to take my Impetuous orders, advancing my Taigha to the stairs leading up to the platform where his Haris team is lurking. I was able to get my mercenary biker into position to light up his HMG Shang Ji up on the catwalk with my looted HMG, and amazingly manage to kill it! This freed up the center of my deployment zone, which was good because I had important work on which to focus!
Revealing my Sphinx out of Hidden Deployment, I proceeded to light up the Blue Wolf. This wasn’t great – we’ve both got Spitfires and were both in our +3 range bands. I have Burst 4 to his Burst 1, but he’s firing AP ammunition and I’m not. Fortunately, my Mimetism -6 (and Surprise Attack, at least on the first go) help. It took me a couple of orders because the Blue Wolf is tough and in cover, but I finally put it down. Whew, that was a load off, but that was pretty much all of the (few) orders I had. I used my final Irregular order on my Taigha beast, leaping forward and unloading on the opposing Liang Kai + Shaolin Haris with its chain colt. Agile close combat troops, they managed to dodge. With that play passes back to my opponent.
In a clever twist, Steve reveals that the Adil that had been duo-linked with his Blue Wolf (and gingerly following it as it rampaged up the field) was actually a holomasked Tian Guo Killer Hacker – and as a Haqqislam player I always appreciate a good holomask! This hacker used the console next to the (now unconscious) Blue Wolf to activate the heating unit in the zone between his deployment area and the central Exclusion Zone. Now Steve too was on the board with points!
The next several orders were spent on his own biker mercenary, and there was hot, biker-on-biker action that ultimately resulted in mine eating a bunch of Red Fury shots and dying.
Closing out the turn was one of the most bizarre series of orders I’ve ever encountered. Bringing the remainder of his core fireteam of Shang-Ji and Jujak heavy armor toward the center of the table (and into the all important exclusion zone), I had an opportunity to do some damage with my Panzerfaust-toting Seed Soldier, who was still ensconced in his gooey egg-sac. In order to hatch, I just needed to pass a single Dodge check. Over the next three of my opponent’s orders I failed three times, each time sucking down at least one heavy incendiary rocket. Yet each time, I managed to completely ace my ARM rolls and survive unscathed! I can just imagine this poor Shasvastii struggling inside his egg-sac as rockets impacted all around him, furiously thinking “How the hell do I get out of this thing?!?”
Alas, the fourth try saw my opponent succeed, and my poor Seed Soldier died burning ignominiously in his unhatched state. It felt like something straight out of Aliens. Still, it ate up a ton of Steve’s orders, and he finished out his turn just making sure all of his HI were safely in the zone.
The Tournament Organizer called 15 minutes at this point, but Steve and I agreed to go fast-fast-fast and get our last turns in – easy for me because I had so few orders left!
Turn 3
That’s right, by this point I had a grand total of 4 orders, including my Sphinx’s Tactical Awareness order and the Taigha’s Irregular Order that I used a Command Token to turn to Regular. Knowing that the Taigha would die at the end of the game anyway – it wasn’t in a heated zone – in my Impetuous phase I used its Impetuous Order to make a Berserk charge into Liang Kai. Understand that Liang Kai is a complete bad-ass, with all of the special skills needed to just carve people up in close combat. But when Berserk is used, the fight is no longer face-to-face – both combatants are simply making normal rolls. In the case of the Taigha beast and its CC 21 attribute it means that you will hit, but you’re likely to get hit yourself in the process. This was essentially mutually-assured destruction, as there was no way I was going to survive Liang Kai’s Explosive CCW. But my own attack was AP+Shock, and while Liang Kai has No Wound Incapacitation, he is not Shock immune. After all the rolls were done, we’d both gone out in a blaze of glory, completely deceased. But my Taigha was 5 points and Liang Kai is 21, so I felt like this was a good trade from a piece I was going to lose anyway.
All 4 remaining orders in my pool would be spent on my Sphinx, who used his massive size and Climbing Plus to bully his way over the railing of some stairs and up onto the catwalk. From this position, I could be seen by a Shang Ji Hacker and a Jujak, both of whom I unloaded on with twin Heavy Flametrhowers. I was just outside the Shang Ji’s hacking area, so it tried to dodge, and the Jujak was just outside my template area. The Shang Ji took a wound, but being heavy infantry had another to spare. As much as I wanted to stay outside the Shang Ji’s hacking area, I knew I only had a couple of orders left. Throwing caution to the wind, I advanced and was now able to catch a couple of other enemy HI (two of whom were facing the wrong direction) in the blast. The enemy hacker declared Total Control as an ARO, hoping to take control of my TAG. Fortunately for me, the attack failed to go off. Even more fortunately for me, both the Shang Ji Hacker and one of the Jujaks facing away from me got lit on fire and died screaming. Twin Damage 15 (Continuous) attacks are no joke, even for heavily armored opponents. And now I was safe from hacking attacks!
My last two orders were spent moving up to make absolutely clear that I was in the zone and roasting the remaining enemy heavy infantry. By the time I was done, only the first Jujak remained, having either dodged or soaked everything I threw at him.
As my final act, I brought on my Cadmus Killer Hacker from airborne deployment using his own reserve order. I had initially thought to bring him on next to a console such that I could activate a heating unit (and get an Objective Point!), but was reminded that the middle area of the board is an exclusion zone. I also realized I didn’t have the orders to both drop and activate the console anyway, so instead I opted to drop way off on my far right flank (over near where my Speculo died), which was in the heated zone Steve had activated in his second turn. I made the roll, and because Cadmus drop with a decoy it kept my hacker alive. He wasn’t going to do anything, but he was 24 points that would survive.
With just a few moments left and many fewer orders than previous turns, Steve remained focused. He voluntarily canceled his Shaolin troopers’ Impetuous orders, as they were already in the heated zone and he didn’t want them to race forward and freeze to death at the end of the game. Using his Tian Guo Killer Hacker he raced over to my downed Shrouded Hacker and completed one of his objectives – I forget whether it was Coup de Grace or In Extremis Recovery. He wanted to get another, and probably had the orders to do so but realized belatedly that Killer Hackers don’t have the Spotlight program and thus his Tian Guo actually couldn’t complete it. He spent an order moving one of his support troops into the heated zone so it didn’t die, and carefully did not activate the remaining Jujak such that my Sphinx wouldn’t have an opportunity to light it on fire. And that was that. The Tournament Organizer called “dice down!” and Steve and I both heaved a sigh of relief and shook hands.
This one was an utter bloodbath. In the end once the freezing rule was applied, I had two models remaining on the table – my Sphinx and my Cadmus, totaling 117 points (out of the 400 I started with). Steve had a Jujak, a pair of 6-point Shaolin monks, and a few other remotes and support troops totaling 56 points (his heroic killer hacker froze to death after completing his objective). The only troops in the central zone were my Sphinx and Steve’s Jujak. Ultimately, this meant I scored 3 Objective Points for killing more Army points than my opponent, 3 Objective Points for dominating the exclusion zone, and 1 point for a Classified. Steve scored 1 Objective Point for activating a console and another for completing a Classified.
My final run with my Sphinx made the difference, incinerating somewhere just over 100 points’ worth of heavy infantry. In four orders, I managed to claw my way back into the game. This kind of close finish is one of the things I absolutely love about Infinity. I’ve had them go both for me and against me, but either way it makes for a really compelling and enjoyable gaming experience.
Final Result: 7-2 Victory!
Debrief
Wow, another fantastic late-night ITS tournament in the can! Despite the scores, all of the games felt really close. One roll falling the other way here or there would have been enough to swing victories to defeats and vice versa. Each of my opponents was a consummate sportsman and each played very well. Roger’s methodical Skiavoros run, Justin’s downright clinical Cyberghost + Omega attack, and Steve’s Blue Wolf rampage – everybody was using the tools they brought to their utmost and making the game really challenging!
Ultimately I placed 4th (out of a small field of only 8 this year), but the difference between me and the guy ahead of me came down to Army Points. In my games I was only too happy to sacrifice troops to complete my objectives (hanging Dr. Worm out to dry twice in pursuit of Classifieds, for instance), and as a result lost a crap ton of troops in the process. I was effectively converting my Army Points into Objective Points, which ultimately is how you win games, especially with limited orders. I made a few boneheaded errors, but nothing that was totally game-breaking.
Further, I feel like I can claim a moral victory in that of all the forces to participate in this event, mine was the only one that was completely painted! That’s gotta be worth something, right?
I also don’t feel bad at all losing to Justin – he’s a nationally-ranked player who would go on to not only win the ITS After Dark event, but also qualify for the Invitational and take second place in the big show after quite possibly one of the closest scores on record; he and the winning player tied on Tournament Points, Objective Points, and even Army Points. The final tie-breaker was determined by how many Objective Points each had given up to their opponent, and Justin lost that 1-2. Super close! Having a nationally-ranked player in our own back yard is fantastic, and I look forward to having him out to the garage for more games.
Similarly, both Roger and Steve are within relatively short drives and both are part of active Infinity groups. Meeting cool people with which to play this game is one of the high points of going to events like GenCon. You can bet I’ll be back next year!
Have any questions or feedback? Drop us a note in the comments below or email us at contact@goonhammer.com.
