
In this week’s Dropfleet coverage, we’re here to look at how to paint the ships that form the spearhead of the Reconquest: the UCM fleet.
Table of Contents
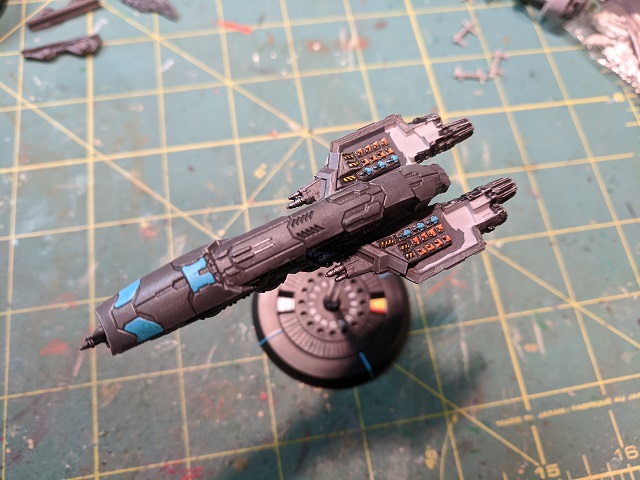
Rockfish’s Homeworld Inspired UCM
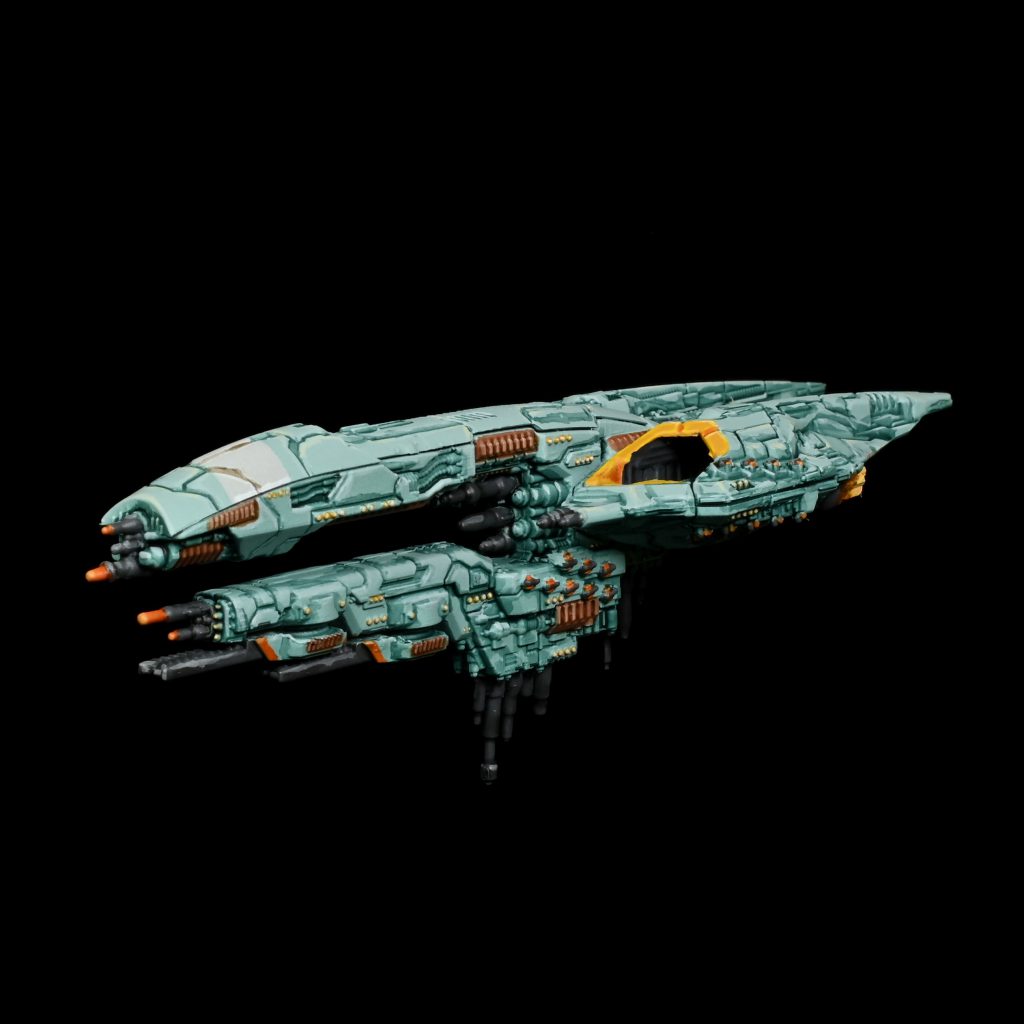
A while ago when a bunch of us were discussing various ideas for colour schemes and sources of inspiration, when I remembered a perfect place to go looking – Homeworld concept art! This scheme was mostly based on some of the really early art for the faction that would be become the Kushan which had this nice desaturated blue green thing for the main colour, along with the rose coloured panels and distinctive use of orange and yellow spot colours. UCM have not dissimilar varieties of surfaces to the homeworld ships, so I hoped it would work as well on them as in that game, and I think it did!
Step 1 – Airbrushing
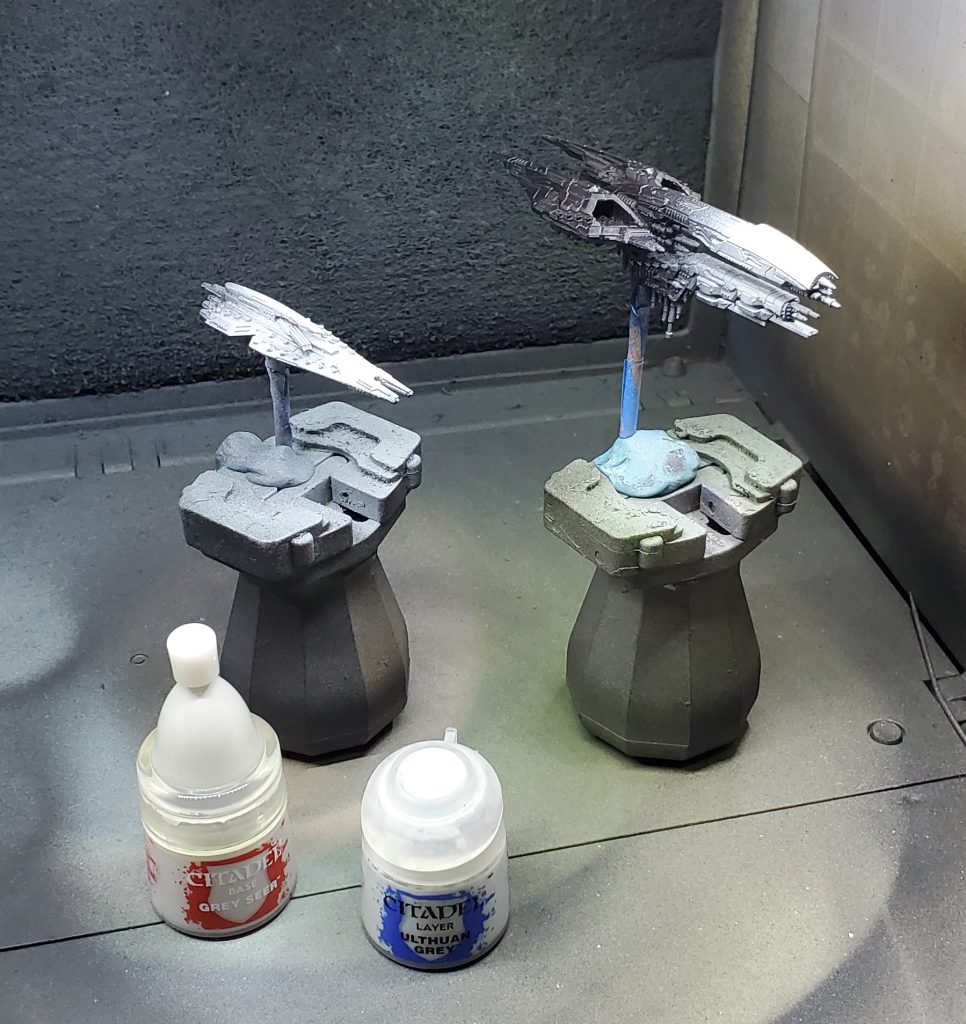
I actually start with the white of the stripe, this is Grey Seer with a fairly subtle zenithal coat of Ulthuan.
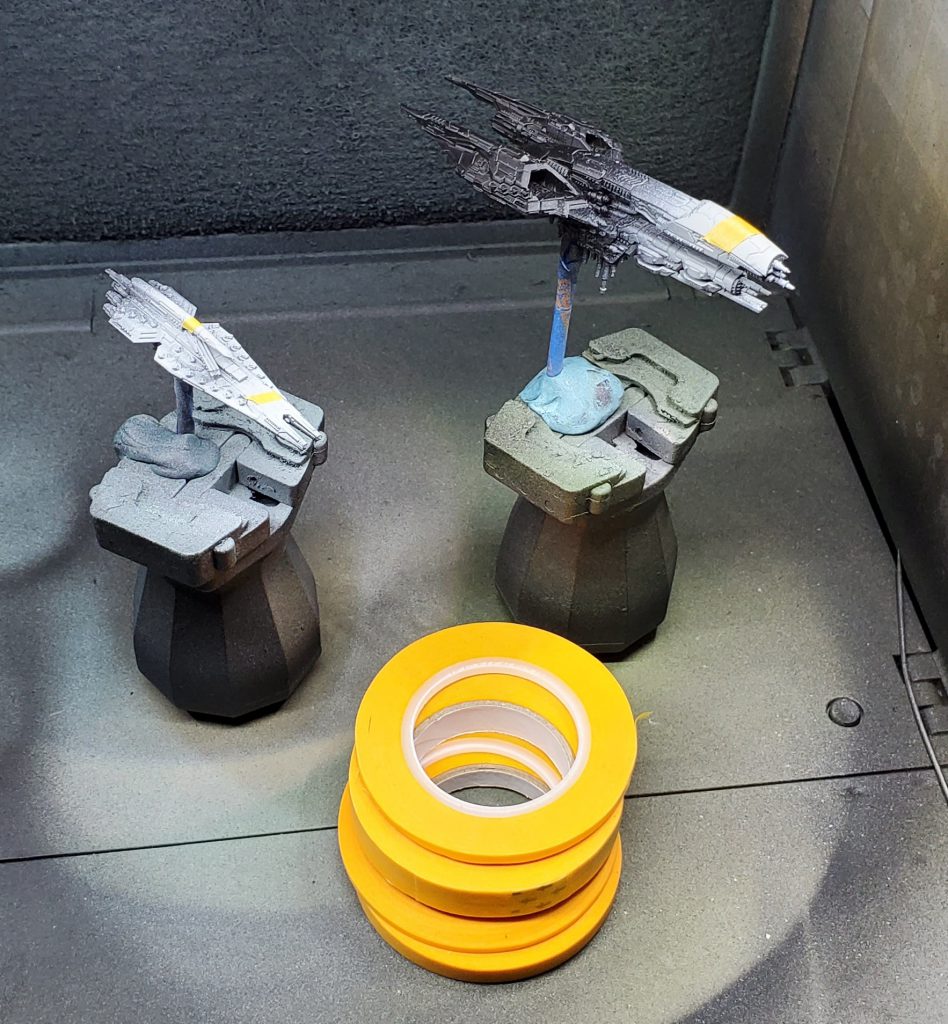
Next up mask off the where you want the stripes to be, for this I am using the pile of different widths of Vallejo masking tape I have. You can play around with the number and width of stripes you use to help differentiate the ships, but with the masking done its time to do the main coat!
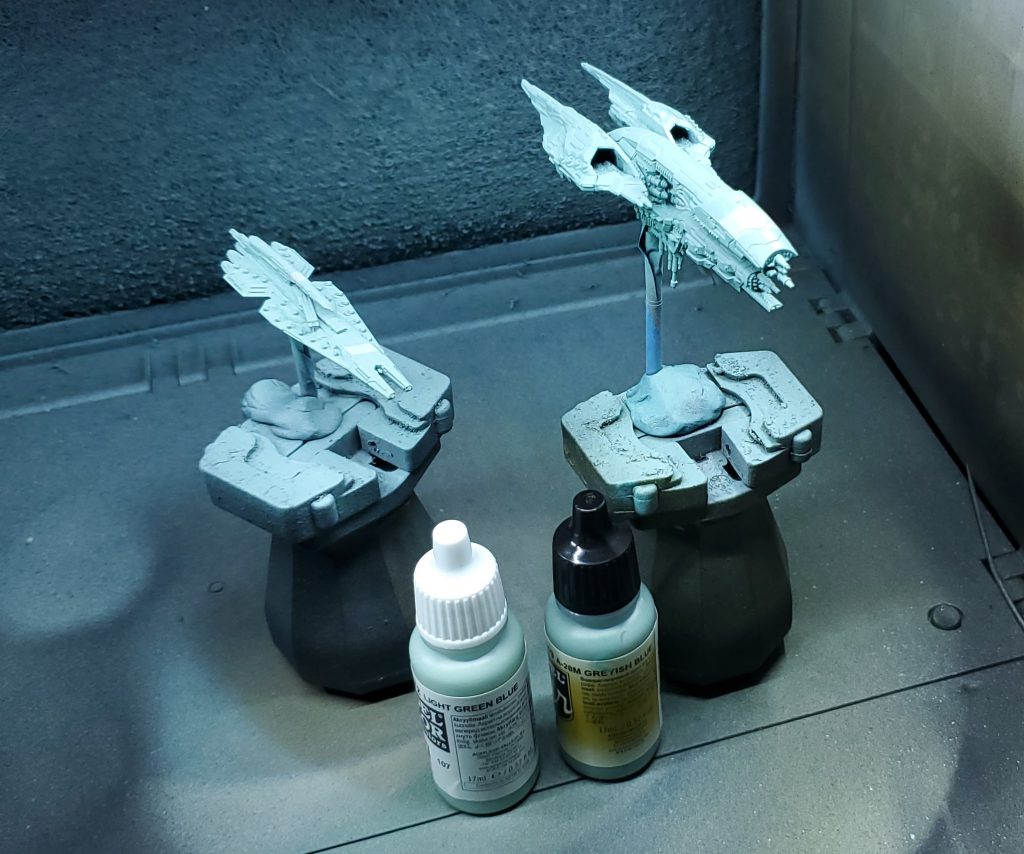
For this I cover the models in VMA A-28M Greyish Blue with a zenithal of VMC Light Green Blue, the contrast will start as looking fairly stark but will look fine once we get the rest of the colours down.
Step 2 – Base coats
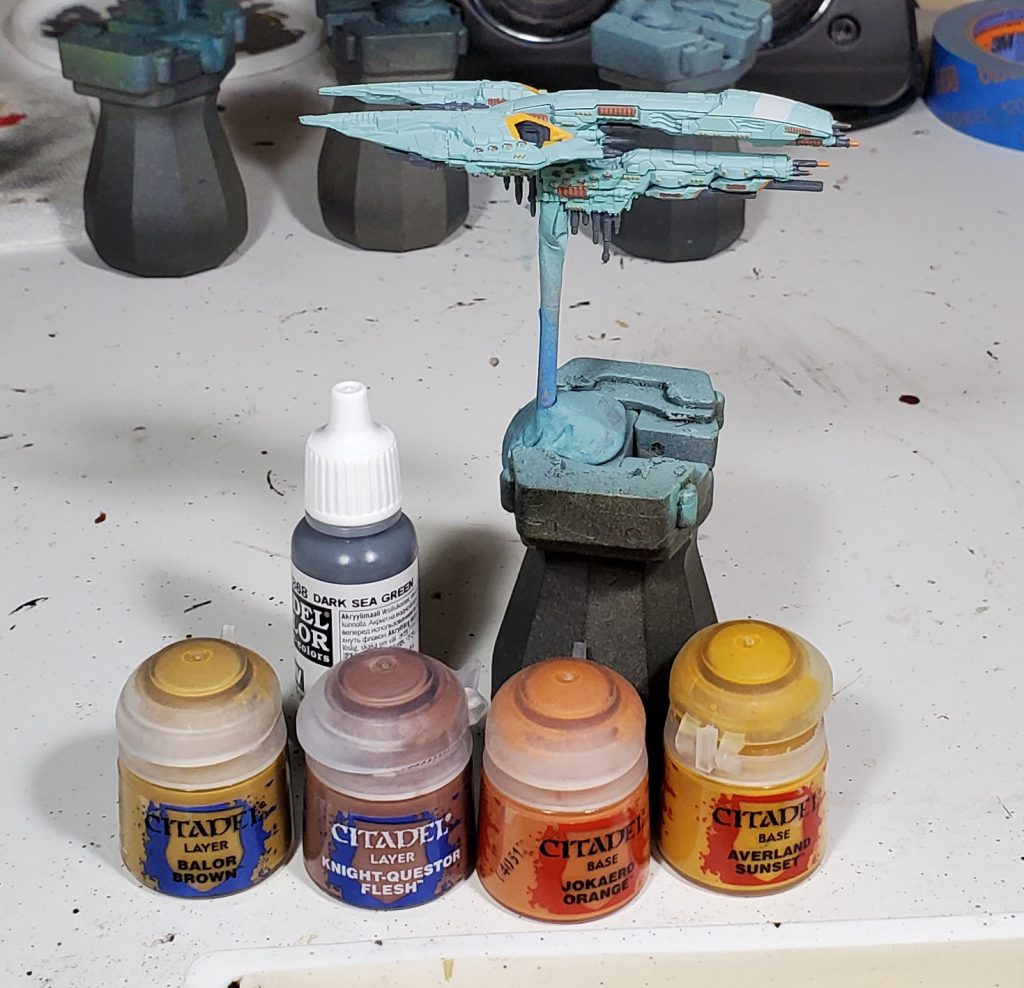
These are pretty straight forward:
- VMC Dark Sea Green for guns, antenna and other similar details
- Jokaero for warning bands on guns and antenna tips
- Averland is mostly reserved for indicators around landing bays
- Knight-Questor is used for the base coat of the detail panels
- Balor is just used to dot the lights
Step 3 – Washes
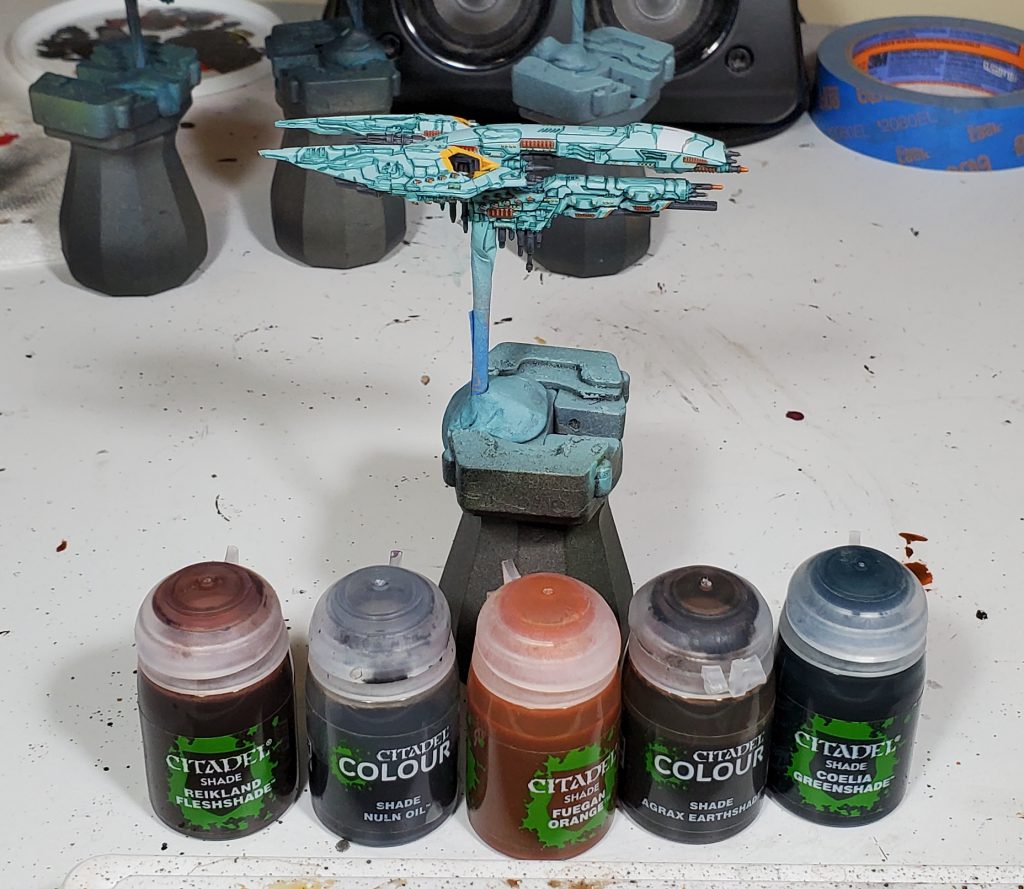
This is split between pinwashes and area washes, with the main armour, white and yellow getting pin washes of Coelia, Agrax and Fuegan respectively. The rest is just general washes of Nuln for the grey, Reikland for rose, and Fuegan for the orange. Note that I am not washing the lights, you could do this if you want, but I don’t really think its needed.
Step 4 – Highlights
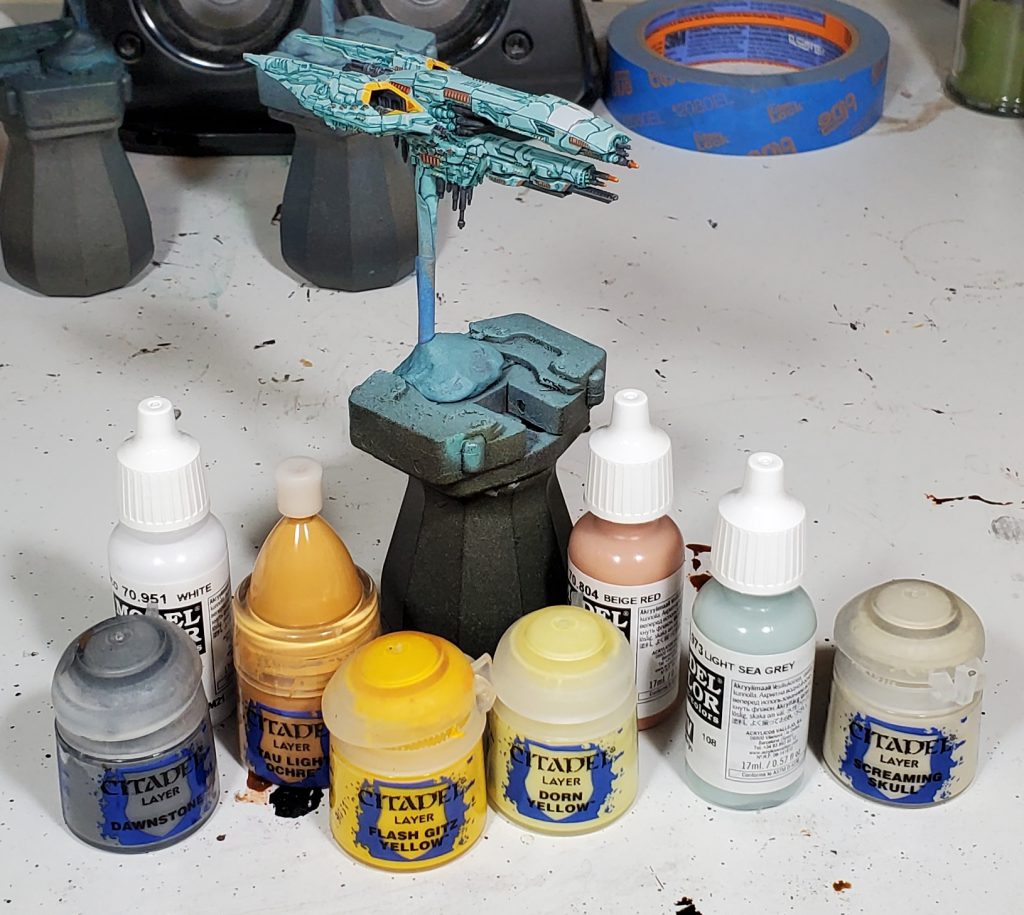
These are mostly straight forward with only a couple of colours getting multiple highlights, they basically go where you expect:
- The yellow gets a couple of highlights of the yellows.
- Dawnstone goes on the guns and antenna
- The orange gets hit with Tau Light Ochre
- Beige Red going on the rose panels
- The main armour has two separate highlights, first the Light Sea Grey and then a few key areas are further picked out with Screaming Skull
- The lights get a dot of Screaming Skull
- White for the white panels, and the engine tips which will help in the next step
You could skip these and still have a wonderful looking model if you prefer of course!
Step 5 – Engine glow
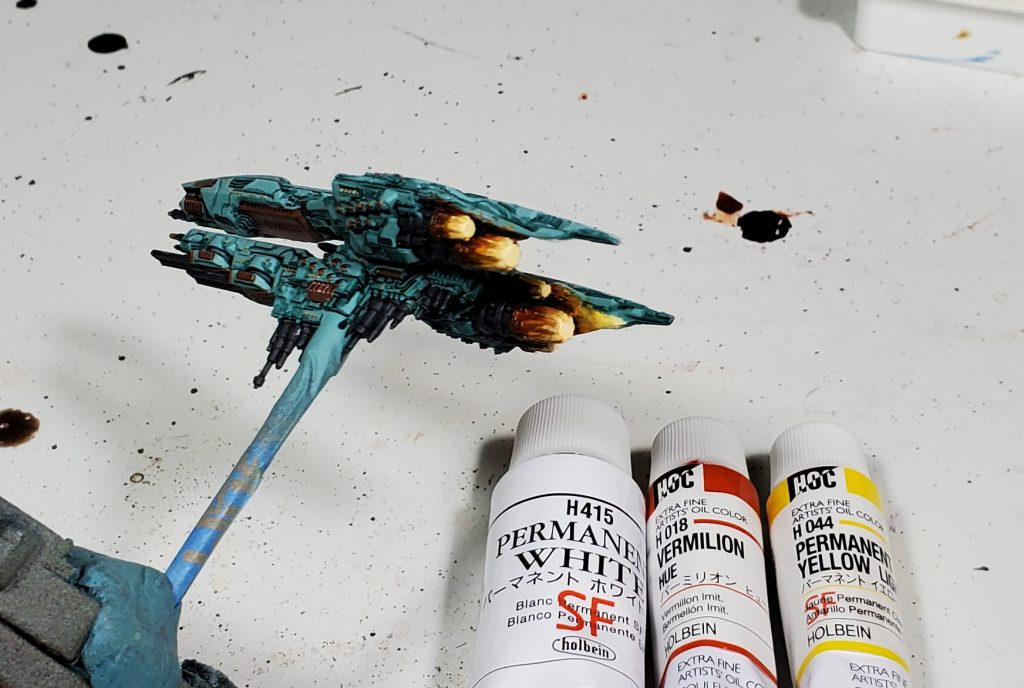
For the engines I start by dabbing half way down the cowling with Vermilion and then feathering it out and then introducing Permanent Yellow closer to the tip and feathering it back to get a rough transition. Then its just dabbing white on the engine tips and feathering into the rest, this should result in just a touch of yellow being in the hottest area and otherwise having a dramatic glow.
Note that by feathering I mean gently pulling the paint back into the previous colour with a dry soft brush so it mixes with the previous colour, I am mostly pulling from the bright colour into the old since I am trying to get it to go light quicky but you can pull the other way a bit if its getting bright too fast.
I usually give the oils a day or so to dry a bit before hitting it with a hair drier and varnishing the models with Vallejo Premium Air
Step 6 – Paint the base (Optional)
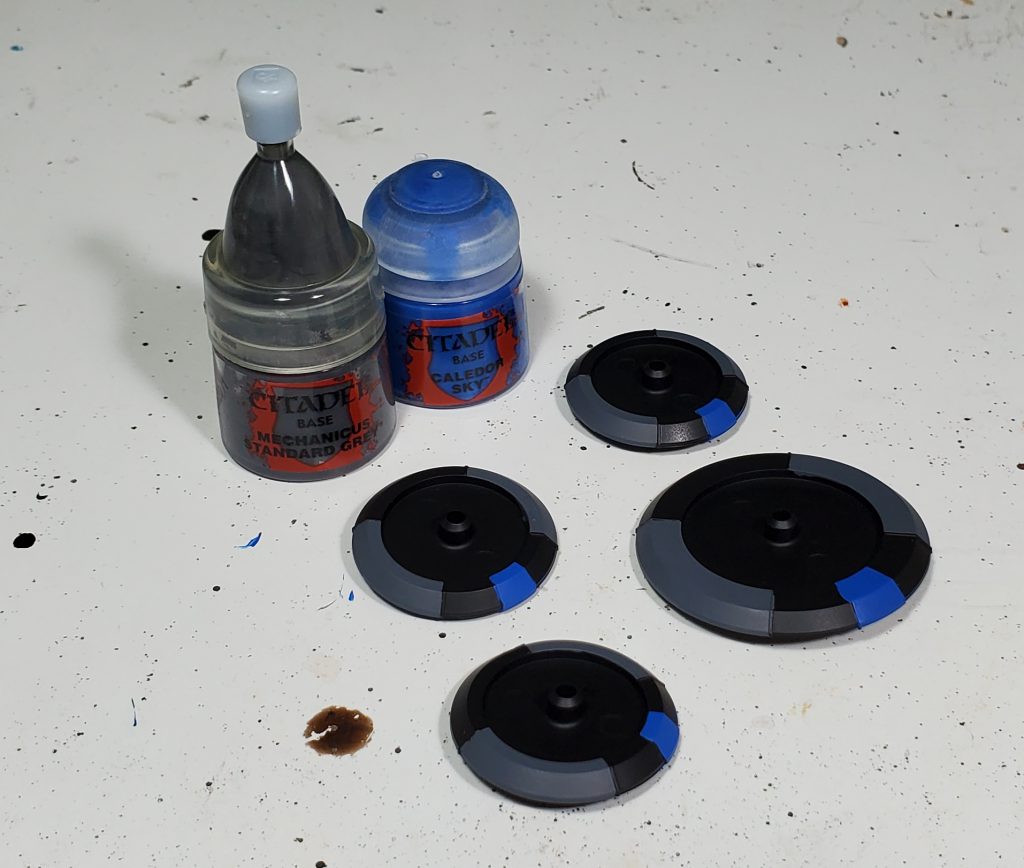
I like making the arcs a bit more clear by doing the sides in Mechanicus and the front narrow in Caledor Sky.
Gallery
Now that the model is done you can sit back and be please with your accomplishments!
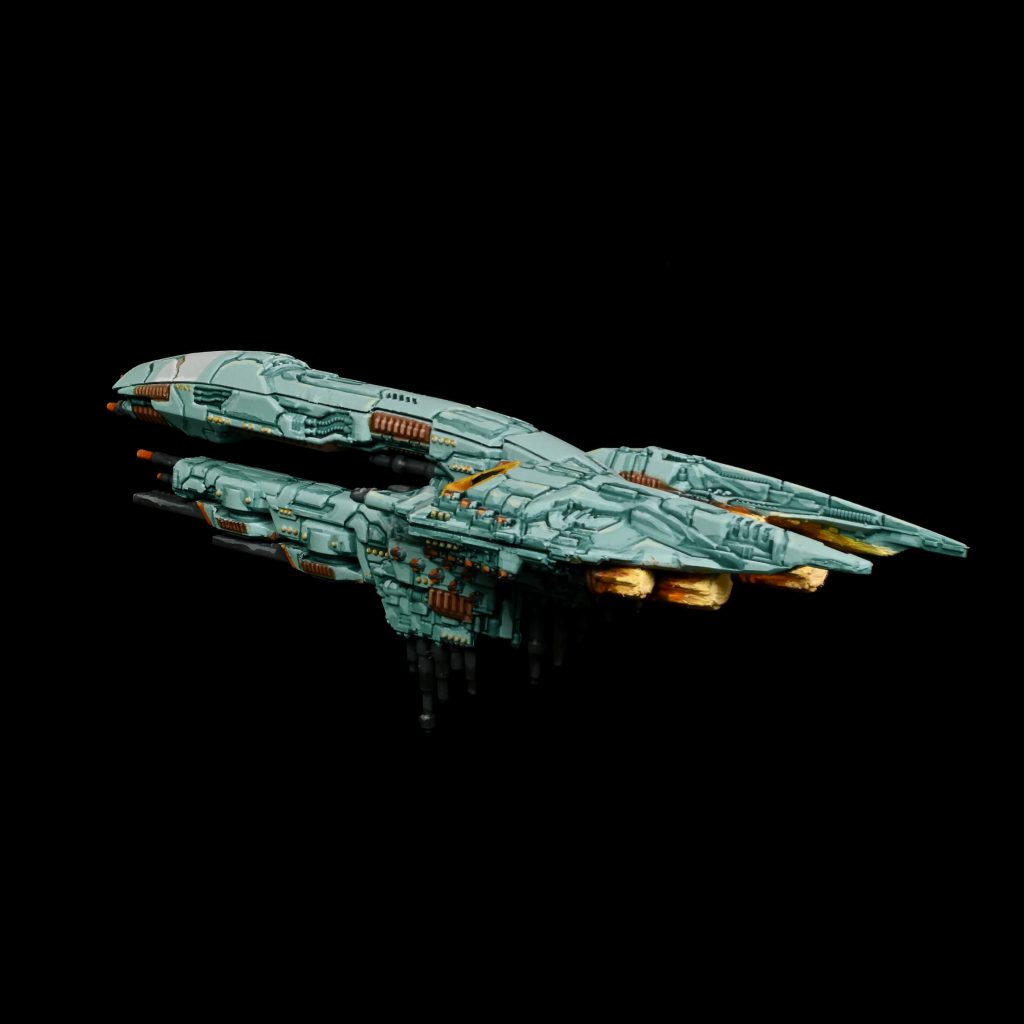
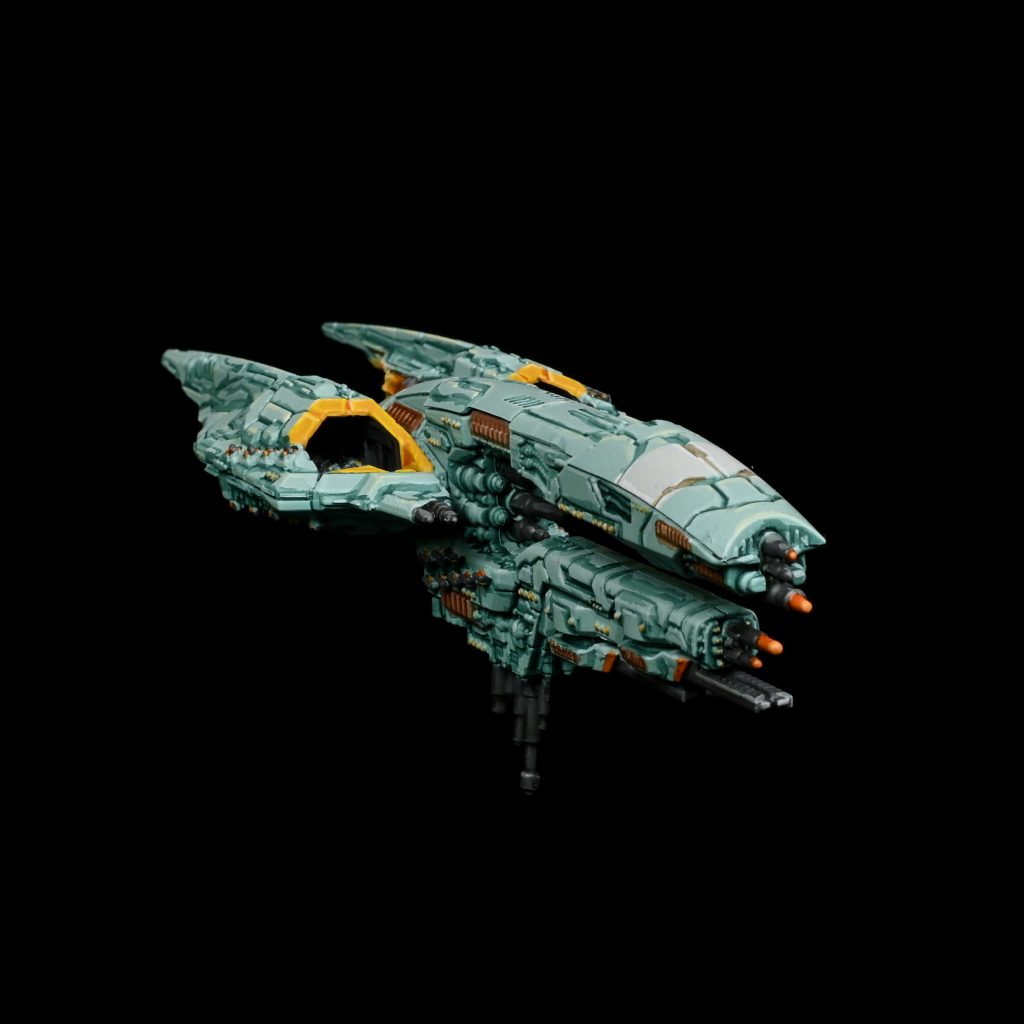
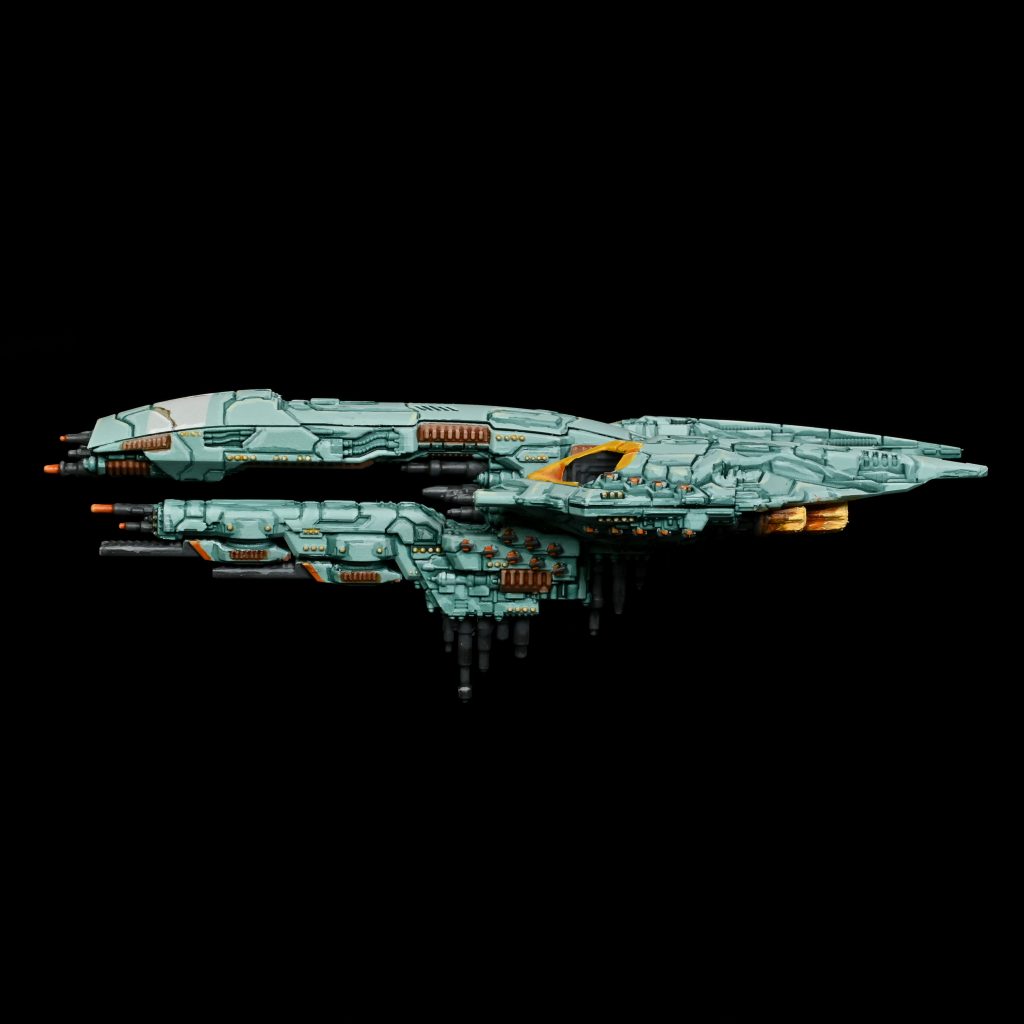
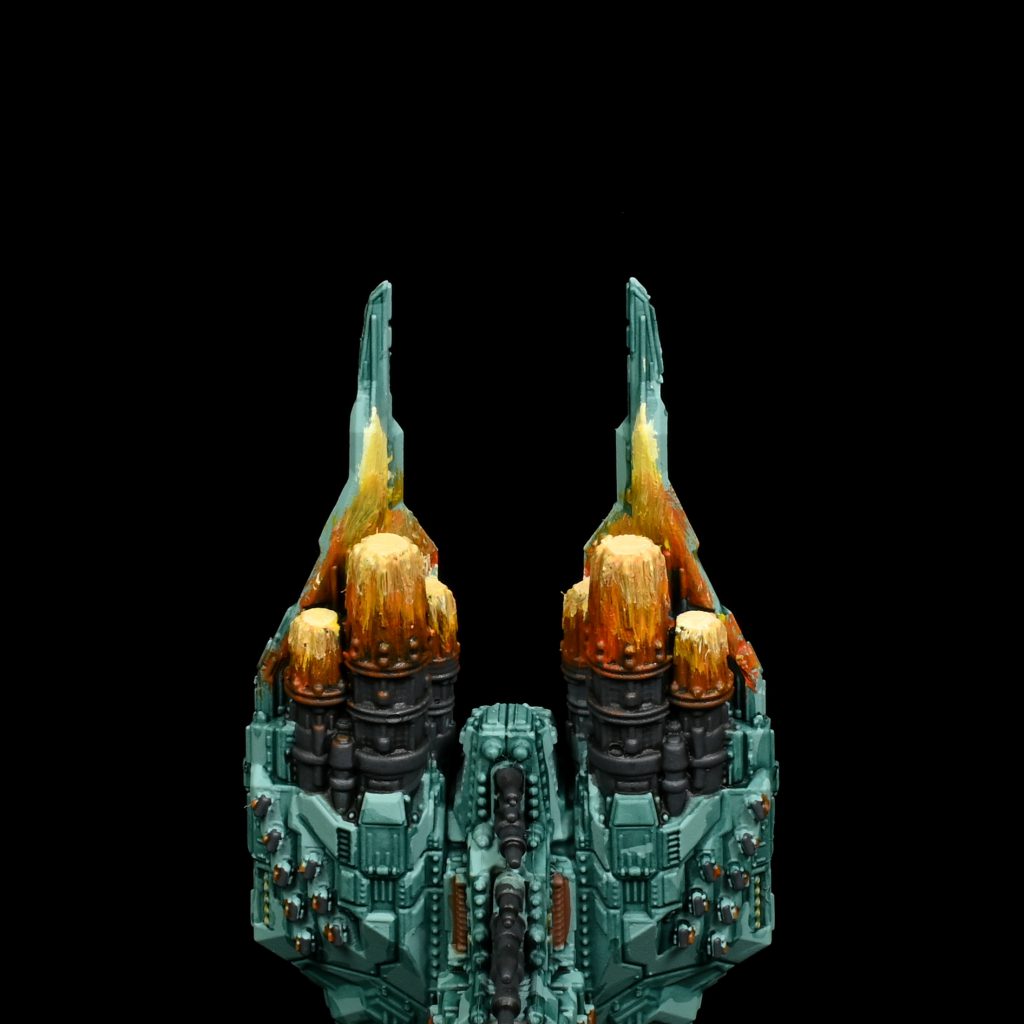
Its a bit incomplete because its intended for TTS and I have limitations in the number of pictures that can be used but take a look at this bit of photogrammetry if it would help with figuring out colour placement!
Ilor’s Oily Spaceships
The studio paint scheme for the UCM fleet was one of the things that really roped me in with Dropfleet. It’s a very dark gray with a few white accent panels here and there. It’s very striking, and I knew I wanted to do a variation on it from the very beginning. My one knock against it is that it’s a little too monochromatic for my taste. I felt like I wanted to give it a little pop of color just to make it stand out just a little bit more.
Step 1: Base Coat
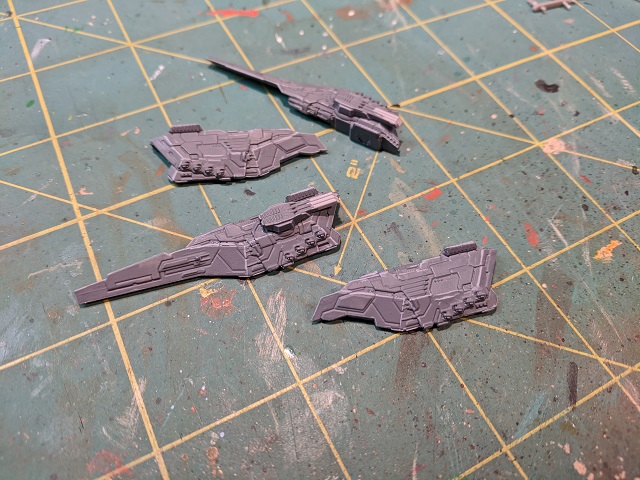
Unlike my Battlefleet: Gothic ships (which were simply base coated and drybrushed), I knew I’d go the other direction for the UCM fleet, largely because the texture isn’t as pronounced and because I wanted a “cleaner” look. That meant rather than starting dark and highlighting, I’d start lighter and use a wash to darken everything down to the tone I wanted. The base coat for my fleet is Vallejo Neutral Gray, which is a nice mid-tone with which to begin. Like most of the Vallejo grays, it also dries just a hair darker than it is when wet.
I thinned the paint down and applied it with a brush. I could have used an airbrush here, but honestly that felt like overkill. Neutral Gray covers well and I was able to get this done in one nice, even coat. Very simple.
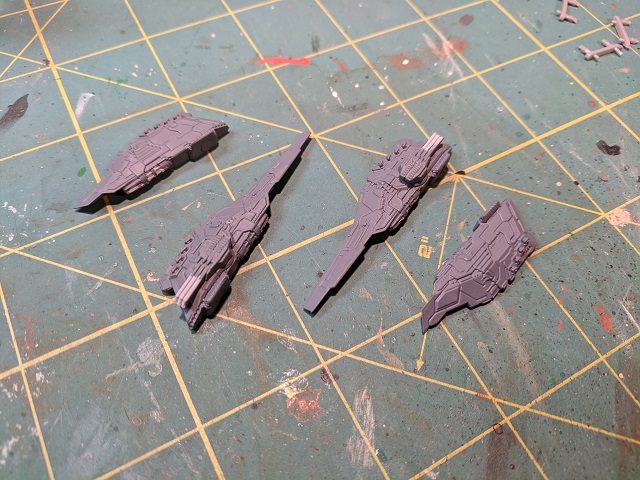
Also, one note here – the examples I’m showing here are pieces of the ships painted separately. That’s because I magnetized everything such that I can swap out bits to create any class of ship. That whole process will be the subject of a future article. End of aside.
Step 2: Edge Highlights
The UCM ships have both beautiful curves as well as some nice angular features, and those angular features in particular really lend themselves well to edge highlighting. Using a thinned down Vallejo Light Gray, I set about picking out these details.
Two words of warning here: First, avoid the temptation to edge highlight every body panel on the ship. The UCM ships have a TON of interlocking panels and you will make yourself insane if you try yo highlight them all. Instead, I found it worked best to just pick out the hardest edges, especially those edges that didn’t coincide with a panel edge.
Second, when you first start the edge highlights will look overly aggressive. But trust me, once we get to the next step everything will work out fine.
Finally, by using basic colors without any sort of mixing, it’s easy to touch up any mistakes you might make during the edge highlighting process. As you can see, I’m not super neat here. This is a detail that’s going to be kind of subtle after the next step, so don’t drive yourself crazy trying to make your edge lines perfect.
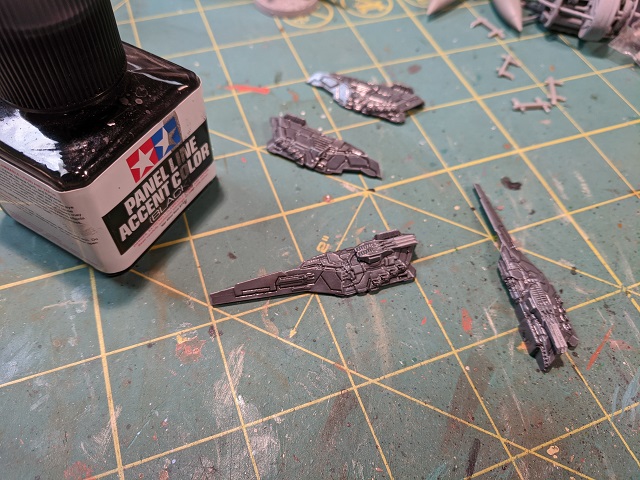
Step 3: Oil Wash
Once the edge highlights are dry, I give everything a fairly heavy all-over wash using Tamiya Black Panel Liner. This is a very thin oil wash that will flow into all of the nooks and crannies molded into the model, and at the same time will darken everything very nicely. It will also smooth out the transition between the base tone and the aggressive edge highlights. Though it dries relatively quickly (certainly more quickly than a thicker wash), you’ll want to give this stage some time to fully dry. I left it overnight and that was sufficient for the next step.
One final note – if you screw up and miss an edge highlight, you’re not sunk. A 1:1 mix of Neutral Gray and Light Gray will give you a color that almost exactly matches the edge highlights after the wash is applied, so you can fix it if you overlook an edge (or just decide that you want to bump up the contrast on an un-highlighted edge after the fact.
Step 4: Metal Prep
Now it’s time to prepare anything that will be metallic on the ship. For me, this was largely limited to the engines, point-defense batteries, and mass driver barrels, though on the cruisers there were some sort of hose details that I though would look nice with a metallic finish. All of these are painted black as a first step. Depending on the finish of your wash you may be able to skip this step, but I’m old-school and think that most metallic paints look better when black-lined, and the easiest way to do that is to just paint the thing black first.
Step 5: Metal Details
Once the black has dried, I apply the actual metallic paint itself. Since this scheme is so dark, I wanted the metallic bits to be very bright. As a result, I went with Citadel Runefang Steel. This step is sort of a cross between a drybrush and an edge highlight, depending on what’s being painted. The goal is to get a nice metallic color on the high spots, but leave the black in the recesses to really pick out the texture of the guns and engines.
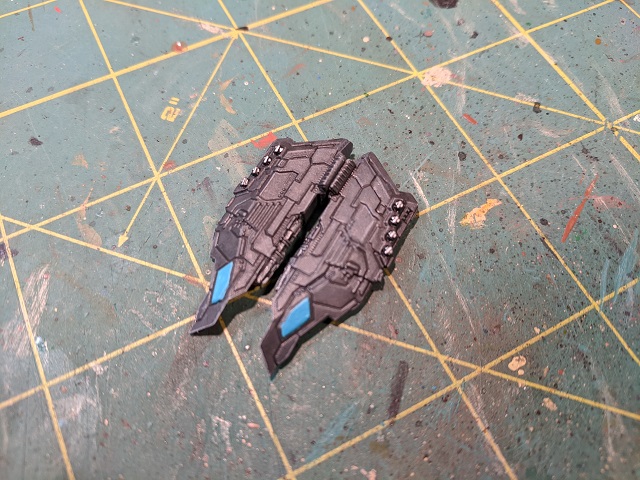
Step 6: Accent Panel Prep
The UCM ships have these great hull panels that make for great accents. On each of your ships, just pick a couple to get the accent treatment – preferably different panels on different ships such that they are unique and distinguishable on the tabletop. But before you paint those panels with your accent color, you’ll need to prepare them first.
Because the ship panels are super dark, if you want any kind of bright accent color you’ll need to take the important step of prepping the area to be accented white first. It doesn’t take much, just a thin coat that will make your accent color pop just that little bit more (and make sure it’s evenly applied so as not to leave brush strokes) I’ve found that this usually produces a better result than simply lightening up your accent color and just painting it over the dark gray hull panels. It’s an extra step, but I really like the effect it gives.
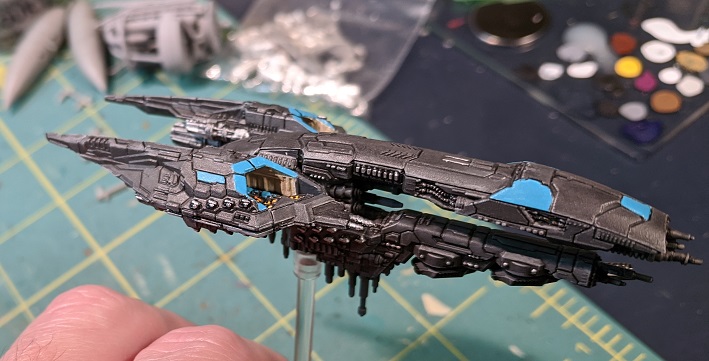
Step 7: Accent Panels
Once the white is dry, go back over the white with your accent color. I chose a nice teal that’s a 2:1 mix of Citadel Ahriman Blue and Vallejo White. It came out exactly how I pictured it in my head, which is really all you can ask for.
One other thing I did at this stage was use the accent color to paint the thin facing lines on the base, just to make them a little more visually distinct. I only painted the quarter markers, not the narrow front facing, mostly because I wanted to keep the base mostly black.
Step 8: Other Details
Now it’s time to pick out all the final details. I painted the interior of the engine exhausts Pale Orange, a color which contrasts nicely with the teal of the accent panels. The missile launcher bays of the Taipei frigates were given the same color (also with white underneath to help the color pop). I also went back in with Runefang Steel and picked out a few details on the hull just to add a little bit more visual interest.
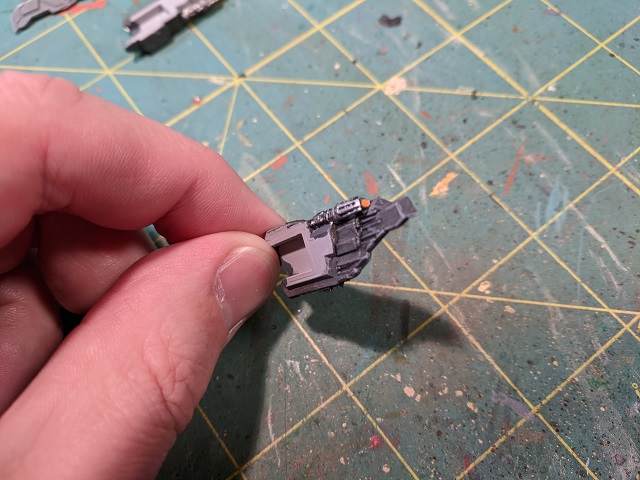
At this stage I also painted all the little ordnance craft in the launch bays. This is an exercise in “dot-ology” because the craft themselves are SUPER tiny and you’re just trying to get an impression of color and shape in there. I did the large craft (presumably bombers) in the same blue as the accent panels and the smaller fighters in the same orange as the engine glow. I also kind of went nuts and did the catapults with tiny yellow and black hazard striping. I painted these details on all of my ships such that I’d always have the magnetized option to use one as a Seattle class fleet carrier, but even if you’re planning to permanently glue your ships together I strongly advise you to paint these details before you affix the “wing” piece that forms the top of the flight deck, as it’s going to be virtually impossible to get at afterwards.
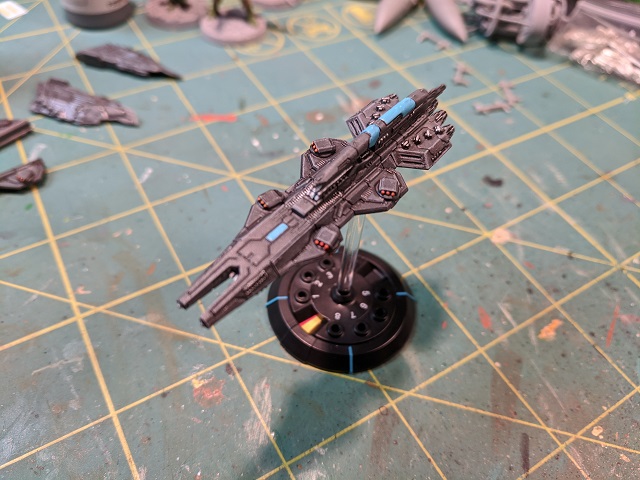
As my final step I finished everything off with spray varnish, and my fleet was ready for the tabletop! This scheme is extremely easy to pull off, quick to paint, and looks menacing on the tabletop.
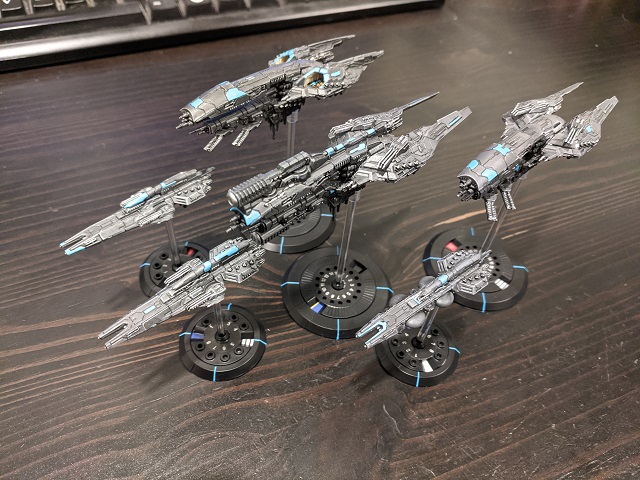

The UCM Starter Set, configured as a Seattle fleet carrier, a St. Petersburg heavy cruiser, a Rio cruiser, two Toulon frigates and a Lima frigate. A 4th frigate is not shown here. (credit: Ilor) 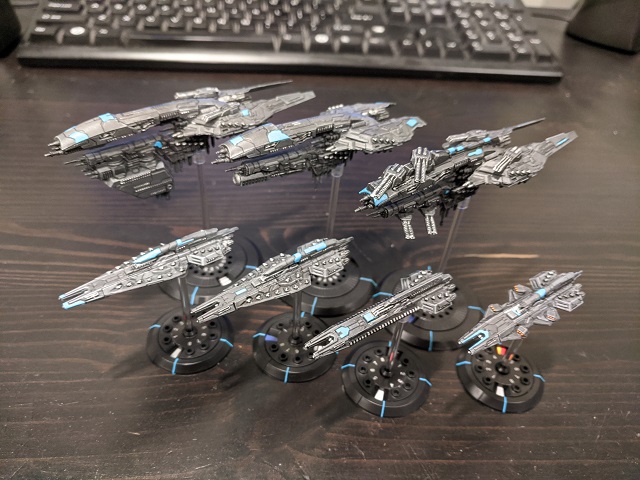
The completed UCM Starter Set, shown here as a San Francisco troopship, a New Cairo light cruiser, a Moscow heavy cruiser, two Jakarta aegis frigates, a New Orleans dropship, and a Taipei missile frigate (credit: Ilor)
