Special thanks to Para Bellum for providing a significant amount of review material. In addition, if you want to get 10% off and support Goonhammer, make your Conquest purchase by clicking here for US/Canada or here for EU/rest of world. You’ll also need to enter code “goonhammer” at checkout. Look, we don’t make the rules, that’s just how it works!
When I first encountered the Spires I thought they were a fascinating concept and a compelling aesthetic – but I ran into an absolute roadblock looking at the miniatures on the store page. The studio paint scheme was a white-on-white colour scheme that, while technically proficient, made the sculpts look extremely flat and one note. I could not get a sense for different textures and materials on what I was looking at and so I ummed and erred and was ultimately put off by the game until I finally got my hands on the review materiel.
But once I had the sculpts in my hands my opinion swung around entirely. These are amazing designs, ranging from merely ‘good’ to ‘a match for anything Games Workshop has produced’. Adding just a few more colours to the design made them come alive in my hands. I wanted to go through each kit to provide more angles and discussion of each model on their own merits.
General Stuff
These models are plastic, which is essentially weightless, tall, and have very thin rigid poses so they can rank up effectively. This means that they are tall and thin and lack any weight, which means that they’ll fall over constantly. Even lifting a group of four on a movement tray stands good odds of sending them scattering – it’s not a dealbreaker but it is very annoying.
The expensive option would be to magnetize the bases to the movement trays, but if you’re on a budget I recommend gluing 3/8 zinc washers to the underside of the bases. You can get these from any hardware store cheaply and in bulk and they add just enough weight and heft to the base models that they won’t fall by accident. If you’re intending to play games with these it’s a very good investment.
There are also very few surplus bits available on each sprue. Some kits will leave you with no spares whatsoever, and even the dual kits are often just replacement weapon arms; the heads and body parts generally remain the same. You’ll usually end up with a couple of spare bits from command models or anything with banners but it’s not like a GW sprue where you’ll end up with dozens of spare guns, skulls and various knicknacks. These also don’t come with transfers and there are not really places in the Spires models to apply them.
You can glue the large circular cavalry/monster bases directly into the movement trays if you like. There’s no reason they are ever separated from their trays, unless you’re going to play the skirmish game First Blood.
Pheromancer
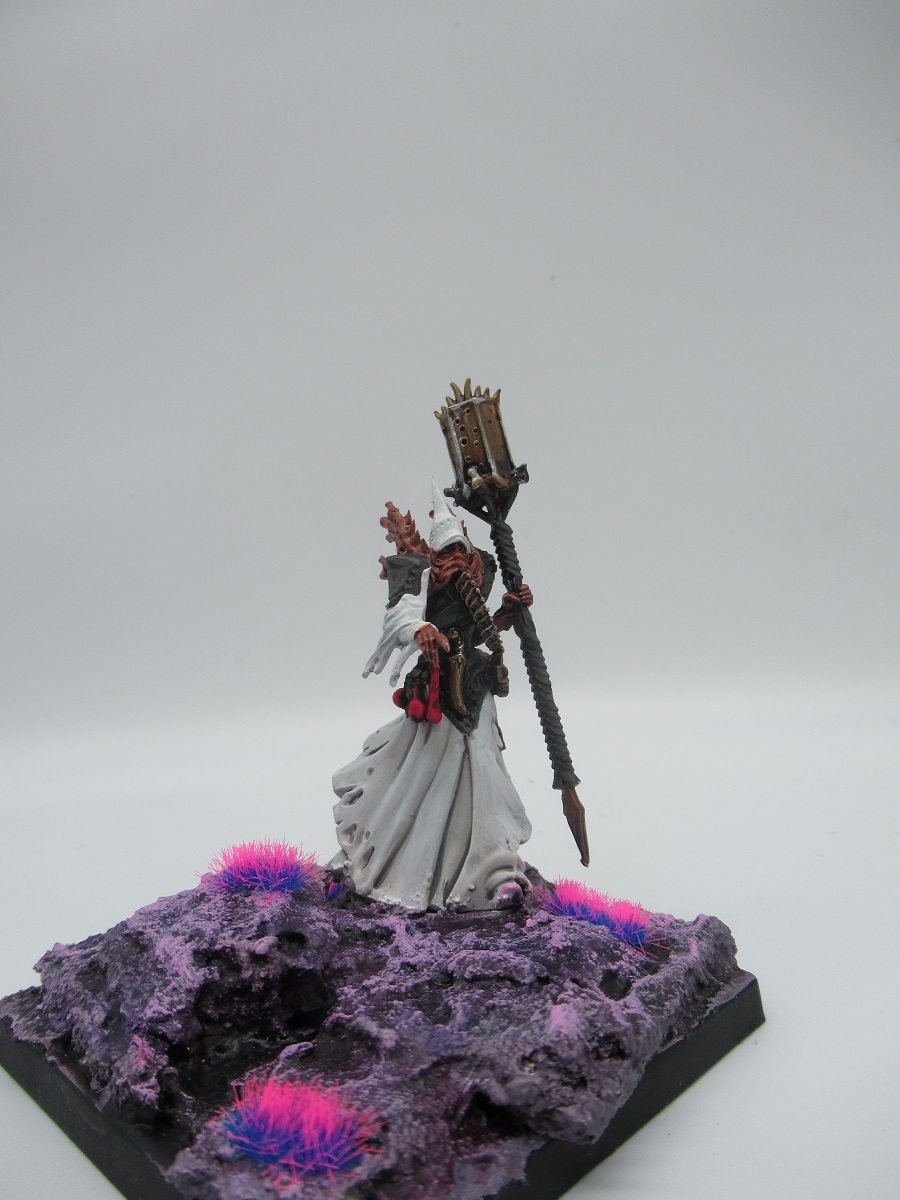
I love this lady; the pointy wizard hat, the hive staff, the spine/vent gasmask face. She’s also extremely tall. She’s head and shoulders above a human mini and even taller next to a hunched-over Force Grown Drone. Giving her even more verticality as I did with this base makes her absolutely tower over her formation.
There are holes in the beehive thing atop her staff. If you wanted you could do a glow effect from those.
Force Grown Drones
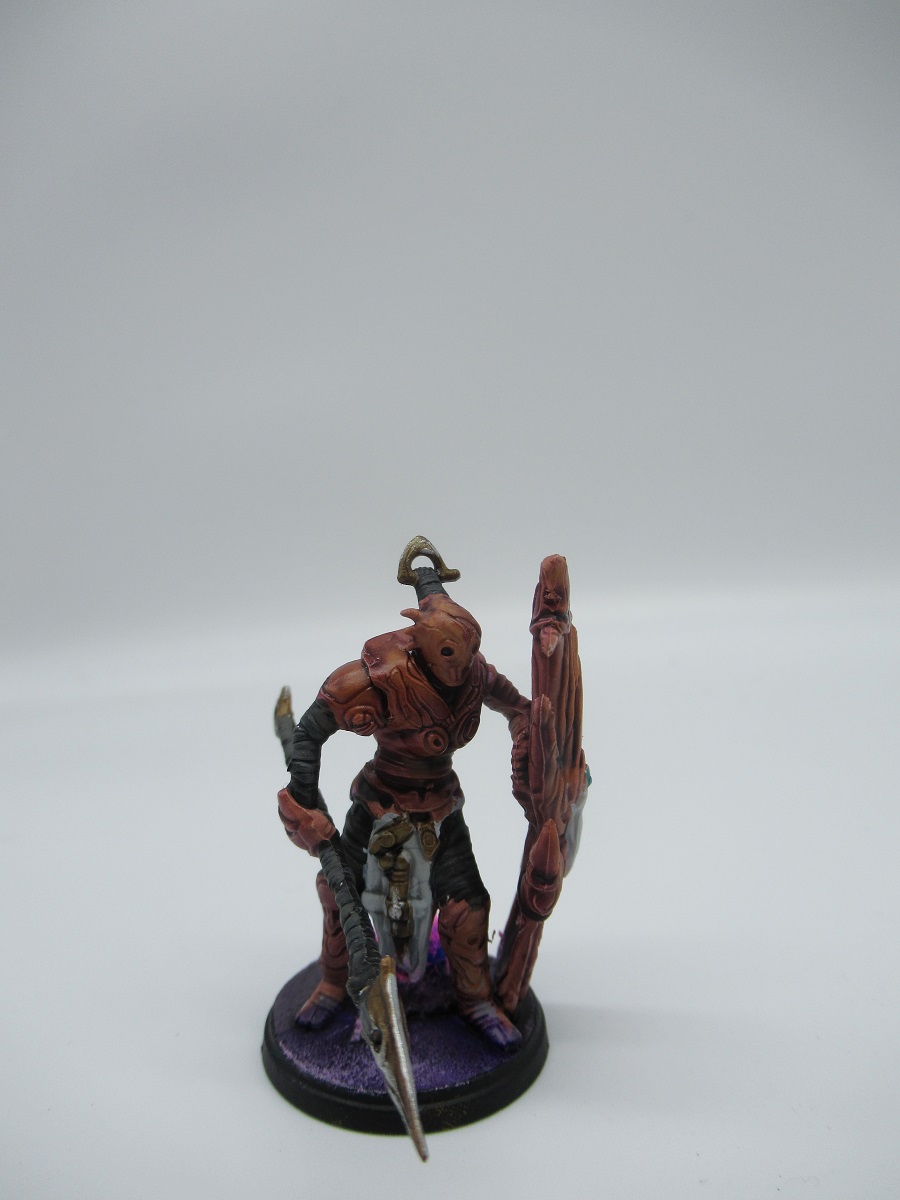
You’ll be painting a lot of these guys so it’s worth going over each part in detail.
Building
You can build these without a guide; they’re essentially monopose and their stuff is freely interchangeable. Head, torso, legs, right arm, left arm, shield, spear – feel free to clip all of these out in one go and then stack everything up. Head, torso and legs can all be done immediately with no thought.
The arms have a little bit of a trick. The shields are big pieces, and heavy – they’ll tear plastic glue and fall if left unsupported, and they’re so big there is absolutely no way to pose them differently than they are. I found the best way to do it was to glue the arm to the shield first, and then once that had set, glue to both the torso and the base. Then while it’s drying brace the mini slightly against a paint pot so that the limb doesn’t fall off.
The spear arms can generally be done as a batch but with one important caveat. One in four arms is held in this upwards reverse grip and if you put that spear on the wrong body it’ll look wrong. Keep those spears in a separate pile.
The other thing to mention is that, especially with kits of this generation, there are a lot of mould lines. There’s no shortcut with this, you just need to spend a session cleaning all of the details. They’re not terrible, nothing here runs down the centre of faces or anything reprehensible like that, it’s just work.
The materiel painting breakdown is:
- Flesh/armour
This is the vast majority of the mini, especially if you paint the shield in the same way as the torso armour. There is enough whorls and three dimensionality to make it take washes and contrast paints well. - Loincloths
Some of these loincloths have this weird injector dagger thing on them; it’s an annoying little detail with some fuzzy edges, not entirely clear what it’s meant to be. There are also some little metallic clasps at the top. This section is the weakest part of the sculpt. - Bandages
Arms, legs, hair and spears are all wrapped in fabric. - Metallics
The hairpin, loincloth-dagger, speartip and, optionally, a little clasp on the shield are all very small metallic areas. The shield clasp can be done as a gemstone if you’re feeling fancy.
There are generally not any hanging details, pouches, or other differently textured materiel requirements, so these guys can paint up extremely fast.
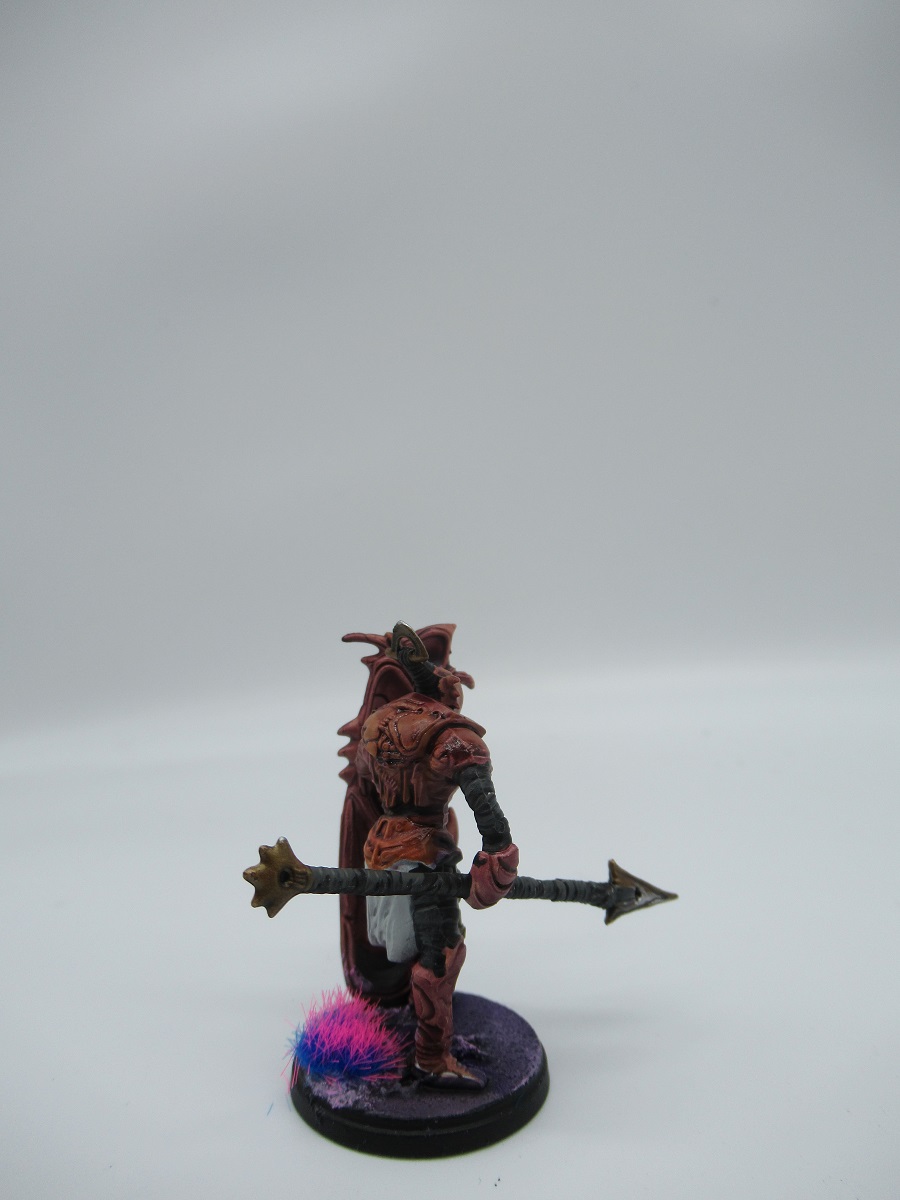
Brute Drones

In a lot of ways these are big Force Grown Drones, and a lot of the same painting principles apply to these as to them. But my biggest piece of advice with these is to be careful how you build them. Yes, there is the potential to put them in big, expressive poses with swinging axe blades, but if you pose them so their big weapons overhang the edges of their base then it’ll be awkward to rank them up. Try to keep them over their base’s silhouette.
These sculpts are probably the weakest of the set; the details are a little soft and there’s not a clear muscle structure or anything on the torso.
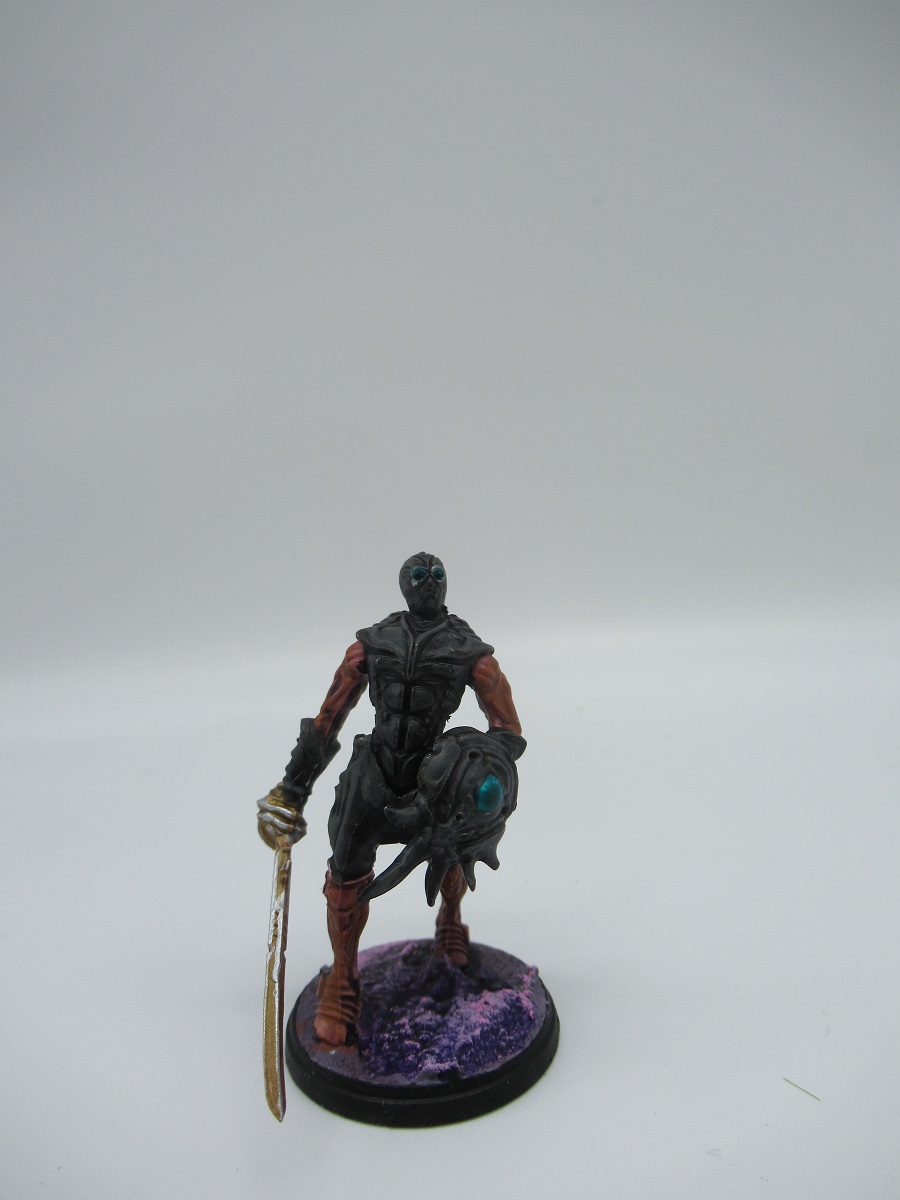
Abomination
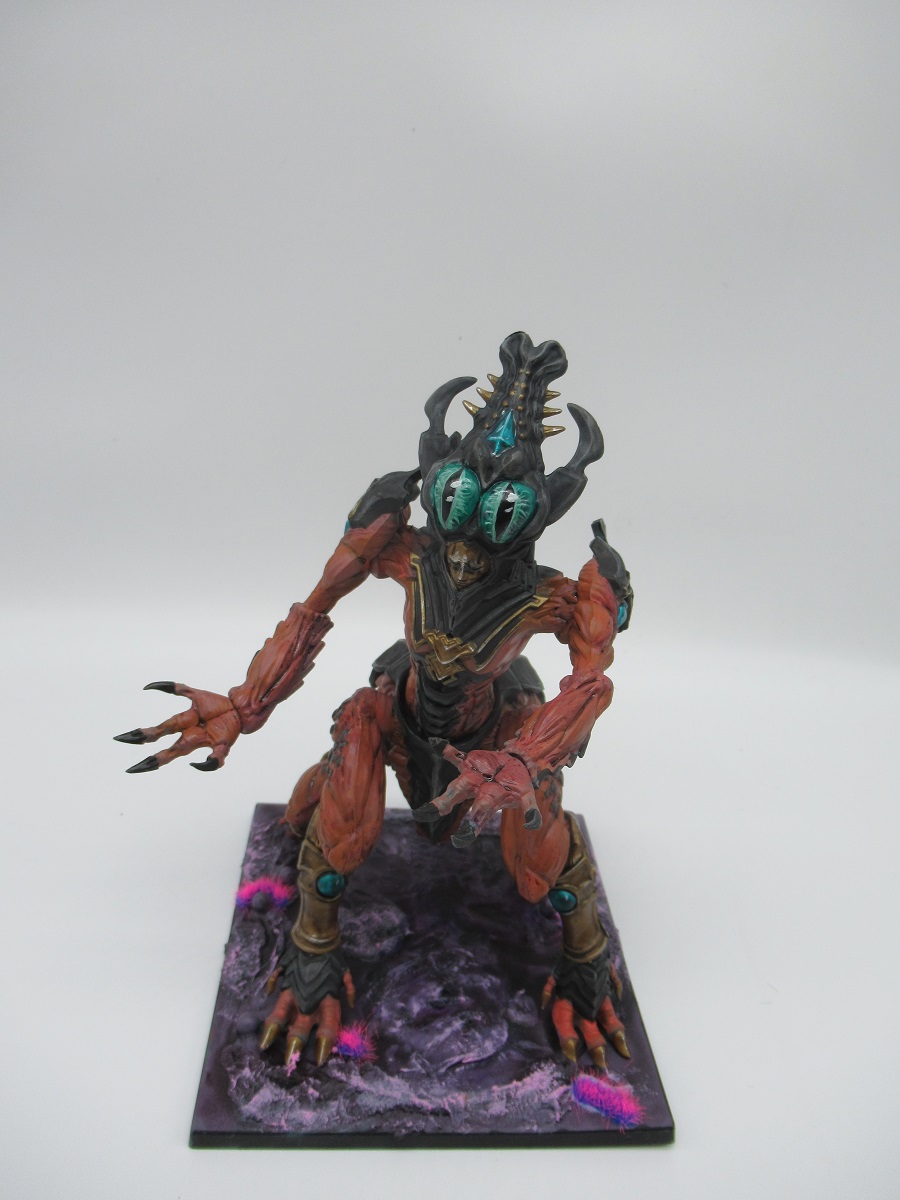
This thing is a little bit clunky to build and it was the only piece I had to go and look up the instructions for. The joins in the feet are a little awkward and it’s hard to get any sort of dynamism out of the pose, especially the arms. Everything’s on a ball socket joint but there’s no real posing options. I think the best move here is to build it in the most basic, default, neutral pose as possible rather than trying to awkwardly convince the sculpt to show any movement.
Painting wise, the big selling point is the two rounded bubbles above the metallic face. I chose to go with creepy eyes, which they’re perfect for – a more patient painter than I could even do some sort of creepy compound eye pattern if they wanted. The ankle shackles have big, rounded orbs that can be painted as gemstones. The angle was a bit awkward to do that when it was glued onto the base so I settled for a contrast paint over silver rather than trying to blend it.
Everything up to this point has been the ‘first wave’ of Conquest content. From here on we’re in the second wave with progressively more modern sculpts, and you can absolutely feel it. At some point in this stage Para Bellum went through a massive upgrade to their sculpting and plastics manufacturing technology and it’s night and day. Mould lines are smaller and easier to manage, details are sharper, poses are more expressive and detail is more intricate. The older kits feel like GW kits from 10 years ago; these newer ones are at least on par with plastic technology of the 2016 Ruberic Marines which is a huge jump in quality.
Vanguard Clones
These are really fascinating studies in posture and balance. They’re humanoid but their centre of gravity is just off, giving them this slightly unbalanced, eerie posture that makes them seem entirely inhuman. Though they’re just head + legs + torso + left arm + right arm, with the arms given ball socket joints, there’s a surprising amount of posing potential with these. Firstly, their weird postures let you get a lot of strange implications out of different sword postures, and secondly, they’re a dual kit and there’s nothing stopping you mixing and matching crossbows with sword and shields.
Marksman Clones
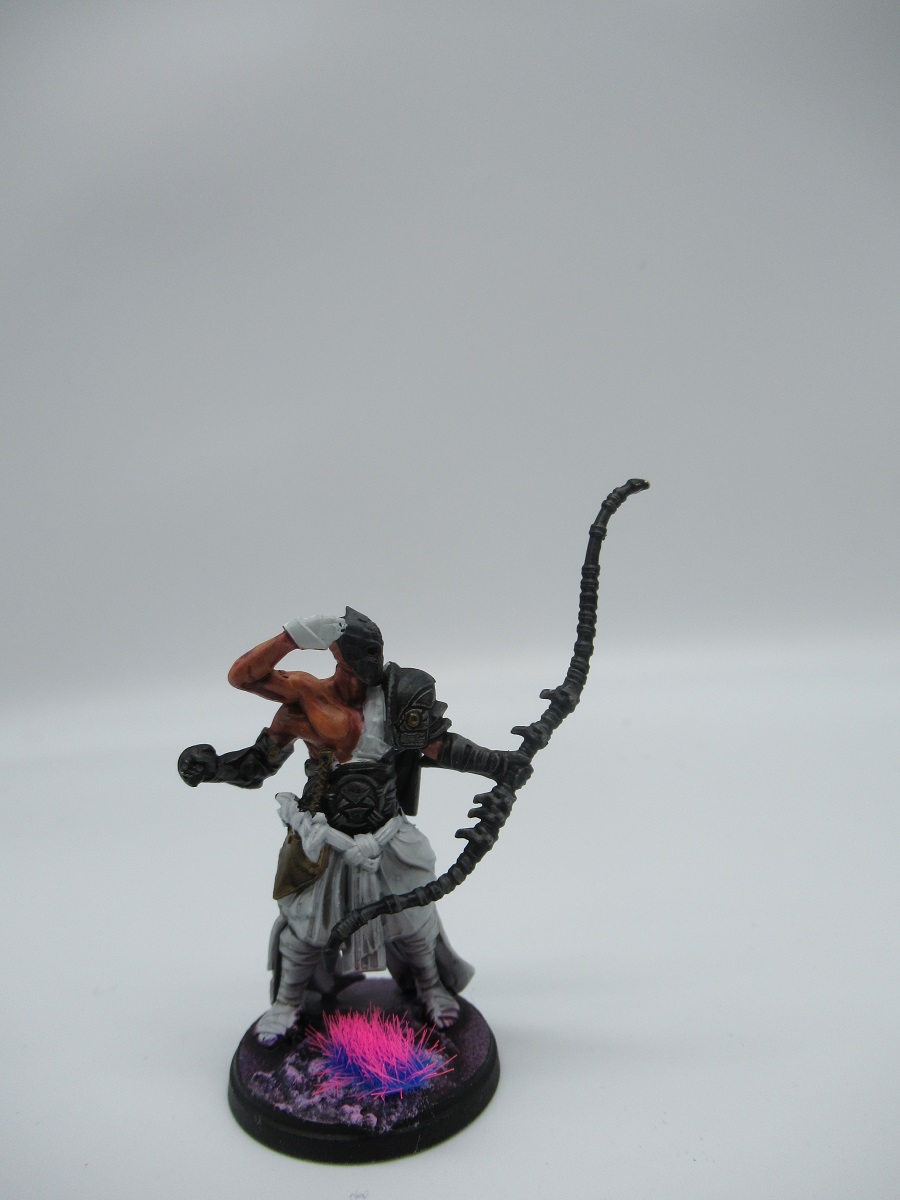
These are just the best; this fascinating, horrible, eerie melding of Japanese archery poses, faceless masks and the subtle but unsettling three arms. I love these to bits, and I think the studio scheme’s decision to paint the skin in the same colour as the armour was a crime against the sculpts.
I personally recommend leaving the quivers off. The quivers aren’t bad; they’re these cool, spined, jagged designs, but I think they clutter the perfect silhouettes. The kit also comes with a number of arrows. You could place them in hands of the Clones but I think it’d be better to cut the arrowheads off and stick them in the ground next to the clones to show where they draw their next shot from.
Centaura Avatara
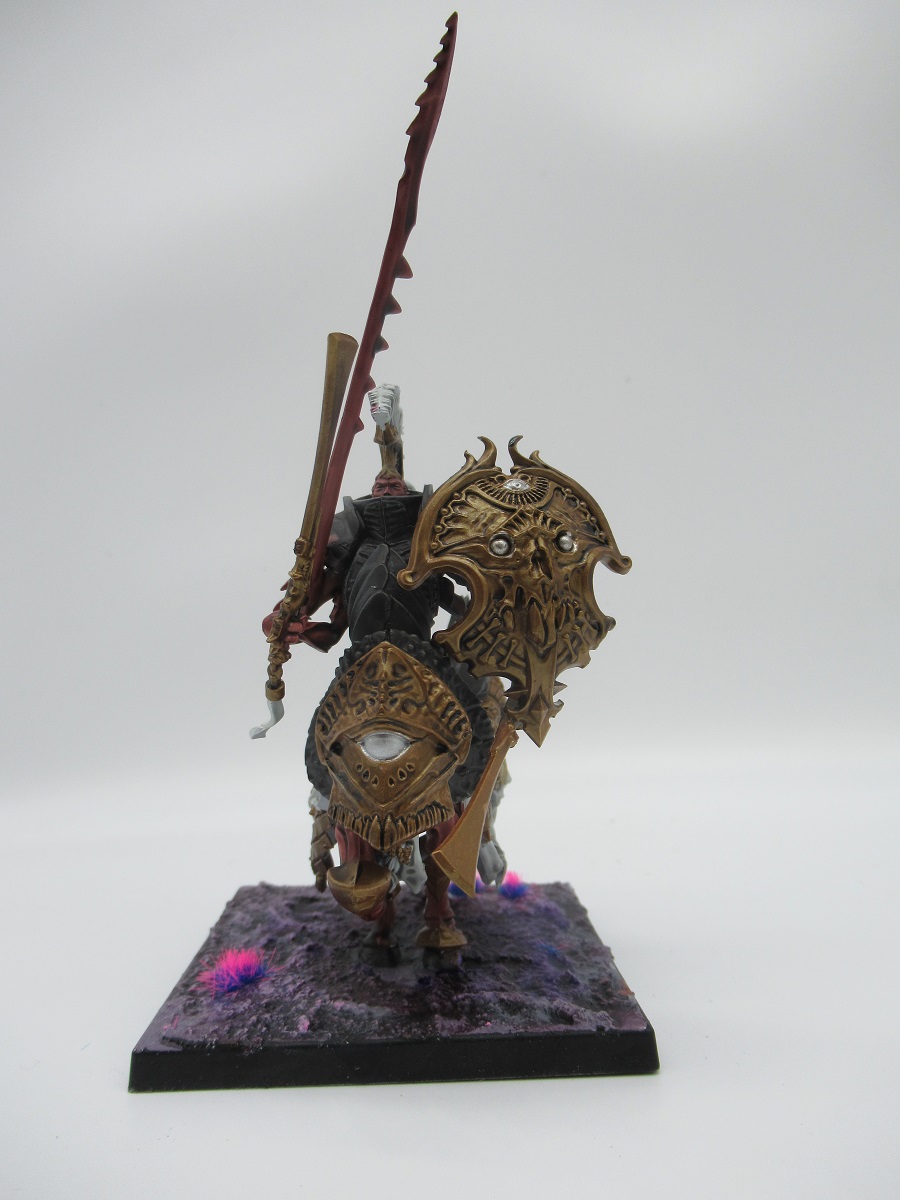
These are the most modern plastics made by Para Bellum and the difference between them and the Force Grown Drones is night and day. These feel like a GW kit; they go together amazingly well and are absolutely saturated with magnificent detail. The shields, in particular, are resplendent and look spectacular with a single pass of metallic paint and a wash.
They’re stable for cavalry models too, with two points of contact for each hoof – using the trick of sculpted reeds to support the one in the reaching gallop. Something else you might not catch at first glance is that they have four arms – two swords, shield, and lance or banner.
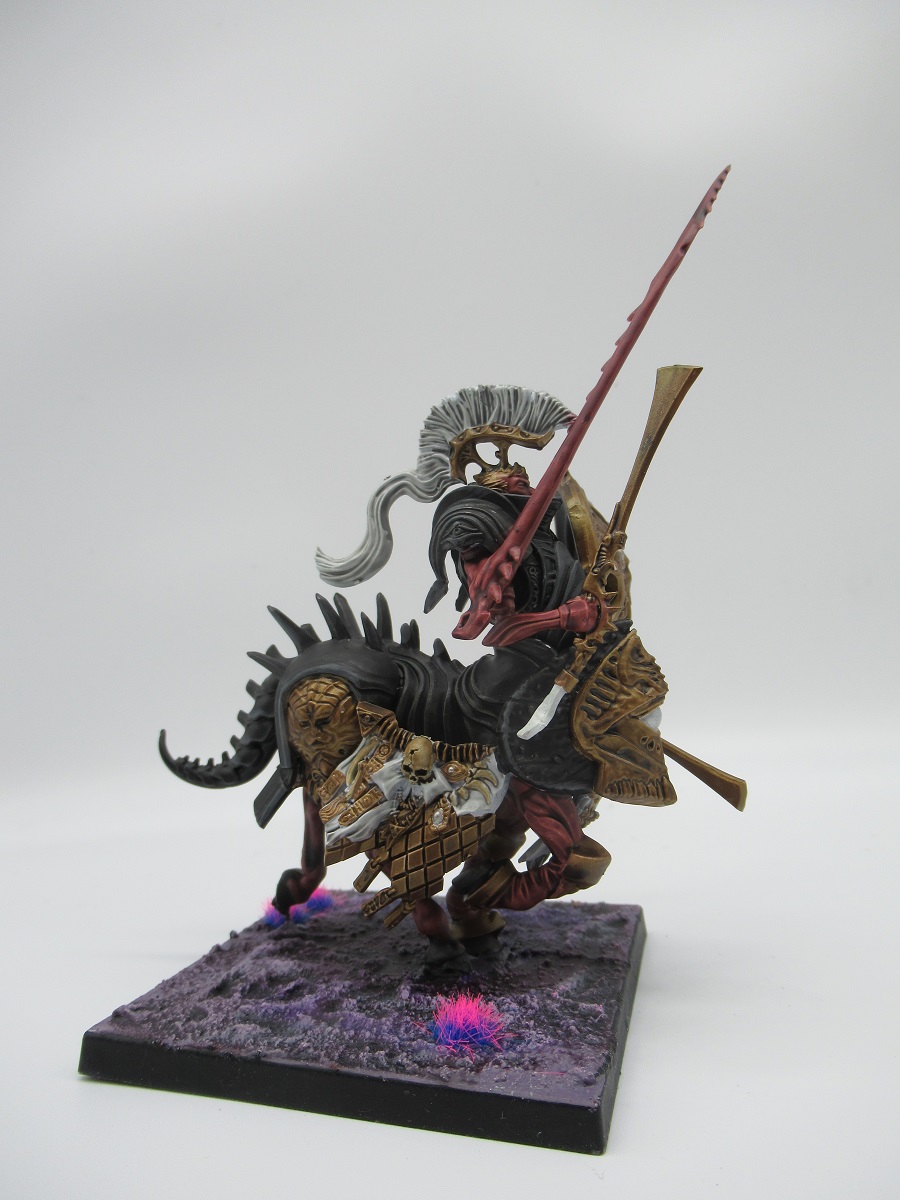
Despite the side-cloths looking complex at first glance, they’re easy to paint – just metallics and bones, no weird textures or recently severed heads or gemstones or anything.
Overall, I am wildly positive about the design of the Spires faction. They’re an extremely compelling meld of sophisticated and elegant along with hideous and wrong biohorrors – sometimes in the same sculpt. The progression of Para Bellum’s technology in such a short time is evident and I’m genuinely keen to see what comes next.
Have any questions or feedback? Drop us a note in the comments below or email us at contact@goonhammer.com.
