Recently we had the massive Strike Force Agastus box make its way to our painters and players, and while it’s a meaty pile of marines we found the time to get them built and painted. Wondering what we thought of them? Scroll on dear reader!
As always, thank you Games Workshop for sending us preview copies of the box for review purposes.
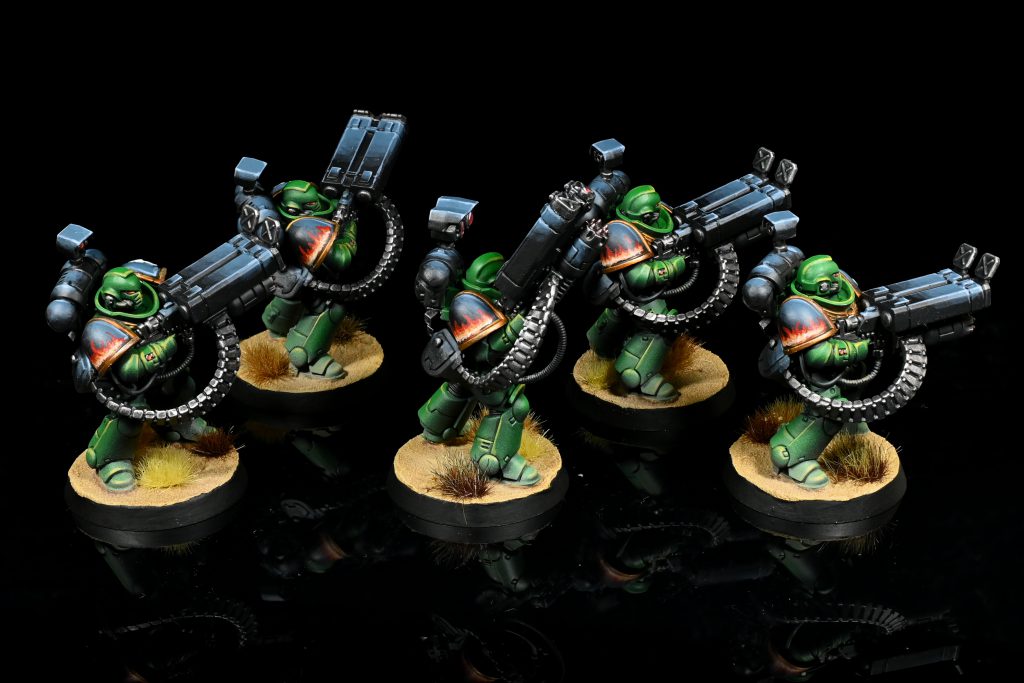
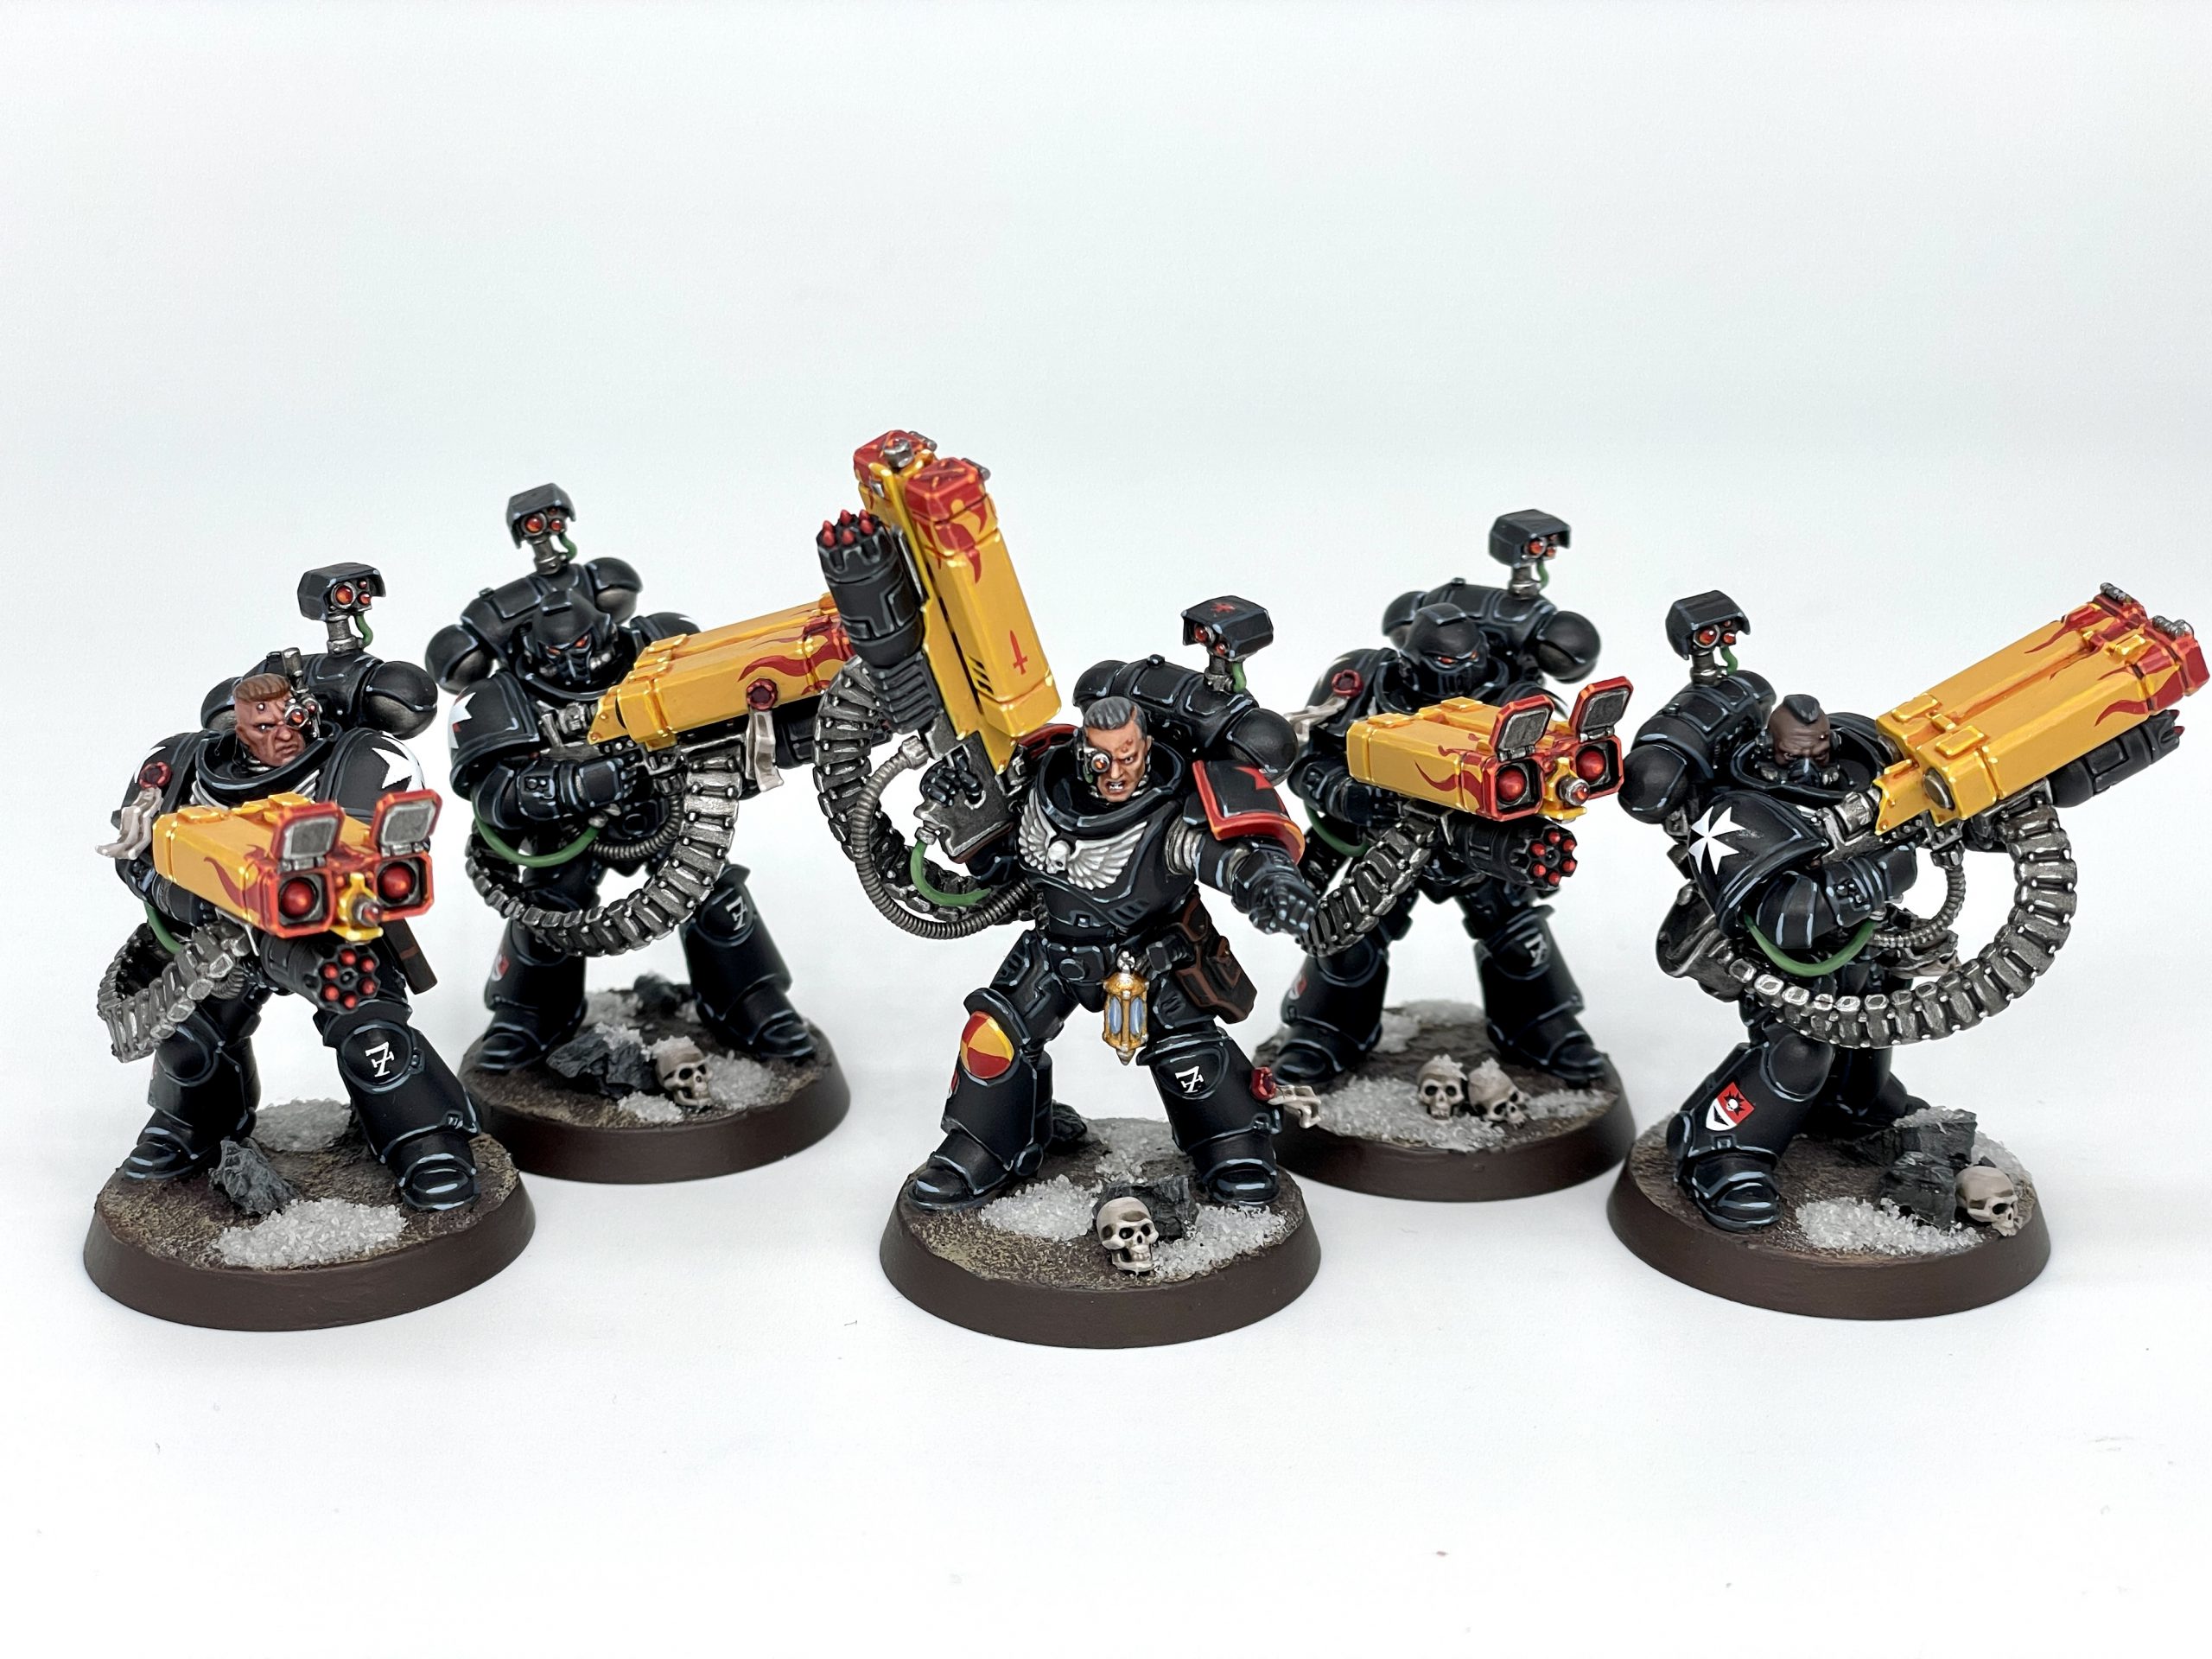
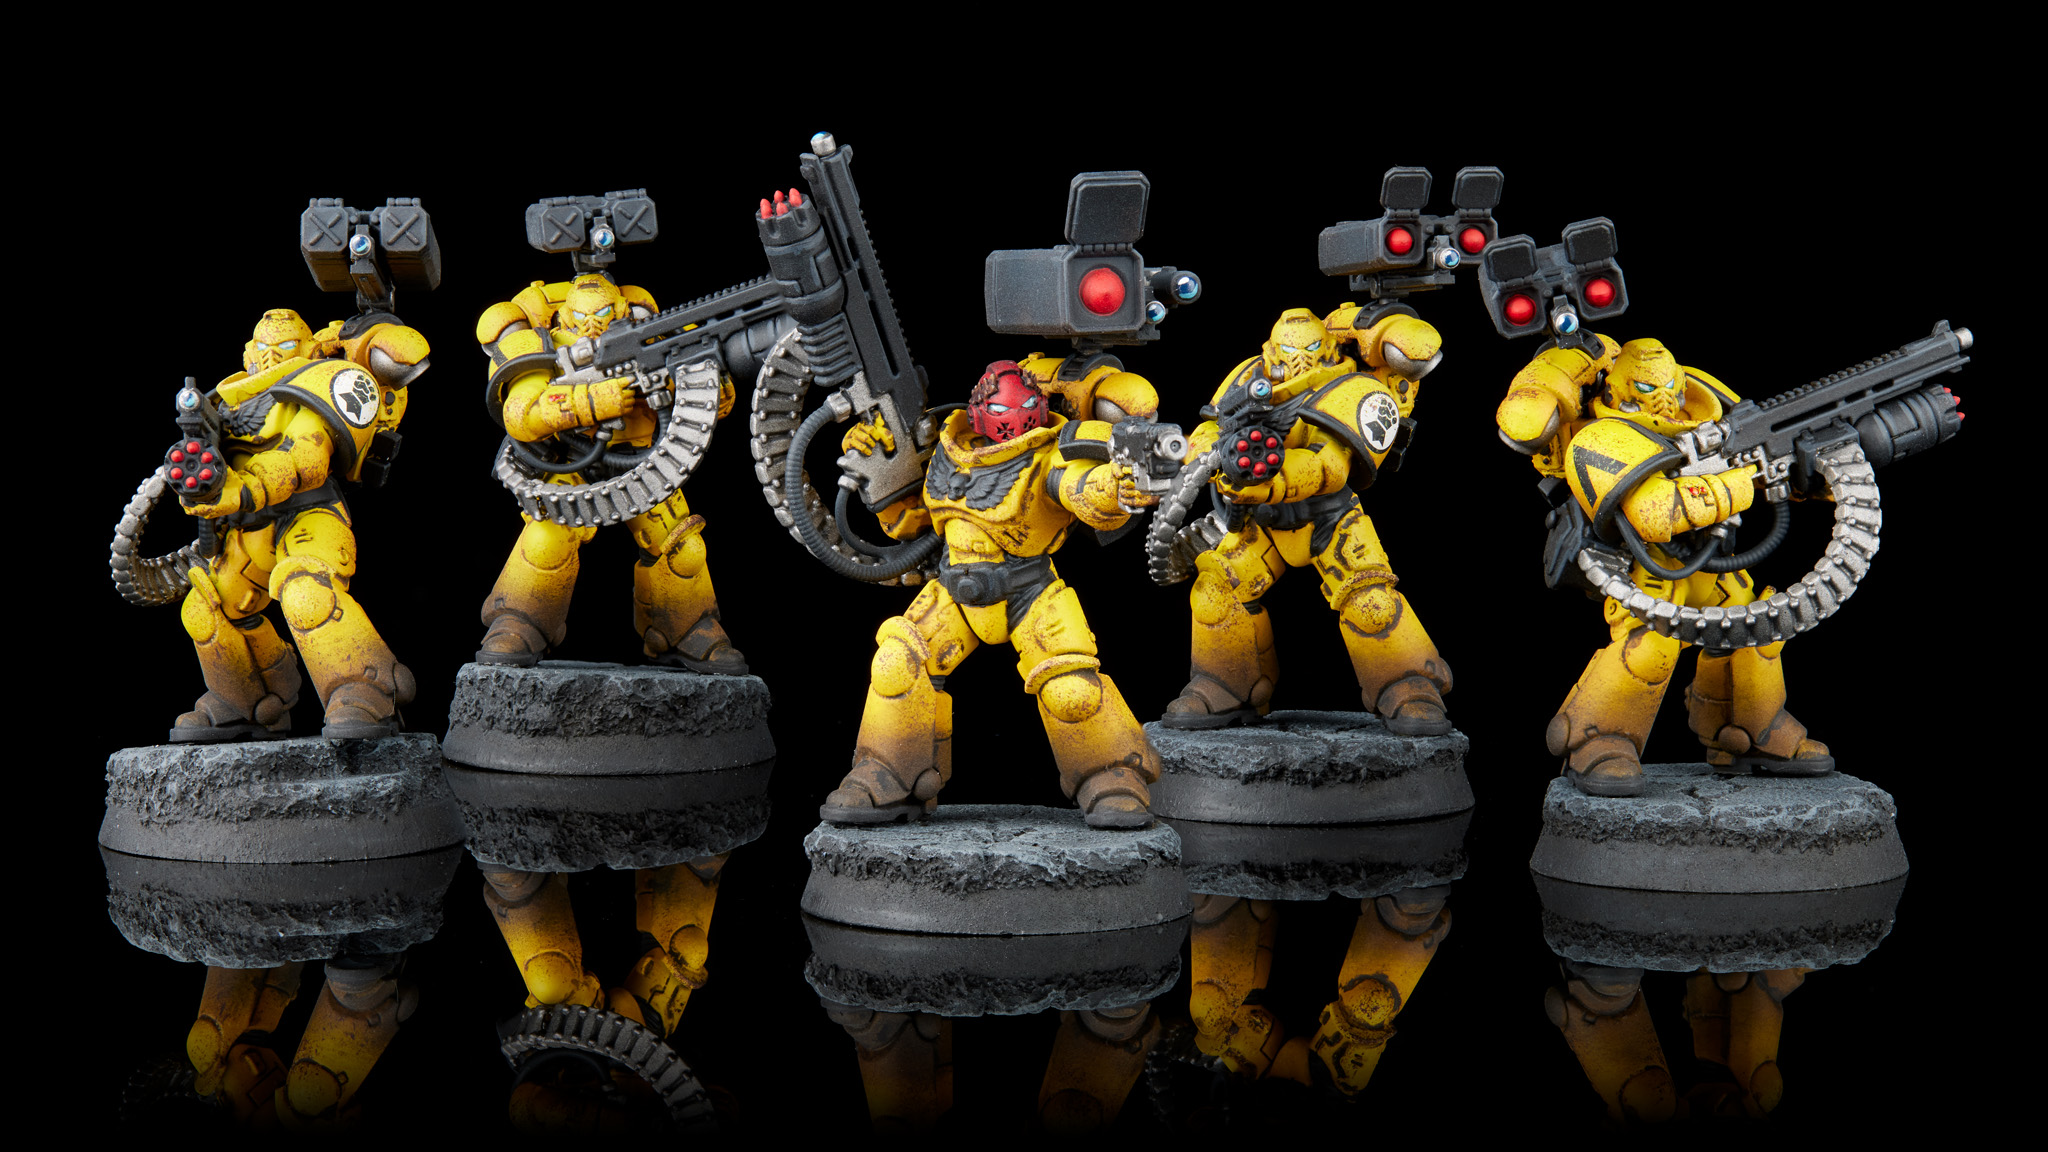
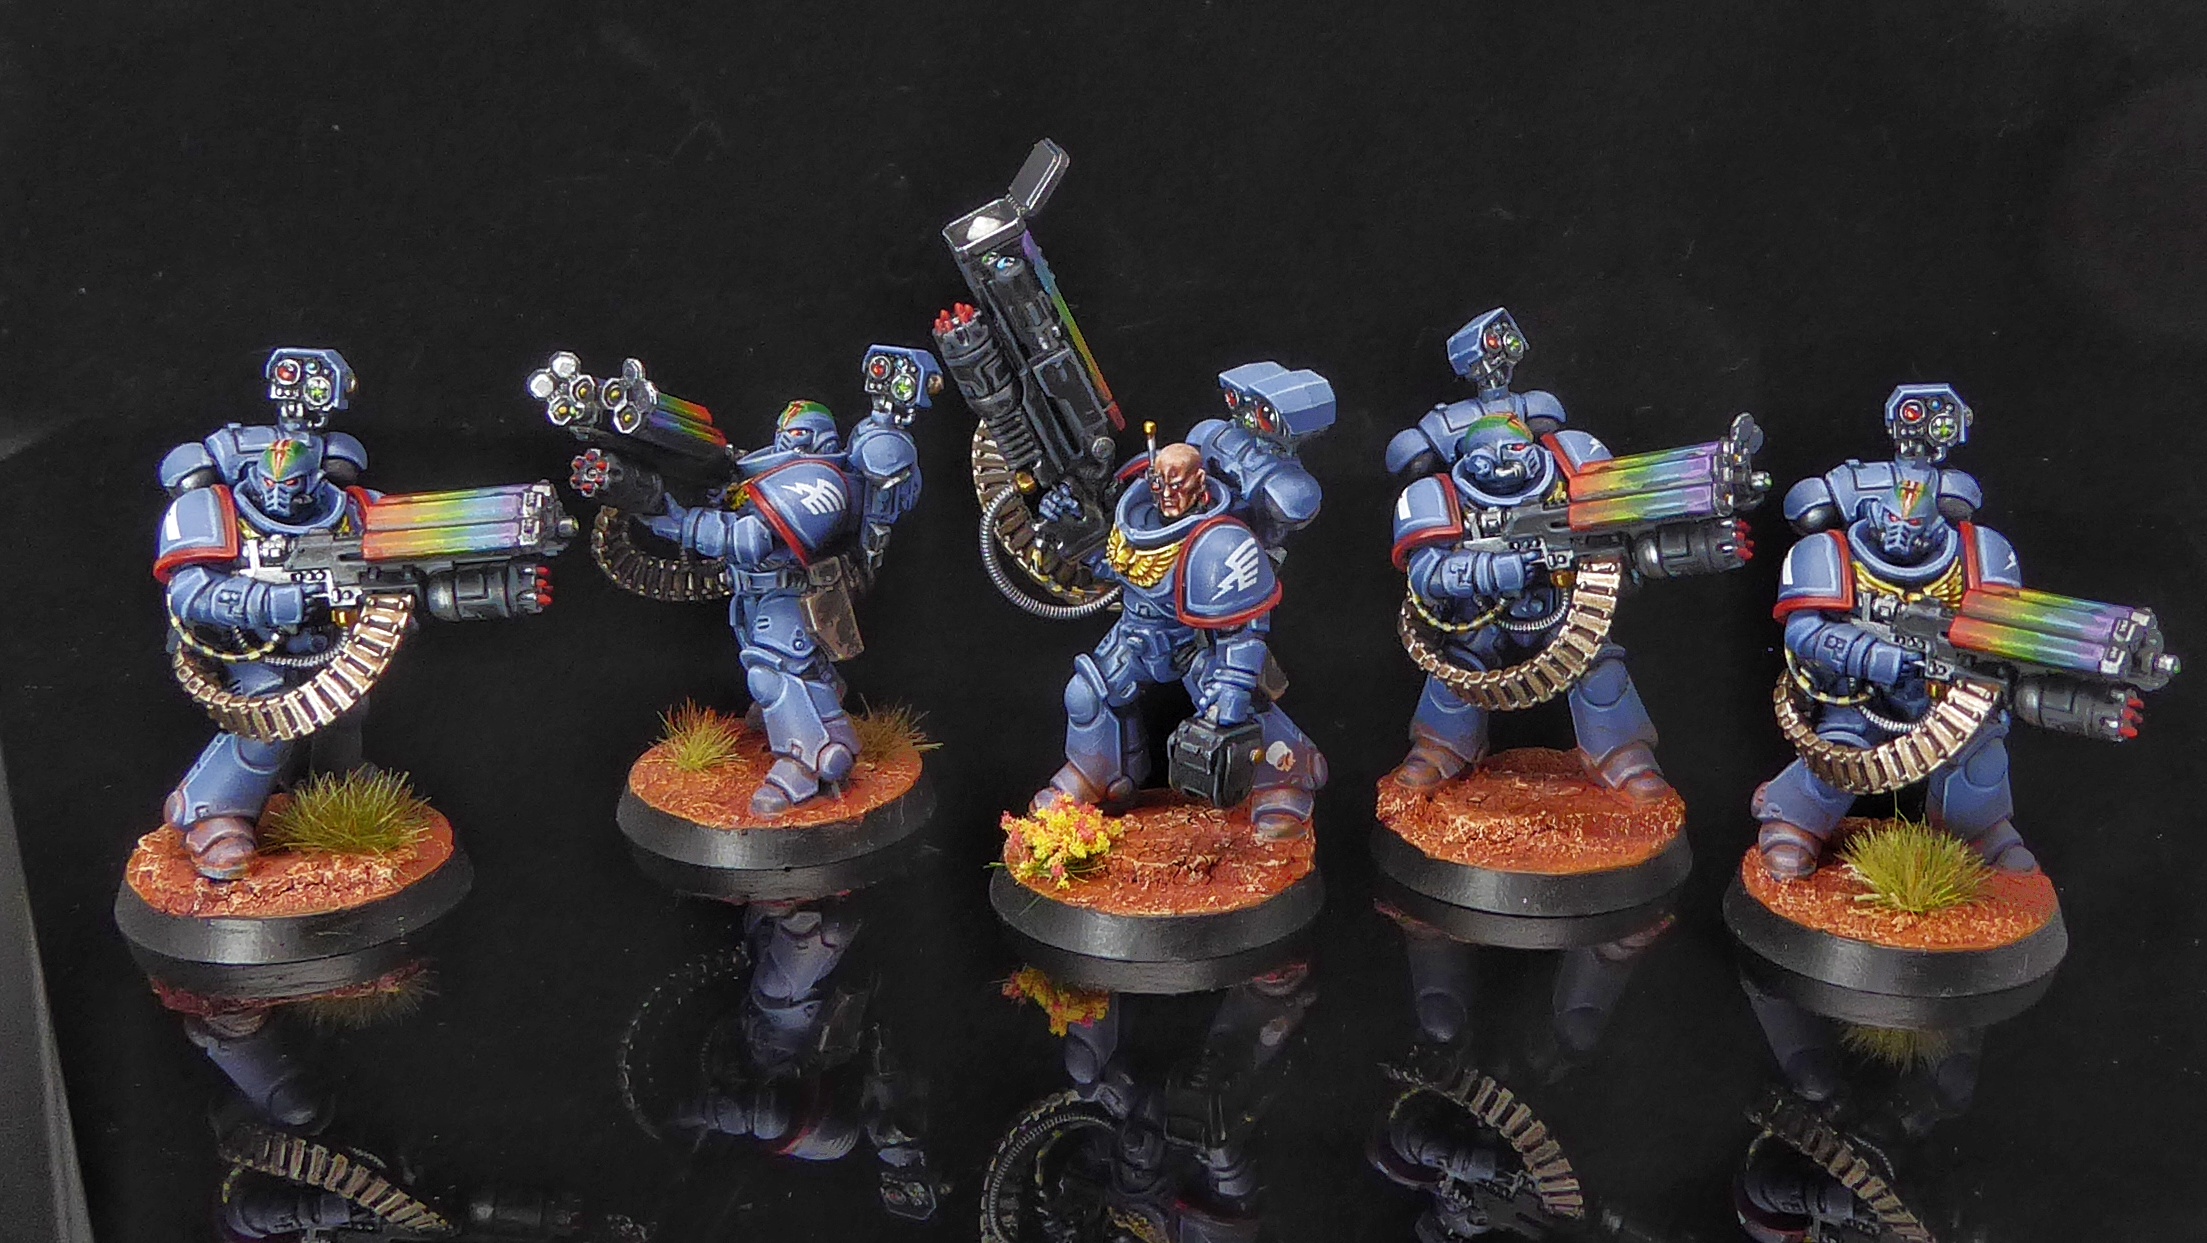
Desolation Squad
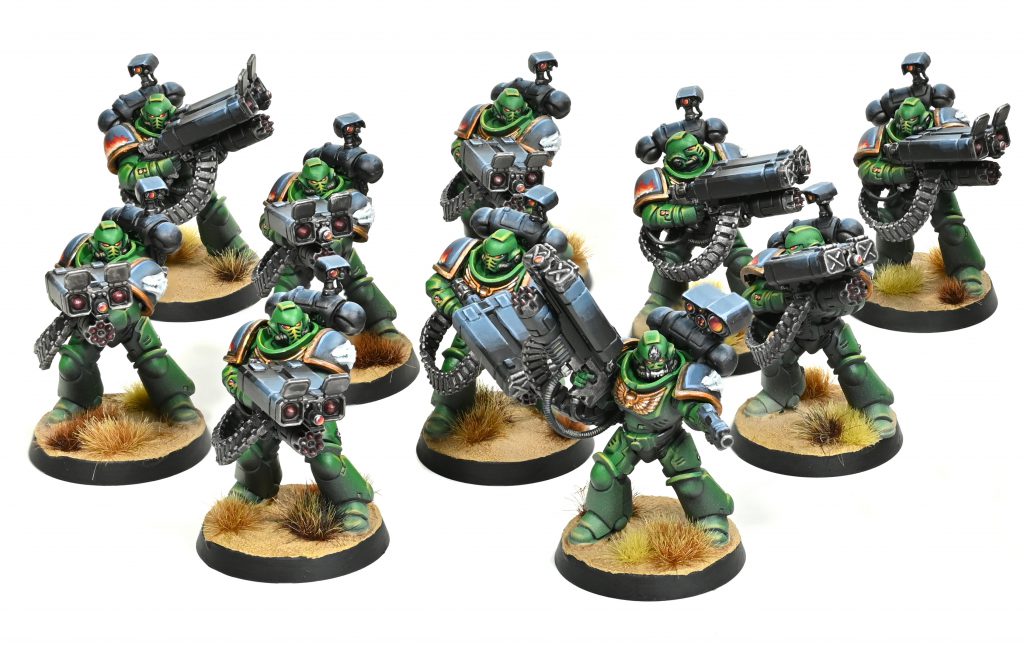
Rockfish: I would put these fellows in as a contender for the most polarizing Primaris kit on reveal, but that’s an ever-changing list so I doubt they will hold the position long. I will be the first to admit I wasn’t particularly impressed at first blush, their incredibly overcompensating missile launcher rifles are a hell of a thing to behold in pictures. Once I got my hands on them I found they don’t actually look quite as ridiculous in person and if anything I quite enjoy the aspect of them being a weapon only a space marine could possibly wield.
If you find their distinctive style a bit off-putting they should be easy to kitbash however your heart desires, as to enable a choice of missile the pods are a separate piece from a fully rendered Castellan launcher. Although I do think the ‘rifle’ part is weirdly insubstantial without the pods, given the cables and ammo belt leading into it you expect a rather substantial weapon rather than the small pod and a long empty rail.
As for building them by the instructions, they went together as well as you could have expected from a modern GW kit. There aren’t many gotchas to watch out for, the most noteworthy risk is that the sensor on the shoulder pad doesn’t really index, so they might slide out of place while drying.
I will call out that the way they handled having the doors for the missile pods a separate piece rules, it means that the missiles themselves are perfectly formed and there aren’t any little fiddly door bits to deal with. *Chief Kiss* You are limited a little with them as they give you exactly three open doors and two closed doors, but you at least get to chose which model to give them to for a bit of variety.

Primaris Lieutenant
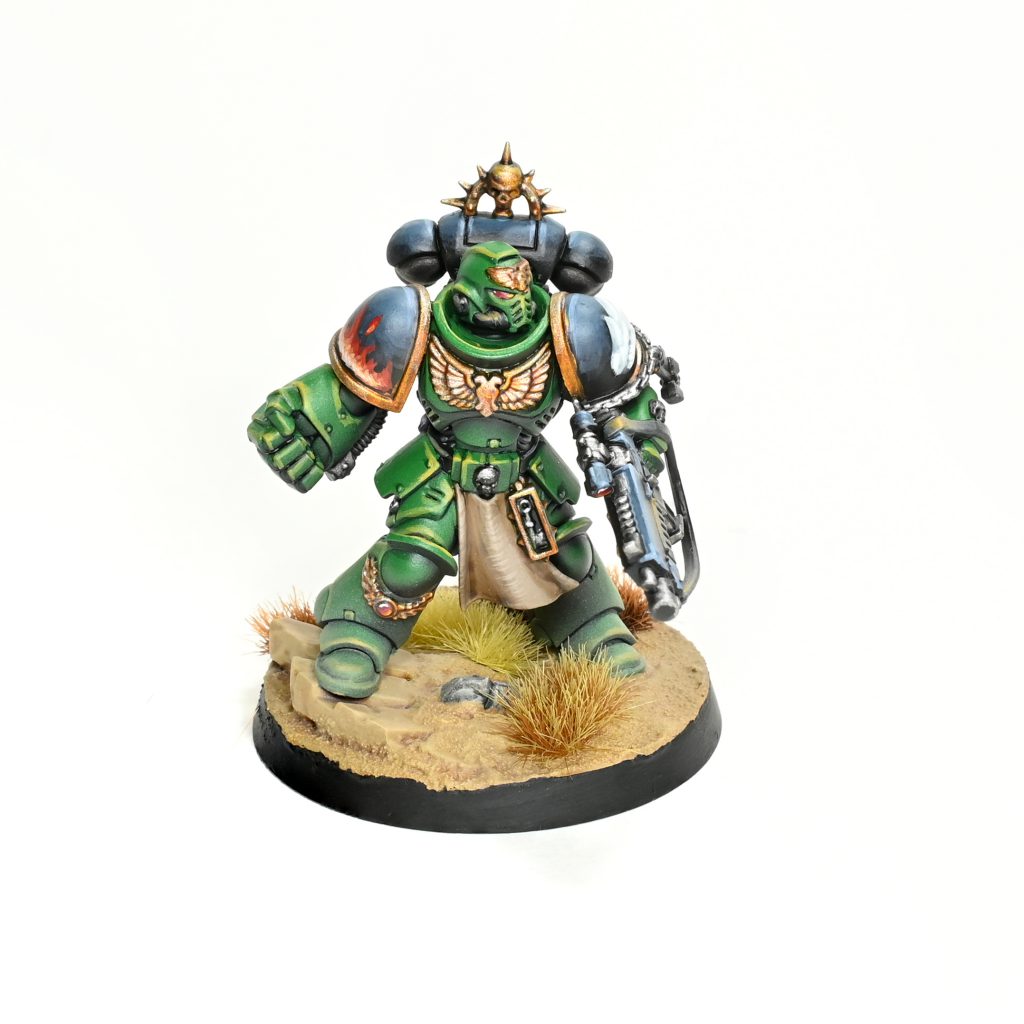
Rockfish: This guy really does feel like a release that should have been with the start of 8th a billion years ago, it’s a perfect little mix-and-match model that gives you a lieutenant that you can make your own. Right out of the box it’s packed with choices for the loadout, from multiple choices of pistol, bolt rifle, and a couple of melee weapons. You might find yourself being drawn to taking a fancy bolter and a melee weapon, which might end up leaving most previous versions of the Lt forgotten since you get to have your cake and eat it too.
Once you get into building it you will quickly notice the flat shoulders and a conventional head letting you can go digging into your bits box if you still feel like there are not enough options on the two-quarter size sprues. I’m sure pieces from this kit will make their way into people’s kitbashes too, if nothing else the Aquilla-ed helmet is sure to be an instant classic. Beyond that, this is a nice little no-fuss kit, it’s just a simple straightforward to build and paint character.
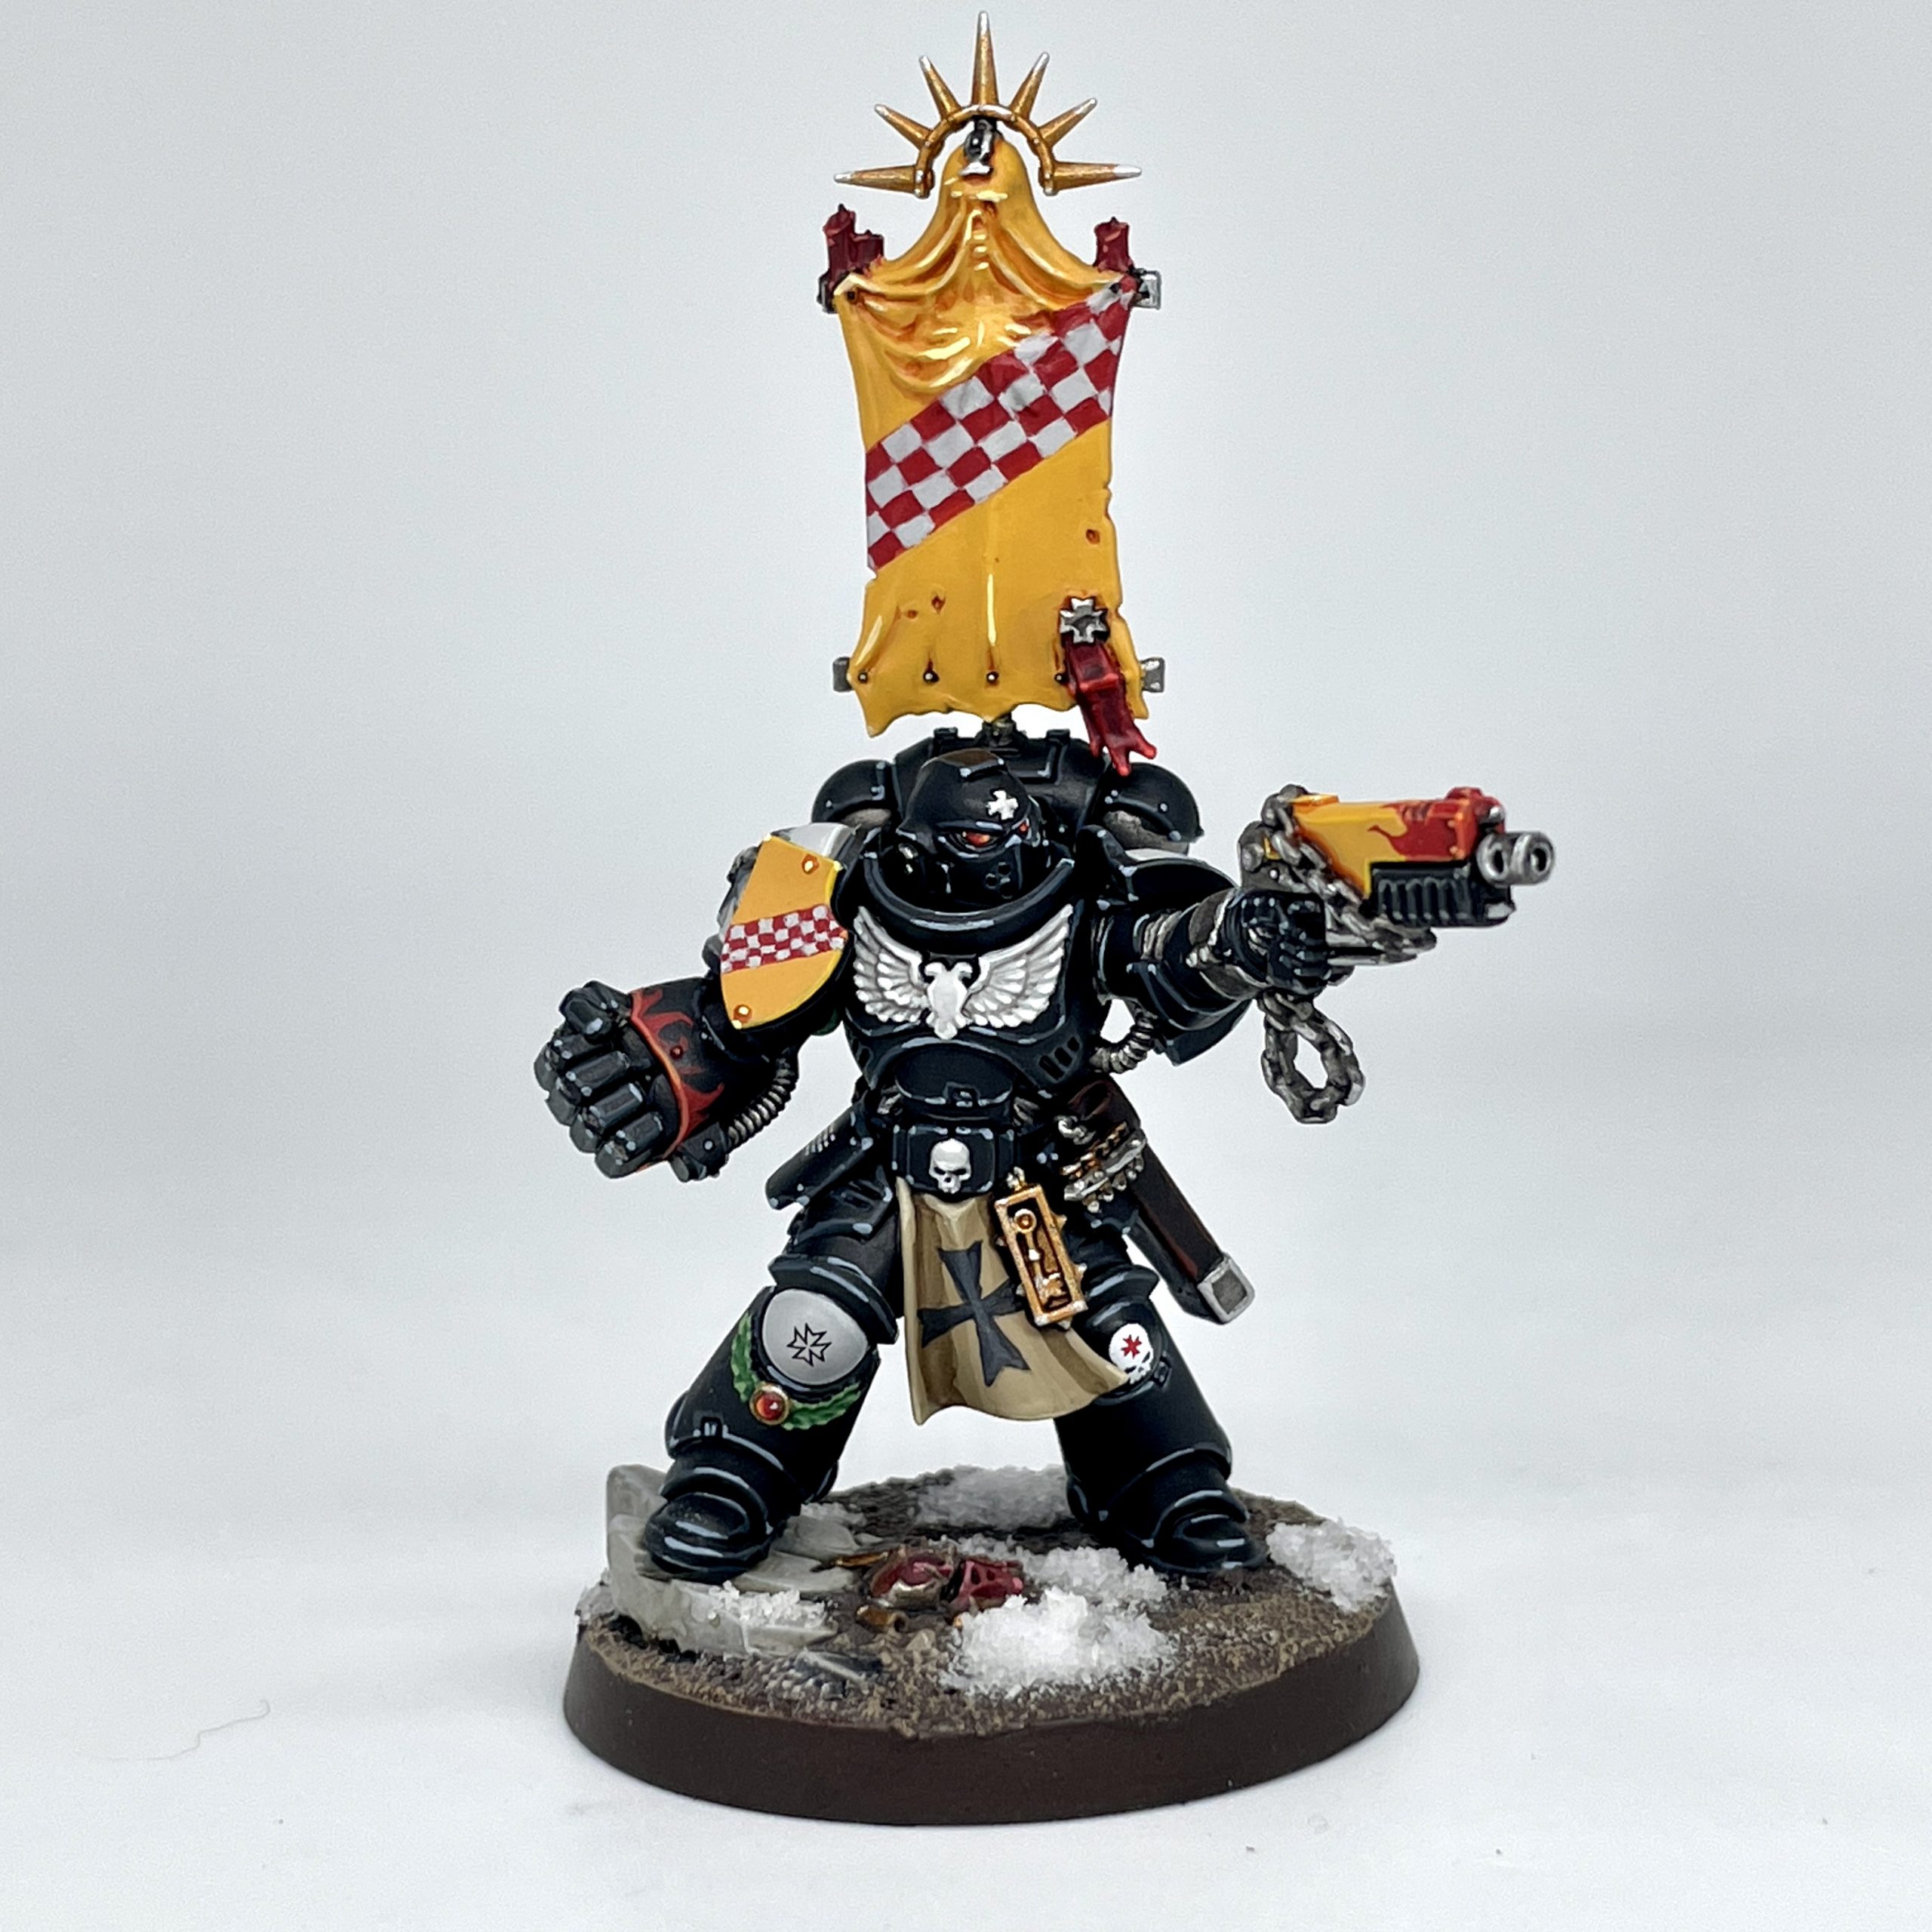
SRM: I wanted to see how well this kit worked with the rest of the Primaris range, and the results won’t shock you – it works remarkably well! I had plenty of leftover Templar bits that I wanted to leverage to make a distinctive Castellan, and had a ton of fun painting the repeated checkerboard heraldry on his tilting plate and banner. Honestly, it was hard to actually pick what to arm this guy with since there are so many weapon options on the two little sprues he lives on. I went for the novel choice of a power fist, and the economical and decidedly Templar-flavored heavy bolt pistol I stuck on there. The included heads are all solid, but I’ve got a Bit and you know I had to commit to it. Rockfish used the same loincloth as I did, but there’s also a set of pteruges that give the model more of that Greco-Roman flair if you were leaning harder into Ultramarines or Blood Angels. I’m also kinda shocked it took this long to make a multipart character kit with so many options, and I’m hopeful others will follow.
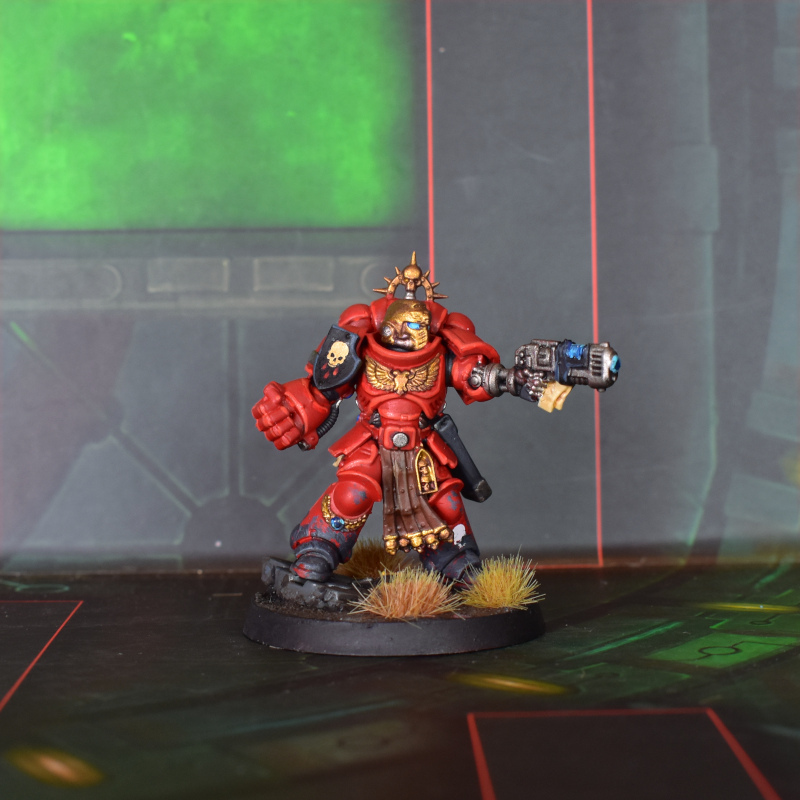
Liam: Since Campbell mentioned the pteruges, here’s my Blood Angels LT using them. Apparently we all went for fists as the melee weapon, but differed on guns; mine has the neo-volkite pistol which mirrors the one in the Indomitus box, which is now available generically instead of requiring you to take the storm shield as well. I built this stock from the new kit, since it was full of cool pieces I wanted to use anyway, but as the others mentioned you can use all manner of other pieces to add your own take on it. Importantly, GW Logic now dictates that for a kit to have options it must be sold in a box with those options; since the LT is now sold in this form, with this flexibility, that opens up the use of a lot of bitz that previously wouldn’t have been legal loadouts.
I had a lot of fun with this guy, and the tilting shield gives you a lot of options to play with for adding heraldry – Campbell has done some lovely bold checks on his, whereas I’ve borrowed a decal from the 30k transfer sheet for mine.
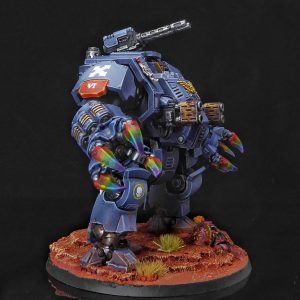
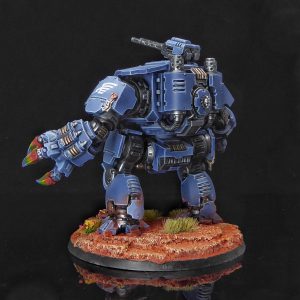
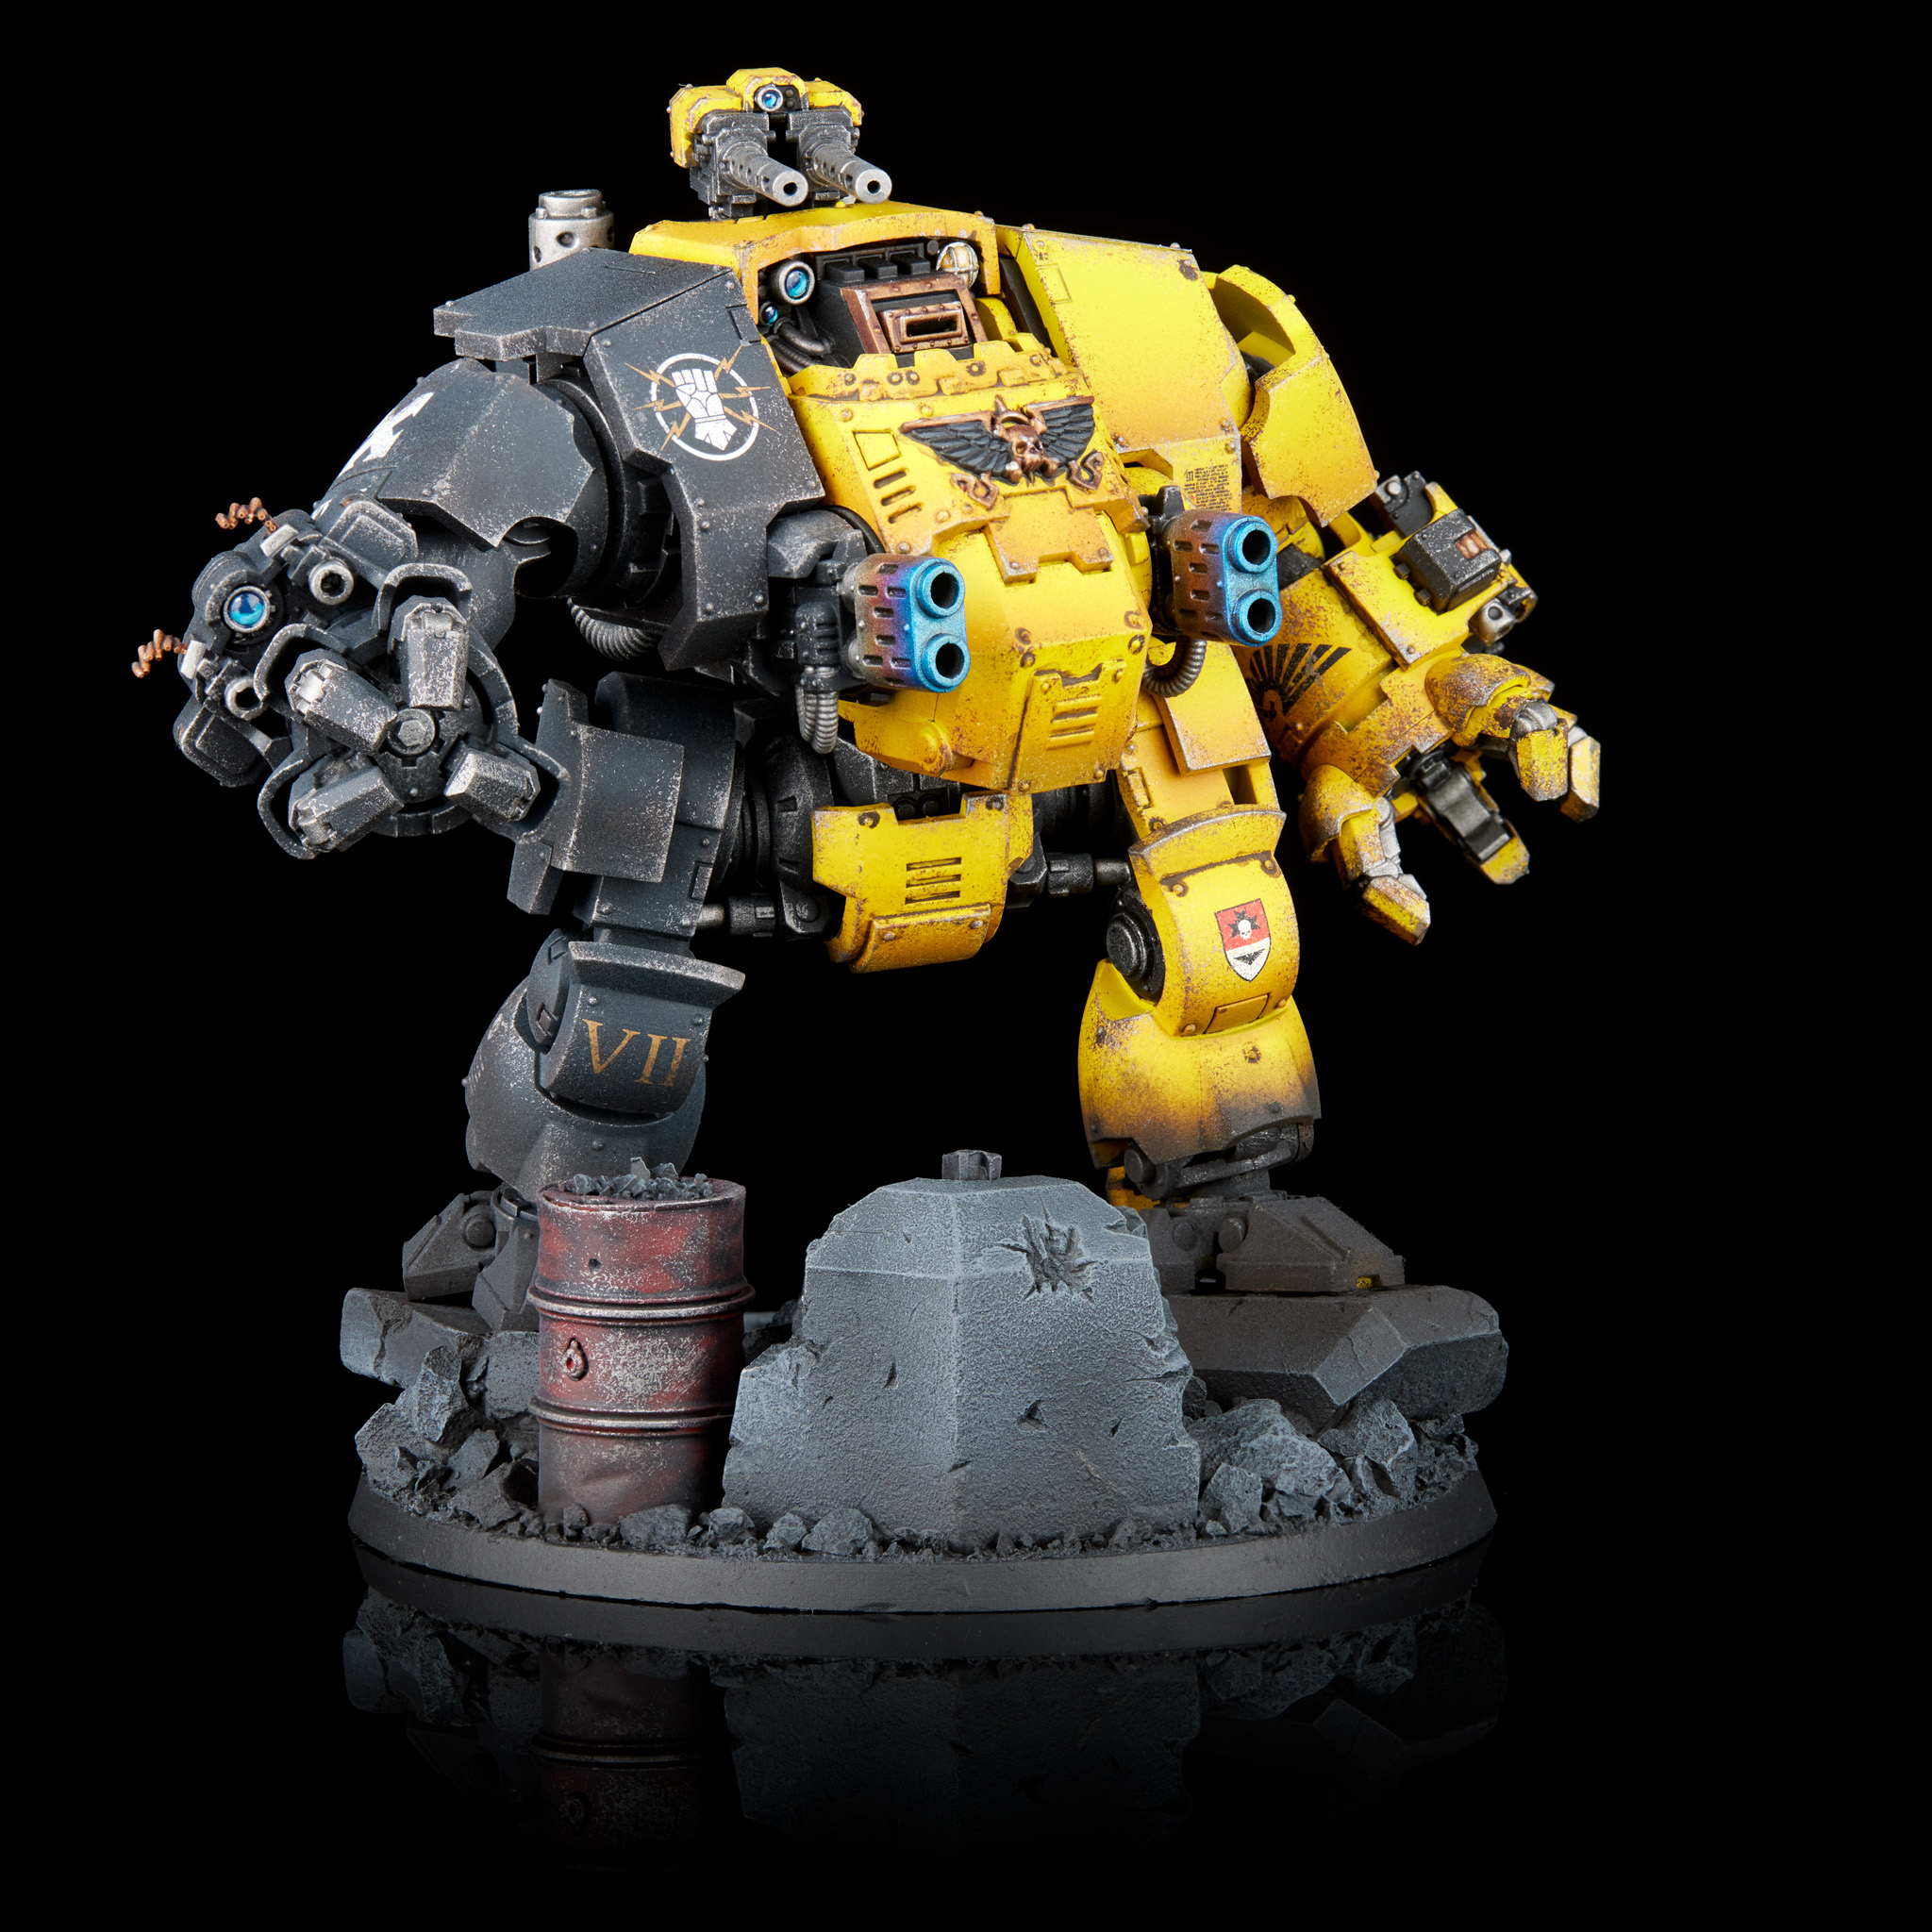
Brutalis Dreadnought
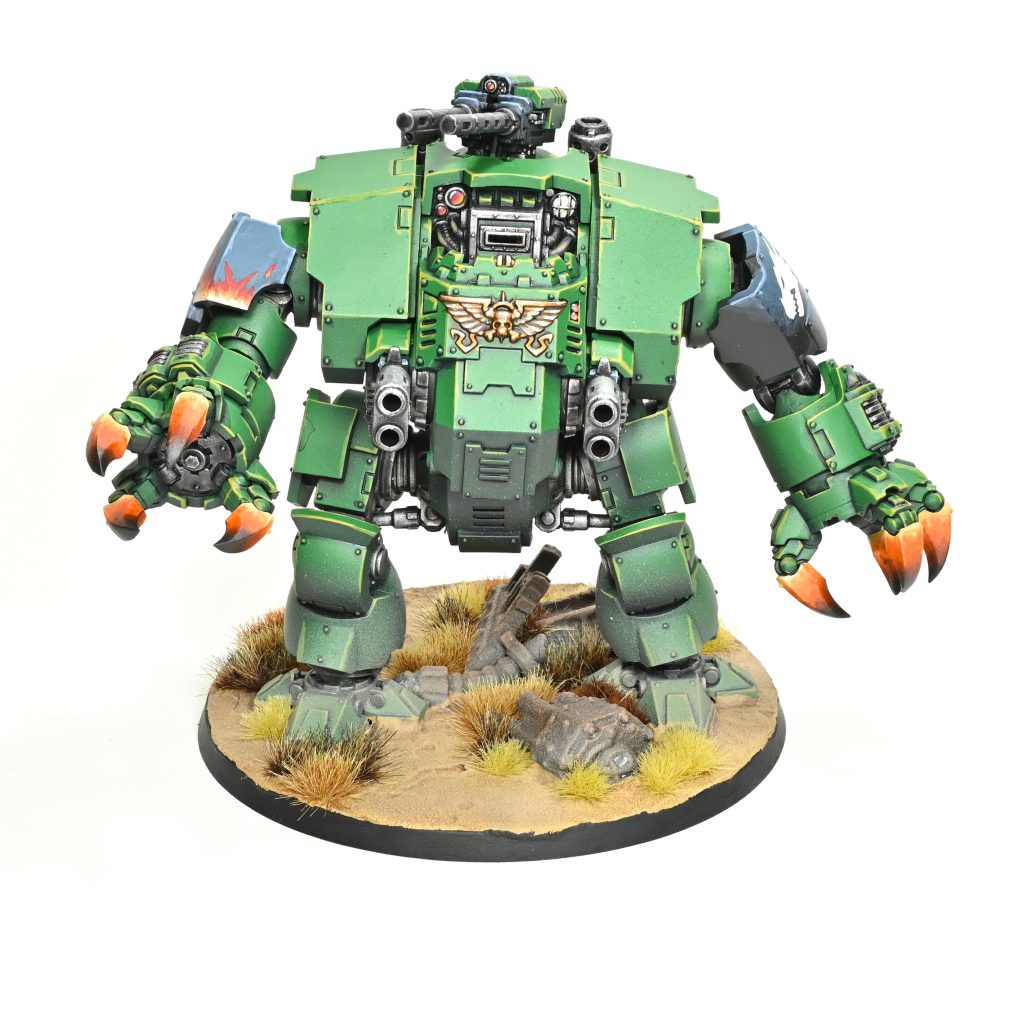
Rockfish: He is big, he is angry and he is coming for your face. It’s a melee Redemptor! With it being a bit more visually up-armored, I suppose this is the ironclad equivalent, but that didn’t mean they were content to limit themselves to only arming it with talons or fists they elected to throw on a rather substantial ‘secondary’ armament. Between multimeltas and stubbers you get a remarkable number of guns on a melee platform, as is the Primaris way I suppose.
While you’ll still find it at home alongside its sibling from the first wave of Primaris models at the start of 8th, the additional armor plates and crenelated chest piece give the Brutalis dread a meatier feel that I quite like. One aspect that might end up being a very personal preference as to aesthetics is the talons versus fists, as they are definitely distinctive. You might find the talons fitting in better with space wolves or blood angels more than with your dark angels or imperial fists. While those yellow-bound players might be drawn to the heavy bolters as they combine with fists to offer a rather enticing collection of bolter weapons, I expect most will still stick the two meltas on for the impact they offer.
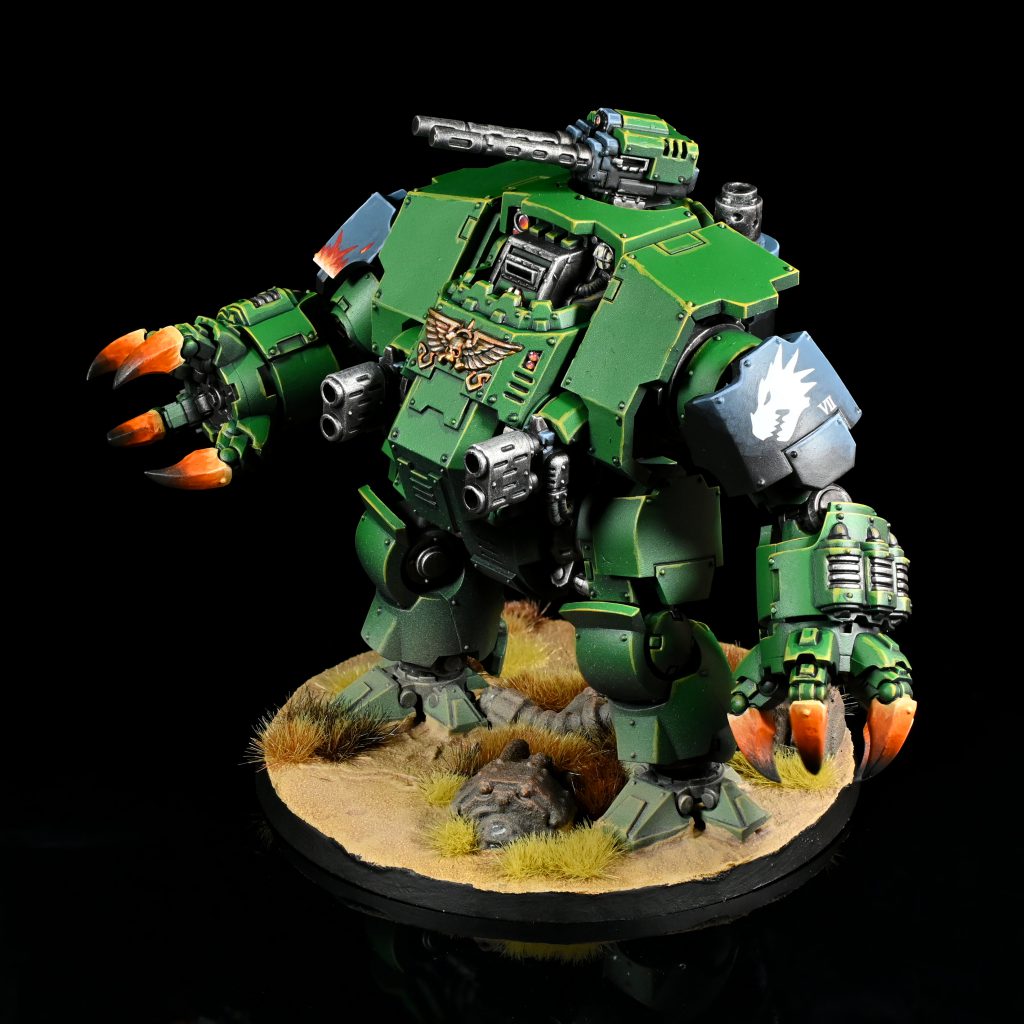
Once you’ve decided on your preferred loadout or have elected to grab your collection of magnets, you should find that the build is pretty decent. If you’ve built a Redemptor before this will be pretty familiar, although Jack mentioned that the instructions for the arms might be backwards part number-wise. I just laid out the bits based on the pictures and it worked out ok for me.
I will admit I just left this with the default posing as I am really bad at coming up with something good, but they do give you a bunch of options. One foot is pose-able with the other being a single piece, so once you clip off all the indexing pieces you should be able to get the thing to be running or imitating a roman sculpture if that’s your thing. I do think that the dread is substantial enough that having it up with its weight only on one leg might leave me worried about sheering it off at one of the smaller connections like the foot. They do give you some flexibility in the pose even without clipping, which is why mine ended up a little goofy looking as I let the plastic glue set in the feet and hips without quite enough thought put into it, oh well!
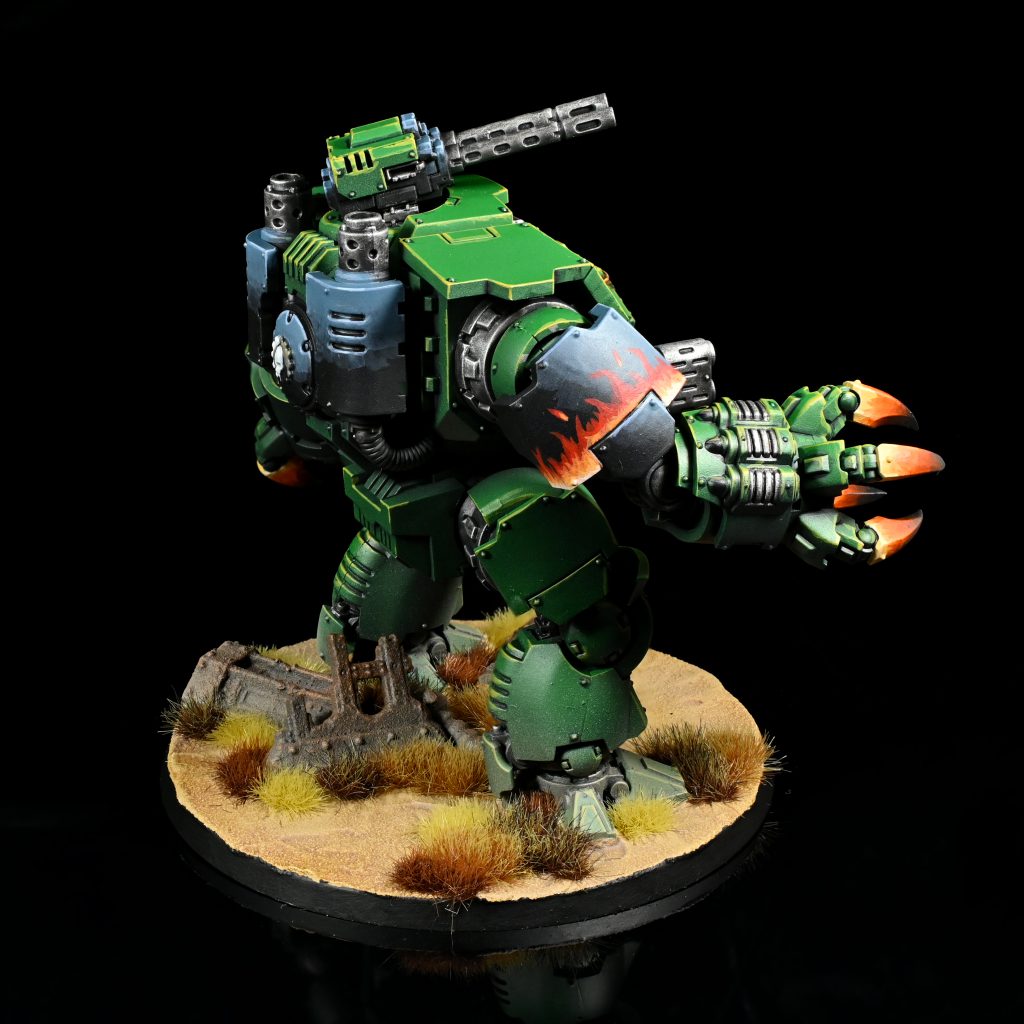
You could probably figure out a way to magnetize the hull guns without too much difficulty, but given I run salamanders I can’t really see ever putting the heavy bolters on instead. It is worth mentioning that the talons and fists use different base plates for the hands, so you could magnetize those too if you are industrious.
After your glue is dry, you’ll find this dread to be a decently quick and easy-to-paint model. Even fully assembled most of it is reasonably accessible with a minimum of awkward-to-reach places, I might suggest leaving some of the armor panels for the arms and legs off if you are into sub-assemblies, but that’s up to you!

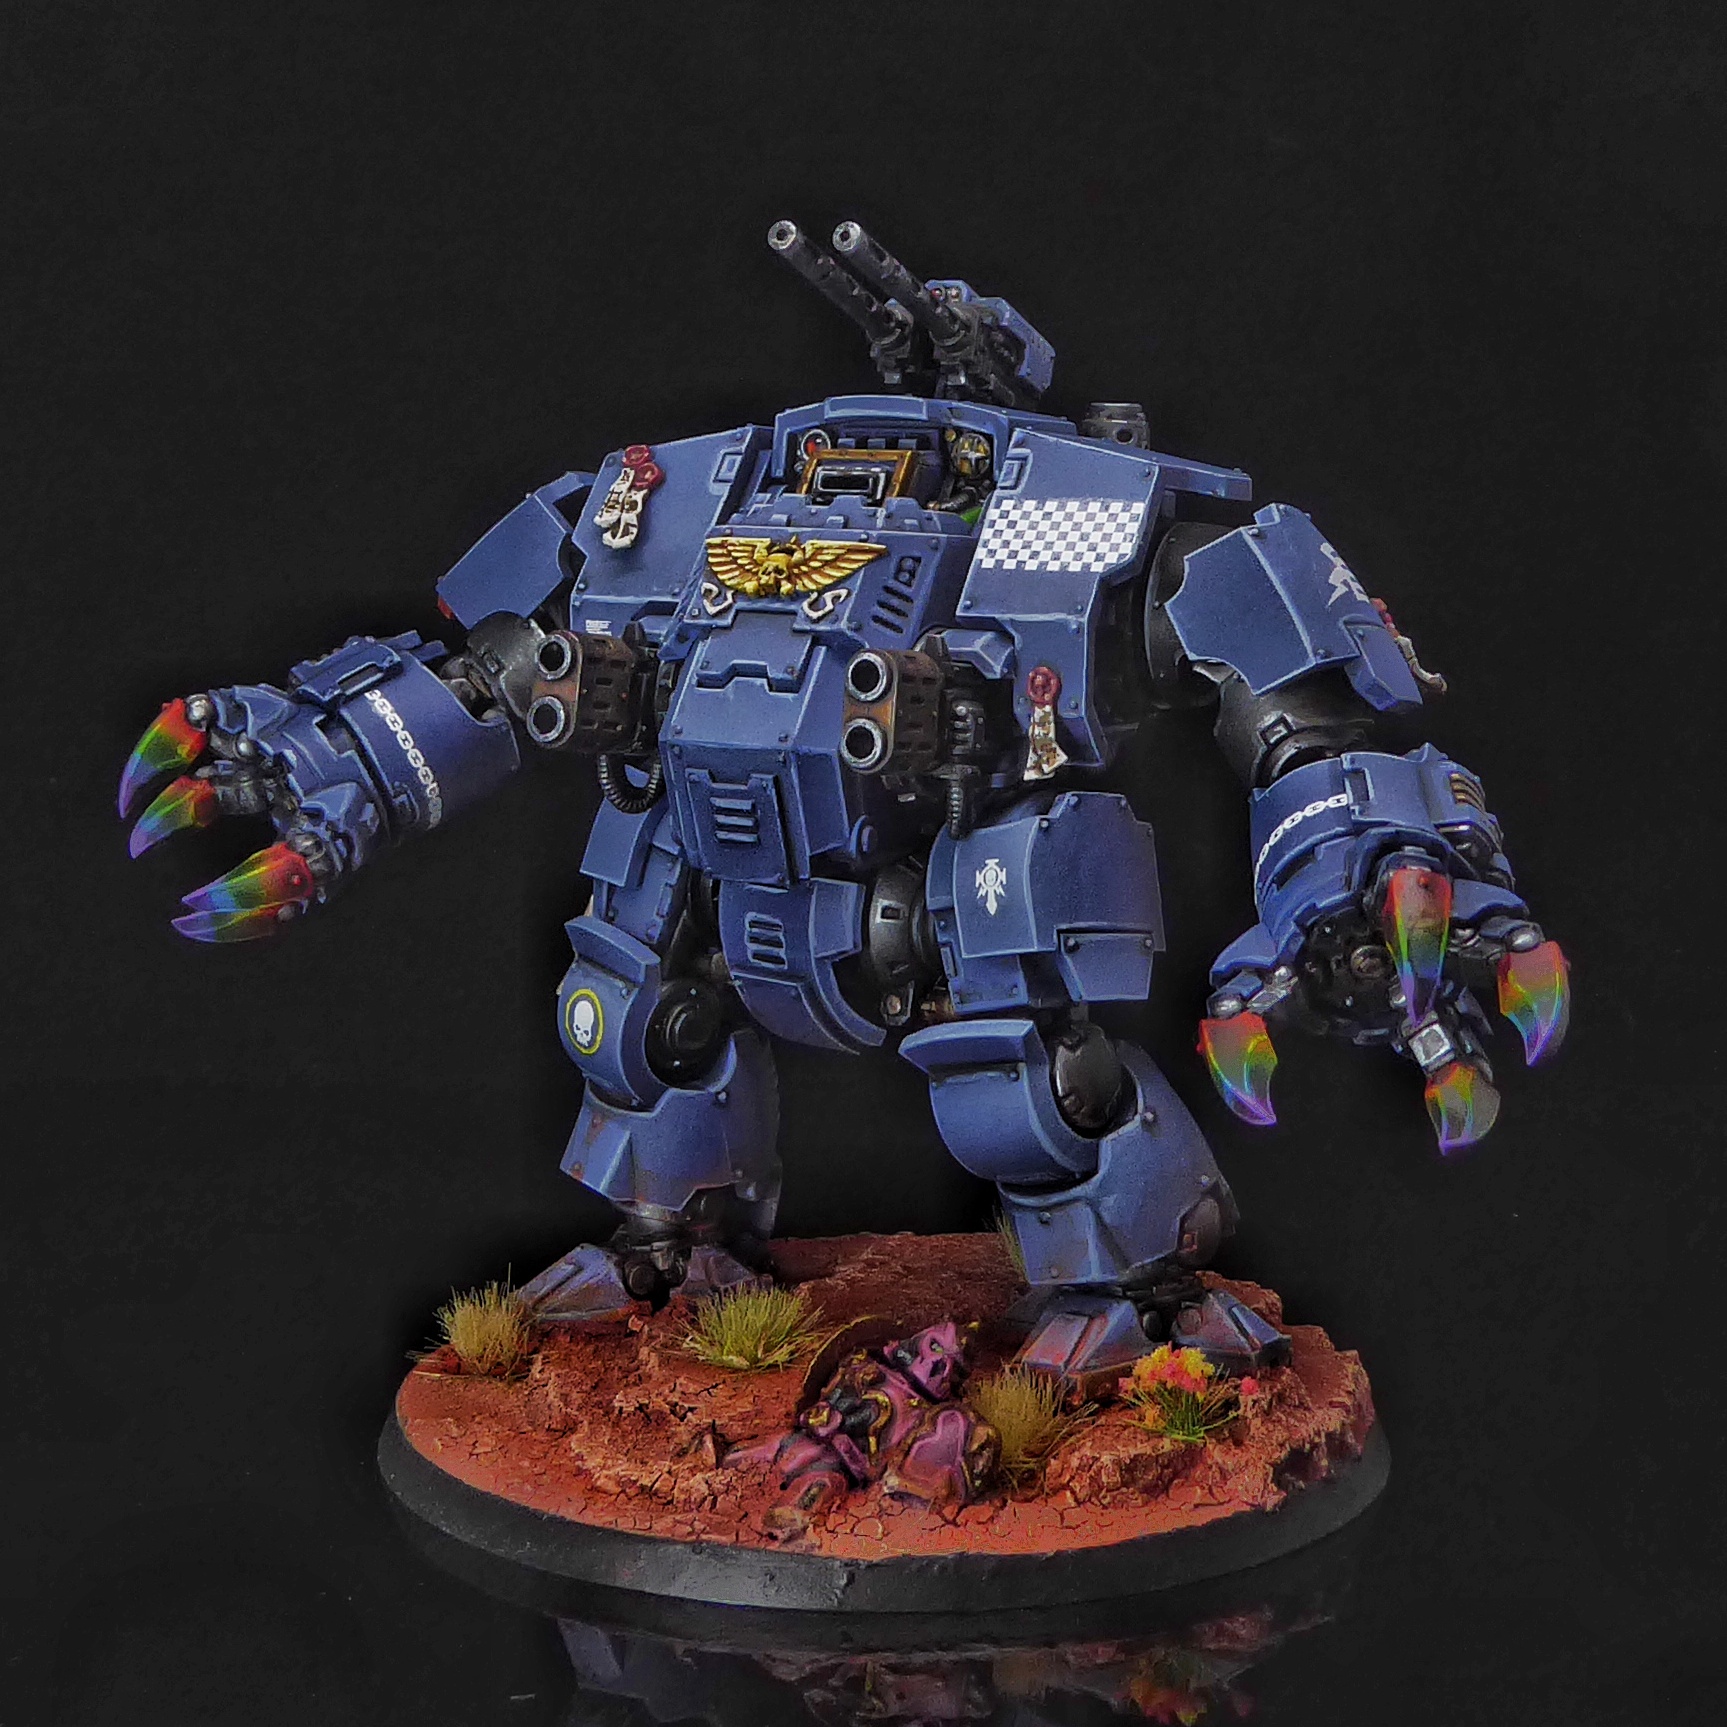
Jack: At its heart this is the same Redemptor body we’ve been building since 8th. There are slight differences to some of the armor panels, but otherwise it goes together exactly as you’d expect. I think the claws look silly, but as you’ll see over in our datasheet review they really are what you’re going to want to take on this dread all the time. For the adventurous among us this is fully posable by clipping off a few guides, though the stock pose is pretty good (and actually what I used for the legs on mine).
One thing to note is that any of the fingers can go into any of the slots on the fists, so when posing you can mix them up to get the fists looking how you want.
MasterSlowPoke: As a true Redemptor-head, I appreciated all of the subtle differences to the standard Primaris dreadnought armor panels as I built my Brutalis. I was honestly just expecting a single different sprue with the new weapon options, so this came as a very welcome surprise. As with the Desolation Squad, this kit kind of resists magnetization, as least with my pedestrian capabilities. For the chest heavy guns, I simply held them in place and drilled a hole through the back of their circular mounting, then stuck pins into the guns to hold them in place without glue. I don’t expect to lose any here, it is now a snug fit. The fists are slightly easier, but I just went with the Talons as they are titularly brutal, and I really wanted to do rainbow acrylic nails for my big boy. I did magnetize on the Icarus Stubbers, even though those are not an actual option, simply to make storing it in foam slightly easier.
The instructions give you a little more posability than the Redemptor which is nice to see. For subassemblies, I had the legs on one painting handle and I glued the top half to a 25mm base to hold it with a second painting handle. I also didn’t glue on the top shoulder pads to give myself a little more access to the detail of the arms, and I felt that was all that was needed to make painting it a joy.